Here’s a simple and easy guide that will show you how to test a thermal fuse without a multimeter. A thermal fuse is an essential safety device to protect your home appliances against overheating caused by overcurrent or any circuit problem.
If the temperature exceeds the maximum range, the thin wire inside the fuse melts, and the current flow stops. So you must test fuses after you find your appliances are not running. We can test thermal fuses without a multimeter using a tester screwdriver, bulb circuit, and a non-contact voltage tester.
In this post, we’ll discuss how thermal fuses work and how to test a thermal fuse without a multimeter to ensure that the circuit is OK.
Let’s discuss this in detail:
How does a thermal fuse work?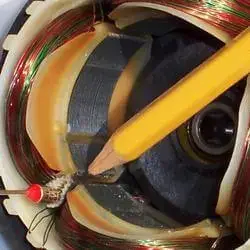
A thermal fuse is a safety component used in different heat-producing electrical devices, such as a coffee maker. Thermal fuses are made of different conductive metal alloys such as tin, lead, etc.
When the current in a circuit increases, temperature also increases. When the temperature exceeds the alarming stage, the thin alloy wire in the fuse melts and breaks the circuit to prevent your device from further damage.
It keeps your devices from overheating and firing by discontinuing the circuit and current supply.
A thermal fuse depends on the temperature of the circuit, while an electric fuse depends on the amount of current.
Different temperature-ranging thermal fuses are used according to the requirement of a circuit.
It is ideal to use a fuse that has a current rating more (above) the circuit it is installed in. When the temperature exceeds the capacity of the fuse, it’ll blow (break).
. You can check the voltage amperage and temperature rating (max range) on the fuse body.
How to test a thermal fuse without a multimeter?
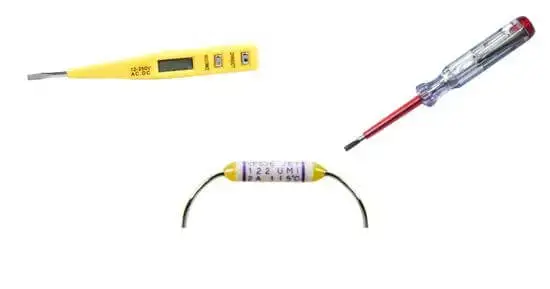
To test a fuse without a multimeter, you can use a bulb circuit, a non-contact voltage tester, and a tester screwdriver.
Place your fuse in a simple circuit made of a battery and bulb. If the fuse is fine, it’ll allow current to flow in the entire circuit, and the bulb will glow.
Connect the tour fuse to a live wire and attach the tester screwdriver at the other end. The bulb in the tester will glow if the current passes through the fuse (complete).
Attach the fuse to a live wire and connect the voltage tester at the other end. The tester will blink or beep if it detects current passing through the fuse.
Below we’ve discussed each test in detail.
-
Visual Inspection:
A thermal fuse is tested the same as any other fuse. A thermal fuse with a transparent cylinder body can be visually inspected to see if the thin fuse wire is broken.
However, some fuses have a black body, and you can’t decide if the fuse is fine or not. So we can use some easily available tools to test a thermal fuse.
-
Test thermal fuse with a light bulb:
We’ll have to place our fuse in a circuit to know if it can pass current. Take a battery (3V or any), bulbs, and a few pieces of wires. Connect the bulb to the battery with wires.
Now we have to insert our fuse into this circuit. After placing the fuse in between, when you complete the circuit bulb will glow, indicating that the fuse is fine. The bulb will glow because the circuit is complete. If the bulb doesn’t glow, the fuse is damaged/broken.
-
Test thermal fuse with tester screwdriver:
The tester screwdriver is a voltage detection tool. If we attach the tester screwdriver with a live wire, it’ll detect current (voltage), and a bulb inside will glow.
Take a fuse that is to be tested. Turn off the power supply and attach the fuse to a live wire in an outlet or a battery-based circuit. Use tape to hook the live wire to one terminal of the fuse.
After joining the fuse to the wire, turn on the power again. Slightly press the top metal head of the tester with a finger and attach the other metal end to the free end of the fuse. If the current passes through the fuse, the bulb in the tester will glow. It indicates that voltage is from live wires to the fuse and the tester.
If the fuse is blown, the tester will not glow, as no voltage is detected at the end of the fuse.
-
Test thermal fuse with voltage tester(non-contact):
Like the previous test, you can test a fuse with a voltage tester by connecting it to a live wire. A non-contact voltage tester detects (senses) voltage in a wire or circuit component without touching it. Now turn on the power supply again and take the voltage tester near the other end of the fuse.
If the voltage tester beeps or blinks, the voltage tester has detected voltage in the fuse. If the tester stays quiet, the fuse could be faulty.
Although all these methods are helpful, without the need for any expensive tool, there could be a situation where a fuse is damaged but not completely broken and still supplies some current.
So we use a multimeter to check whether the fuse is in its ideal condition (having minimum resistance).
How to test the thermal fuse with a multimeter?
Using a multimeter, it’s easy to analyze a fuse deeply. Fuses are meant to be installed in a circuit to pass current up to the maximum heat and current ratings. For better current supplying a thermal or a fuse should have minimum resistance. Resistance is the force opposing the current flowing in a conductor.
To be an excellent conductor, a fuse should have minimum resistance. Please turn on your multimeter and set it to continuity or resistance.
Attach both multimeter probes to both terminals (pins) of the fuse. A perfect fuse should have 0-ohm resistance, which means excellent continuity. If a fuse is broken, the multimeter will show OL, which means an open or broken circuit.
However, a relatively high resistance reading indicates that the fuse is damaged and not fit for use. However, the fuse is safe if your multimeter reads around 0-.2 ohms.
Frequently Asked Questions
-
How to reset a thermal fuse?
A simple way to reset your fuse is to remove it from a circuit. Hit it on a hard surface such as stone and test for continuity in the fuse. If the fuse is reset multimeter will show continuity. Hit the fuse a few times after each reading if the multimeter doesn’t show continuity. Then the fuse is broken.
-
How to check fuses without removing them?
To test a fuse without removing them, use a multimeter, as its needle probes can easily connect to any circuit component. Set your multimeter to ohms or continuity (volts) signs.
Attach multimeter probes at both ends of the fuse without removing it from the circuit.
An OK fuse should have minimum resistance, such as 0 ohms.
If the multimeter reads OL, then the fuse wire is broken.
-
How to Fix the thermal fuse in the dryer?
Remove the screws from the back panel of the dryer and remove it apart. Locate the thermal fuse and remove the wires from it.
Remove the mounting screw from the thermal fuse and remove it from the device.
Test the fuse for continuity; if it’s fine, install it back; otherwise, buy a new one. Screw the thermal fuse back in the dryer and connect its wires.
Conclusion:
Testing a thermal fuse is easy if you know how to work with electrical equipment. A thermal fuse passes current through a thin metal wire unless it’s not damaged. Place the fuse inside a circuit and check if the current is passing through the fuse or not. If the fuse is broken, it is unable to pass current.
Follow the complete guide above to test a thermal fuse.
Share your opinions & queries in the comments section.
Related Guides:


