This is a quick tutorial on how to burn a bootloader on your Arduino Mega 2560. The procedure for burning a bootloader onto an Arduino Mega 2560. In the physical stuff, connect the ICSP pin for pin among the target and the programmer. The programmer locates a ten microfarad cap on the reset and ground. With the help of a USB connects to the computer. It also uses the target board.
It would help if you joined the USB to power the laptop. Burning of the Arduino mega bootloader uses the Arduino, then writing the isp sketch to the mega and changes the setting of the board to the target, and the com port stays at the same position. For burning the bootloader, we require to select the microcontroller.
The burning of the bootloader means that the “burn bootloader” gives the command in the Arduino environment, an open-source tool. These four steps include in it.
The procedure for burning a bootloader on an Arduino Mega 2560
The boot loader is the program that helps load more programs via a standard USB cable. The boot loader requires when you want to update the firmware without giving access to the programming header. The working of the bootloader is that bootloader is the small program that starts working when you turn Arduino on.
You can also press the reset button. The bootloader’s primary function is to wait for the Arduino software on the computer and then transmit it to the new program. The Arduino can also work without the bootloader.
Resetting the bootloader, click the verify button for compiling the sketch.
It solves the issue of timing. The bootloader helps load the operating system for adding the programs into the memory and providing access to the component. It requires running the start-up process and initializing the hardware. The bootloader can be put in one of two places—either the first block of the bootable medium or another location.
- Unlock the section of the bootloader on the chip.
- I am setting all the fuses on the chip.
- Then upload the bootloader code on the chip.
- Then, again, lock the bootloader section on the chip.
What is the Arduino Mega 2560
- The Arduino mega s very reliable for projects and needs more memory, I\O lines, and RAM. It focuses on 3D printers and robotics projects. There are 16 analog inputs, 54 digital inputs, and output pins for four hardware.
- If you handle a complex project, you can combine it with the Arduino board. Additionally, you can employ multiple sensors. The software of the Arduino mega has an integrated development environment, which is convenient for many of the boards.
- Because you don’t have to bother about the technical parts of programming, Arduino is quite convenient. The main benefit of using Arduino is that its processes are less complex. the .hex file is complicated for beginners. The .hex file locates in the AVR chip of the Arduino, so it only requires you to use the USB cable to run your program.
Burning the Bootloader
the bootloader is the operating system in partnership with the computer’s memory. It is the center point of the operating system and the hardware. Burning the bootloader requires them to select the microcontroller.
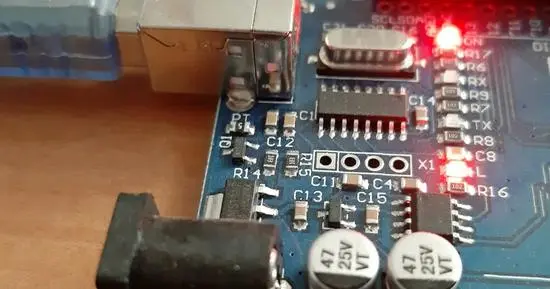
The led started flashing. The lead stays on once until the bootloader gets uploaded to the microcontroller. If you need to upload the sketch, leave everything connected and open the drawing. The accuracy of the pin connection should be checked.
- Connect the Arduino file with the bootloader file.
- Install the essential driver for the AVR ISP programmer
- Then connect the programmer with Arduino.
Uploading the Arduino ISP
After making all the connections of the Arduino with the AT mega, we must upload the Arduino isp sketch.
- Go to the file, example, and then Arduino ISP.
- We require to select the Arduino board tools.
- Then select the serial port.
- Then it is ready to upload.
- You upload it and wait for uploading.
Selection of the Programmer
- Dedicated Programmer
It would help if you looked into the AVR pocket programmer for an easy and quick programmer. The AVR programmer is the cheapest and can work with many applications. But sometimes, some boards can have a problem, especially with the large memory board.
- Programming with the Arduino
The Arduino UNO is the alternative method. Your Arduino performs the functions of an AVR programmer once the code has been uploaded.
Utilizing the Arduino UNO is the alternate choice. Your Arduino functions as an AVR programmer after you upload the code. It’s for something other than the board’s production or the board with the large memory.
Conclusion
So how to burn a bootloader on an Arduino mega 2560? Sometimes you require the hex. The Arduino can tackle the file, which could be more user-friendly and help with working. The hex file that launches when the board is powered is the bootloader.
When making your own Arduino, you have to replace the IC, which requires installing the bootloader.. in some cases, you may have to face the lousy bootloader, then you have to replace the faulty bootloader.
Related Guides:


