A hand planer is useful for smoothing rough wood surfaces, but dull blades can hinder its performance. Fortunately, changing the blades on your Ryobi hand planer is a simple task that can greatly improve its effectiveness. This guide will provide a quick and easy tutorial on how to change Ryobi hand planer blades.
Hand planers are the requirements for where wooden work is carried out; whether it is a home or a carpenter shop, the hand planers must be variable.
Different companies introduce their products with the escalation in demand for hand planers. All companies do not come with the removable blades hand planer. Still, the Ryobi hand planer is the number one choice because it has the facility for removable blades.
Whenever you buy new blades for your hand planer, you must buy them in a pair. But the first thing is to buy the right blade for your Ryobi hand planer. It means that you have to tell the shopkeeper about the model and company of your hand planer and then buy the exact size and type of blade for your hand planer.
Why is the changing of blades necessary?
Most people may need to learn that the Ryobi hand planer comes with non-sharp able blades, which means that you cannot sharpen the blades of a Ryobi hand planer.
Every time you see that your hand planer is causing trouble for you and the blades are not working properly; then the first step is to reverse the blades; if it is also not working, then you have to change or replace them with a new blade because you cannot sharpen them.
How to change Ryobi hand planer blades?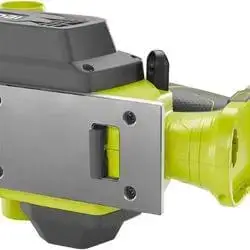
Equipment required:
- Ryobi hand planer
- Screwdriver
- New blades
After buying the new blades for your Ryobi hand planer, you now have to know the exact way to change the blades of your hand planer so that you do not get into a difficult situation while doing so.
Here are some quick steps to change Ryobi hand planer blades
- Please disconnect the power supply to the hand planer so you can easily handle it and change its blade.
- Place the ryobi hand planer upside down to access the tightening nuts.
- Take the screwdriver and unscrew all three nuts that are securing the blade of the Ryobi hand planer.
- Use the same screwdriver and remove the old blade, which is adjusted in the holder.
- Adjust the new blade to the same position in the blade holder
- Tighten all the loosened screws
- Perform the same step for the other blade too
Below is a brief step-by-step explanation of changing Ryobi hand planer blades
Step 1: Disconnect the power supply
The first rule of the maintenance of any electrical equipment is to turn off the power supply to that equipment so that you can perform any testing procedure without interrupting electrical charges. So in the case of the ryobi hand planer, you have to do the same. Turn off your Ryobi hand planer and move forward toward the next step.
Step 2: Place the hand planer upside down
Now you are up to change the blades of your Ryobi hand planer, so you have to place your hand planer upside down so that you can access the blades easily and can proceed with the maintenance of your Ryobi hand planer. Do it carefully, and don’t harm yourself while using this sharpening tool.
Step 3: Loosen the nuts
To remove the old blade and insert the new one, you have to lose all three screws of the blade holder of your Ryobi hand planer. You can use a screwdriver and carefully remove all three nuts.
Step 4: Remove the blade
After losing the nuts, it will be easy for you to remove the blade. Just use the screwdriver’s tip and hold the old blade of your hand planer. Remove it carefully and place it on the side so you cannot mix it with the new one.
Step 5: Clean the blade holder
This is the point that most people neglect, and this neglection leads to fast damage of their new hand planer blade. Whenever you remove the old blade from the blade holder, you have to see the condition of the blade holder. If there is any dust particle or rust present, you must remove it before installing the new blade. If you do not, your new blade will also get damaged soon.
Step 6: Install the new blade
As of now, you have removed the old blade, so this is the time to insert the new blade in the same position. Make sure you are inserting the new blade and inserting it in the exact place, so do it carefully without harming yourself.
Step 7: Tighten up the screws
You have to tighten all three screws of The blade holder so they can easily hold the new blade. Do not show negligence at this point because if you do not tighten the nuts exactly, the blade may get damaged when you start using it. So tighten the nuts fully.
Step 8: Important Tip
After tightening these screws and changing the blade of your Ryobi hand planer, you are advised to test the blades of your hand planer immediately to know whether you have performed this maintenance procedure correctly or not.
Reasons for a damaged blade
Here is the list of some neglections we made while using the Ryobi hand planer. A Ryobi hand planer blade can last longer if we avoid these conditions.
- Do not place the ryobi hand planer in a place where any other material can harm the device.
- A Ryobi hand planer comes with movable parts, so it will be beneficial to lubricate those parts at regular intervals; otherwise, they will get jammed or will damage the condition of your Ryobi hand planer.
- Placing the Ryobi hand planer in a dirty place will cause the blades of the hand planer to get rusted.
- Every time after using the Ryobi hand planer, you should check the screws of the hand planer. If the nuts are loose, you have to tighten them up before storing them and using them again.
Final verdict
Ryobi hand planers differ from ordinary hand planners because the type of blades used in them differs in length and kind. As you cannot sharpen the blades of a Ryobi hand planer, you have to change the blades every time you see that they are getting dull and are not performing well.
In that case, you should store them appropriately, so you don’t have to change the blades. It will save money and help your hand planer perform well.
Related Guides:


