
A soldering iron tip is essential for anyone who frequently works with electronics. However, these tips can wear out over time, damage, or not fit specific soldering needs. This guide will show you how to make your soldering iron tip using simple materials, saving you money and providing a customized solution for your soldering projects.
With our step-by-step instructions, you’ll be able to create a new tip in no time. Let’s get started!
Soldering iron rods have a wide range of applications leading towards joining metal objects. We have to do a lot of repair work at homes where we need the soldering iron rod.
Some people like to prepare their homemade soldering iron rods. All the tasks are easy, but the main thing while preparing the soldering iron rod, which people find difficult, is to make a proper soldering iron tip. This is because the soldering iron tip has a major role in joining the two metallic objects.
So if someone is up to make a soldering iron rod, then the first thing you should know is to make a proper soldering iron tip.
Types of soldering iron tips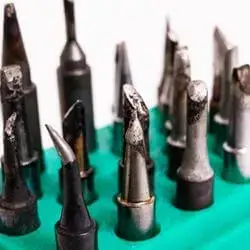
Before making a good soldering iron tip, you should know different iron tips. Although there are different soldering iron tips, two are used most of the time. These two types of soldering iron tips are:
- Screwy style tip
The screwy-style tip is the one that gets threaded from the side of the soldering iron. It enters and gets out from the side of the soldering iron.
- Slidey style tip
For the slidey type of tip, you must get a fat screw. The tip should be secured strongly before using the soldering iron rod. If the tip slides out from the rod, you will not be able to do your task there.
Making of both these types of tips is different from each other, but most of the time, the slidey style tip is used because it is easy to make and has a strong grip, so most people always move towards making the slidey style tip when they are intended to do any soldering task.
How to make a soldering iron tip?
Tools required:
The materials and tools you will need while making a soldering iron tip are below. You have to arrange all these materials before starting to make the soldering iron tip
- Drill press
- Pliers
- Vise
- Copper wire
- Soldering iron
- Hacksaw
- Sandpaper
- Steel wool
- File
After arranging all these materials, you can move towards the making procedure of the soldering iron tip.
Below is a quick steps overview to make a soldering iron tip:
- Choose the slidey style tip for the soldering iron rod
- Get the appropriately sized copper wire
- Straighten your copper wire
- Cut the wire to the appropriate size you need
- Give your desired shape and look at the copper wire
- Adjust the diameter of the copper wire with the help of a drill press
- Make the threads on the tip
- Cut the tip to the appropriate size.
- Make the tip sharp.
- Insert the tip into the soldering iron.
How to make a soldering iron tip (step-by-step explanation):
Step 1: Choose the type of tip
There are two major soldering iron tips: the screwy style tip and the slidey style tip. The slidey style tip is the one that is used mostly, so we will move forward toward making the slidey because it is easy to make. Also, the installation procedure of this tip is convenient in contrast with the screwy-style tip.
Step 2: Get the copper wire
To make a soldering iron tip, you will need copper wire for this purpose, but it is important to know what type of copper wire and what size of copper wire you need to make the perfect soldering iron tip.
You have to buy a non-stranded type of copper wire which is an electrical wire used for electrical purposes. The wire should be 6 AWG. Buy a long copper wire because you have to perform so much grinding on it, so you should not run out of the wire while making the soldering iron tip.
Step 3: Straighten the copper wire
After buying the copper wire, you now have to straighten it. The electrical copper wires are soft, so you must apply the pressure while considering its softness. Make sure that you do not damage the wire while straightening it.
You can use the vise for this purpose, but most of the time, people like to do this task with their hands because by using their hands, you can easily adjust the amount of pressure you have to put on the wire to straighten it.
You can stop putting the pressure when you realize that you have enough to straighten the wire according to the need, and then you can move towards the next step of making the soldering iron tip.
Step 4: Cut the extra wire
Now you have to take the hacksaw, and by knowing the depth of the soldering iron rod, you have to cut the extra length of the copper wire.
This will help you get rid of the extra length of the copper wire, which you will not need in preparing a soldering iron tip, and now you have the exact length of the wire you will need in the next step.
Step 5: Shape the wire
After getting the appropriate length of the wire, you now have to work on it to make a soldering iron tip from it. For this, you can use the drill press and adjust the cutting copper wire in the drill press.
You have to grind the wire using steel wool or sandpaper. You are using this because you have to get an appropriate shape of the copper wire to transform it into the desired soldering iron tip.
Step 6: Adjust the diameter of the wire
An ordinary electrical copper wire has a diameter of around 4 mm, but the diameter of the soldering iron tip is a little smaller than it, around 3.9 mm.
So you have to do some grinding to reduce the diameter of the copper wire. You can use the drill press again to give your copper wire the exact shape and diameter.
Step 6: Sharpen the tip
Of course, you will need a sharp tip because it is easy to insert it in the hole of the soldering iron rod. So, you have to sharpen the tip of the copper wire. Keep grinding the tip of the copper wire to get the desired sharpness.
Grind the tip until you get the desired diameter, which will easily get into the soldering iron rod hole.
Step 7: Make threads on the tip
You have to make threads on the tip of the soldering iron. You can use the vise to place the piece of wire in one place and then make fine threads on the soldering iron tip. The threads’ size is about 0.75 mm, which is not visible to the naked eye.
Step 8: Take the appropriately sized tip
An ideal length for a soldering iron tip is 2.5cm. So now you must cut the tip’s size according to the need. Placing the exact length tip in the soldering iron rod is easy, so cutting it into the appropriate size will be beneficial.
Step 9: Refine the tip
After getting your exact-sized soldering iron tip, you can perform a little refined step upon it using the same drill press. You used it earlier in making the soldering iron tip. Refining will help you be satisfied that you have done your work greatly and have the perfect soldering iron tip for your soldering iron rod.
Step 10: Insert the tip
After making the desirable soldering iron tip, you can insert it into the hole of the soldering iron rod to take work from this freshly designed and made soldering iron tip.
Final verdict
While making the soldering iron tips for your soldering iron rod, the only technique you will need is to use the drill press perfectly. Suppose you know how to use it and give an appropriate shape to anything by using the drill press. In that case, you can easily design the perfect soldering iron tip and get your soldering work done at home without extra help.
It is easy to make a soldering iron tip by following the above-given guideline, and a good approach to the working technique of the drill press will always help you do the tasks related to plumbing and soldering.
Related Guides:


