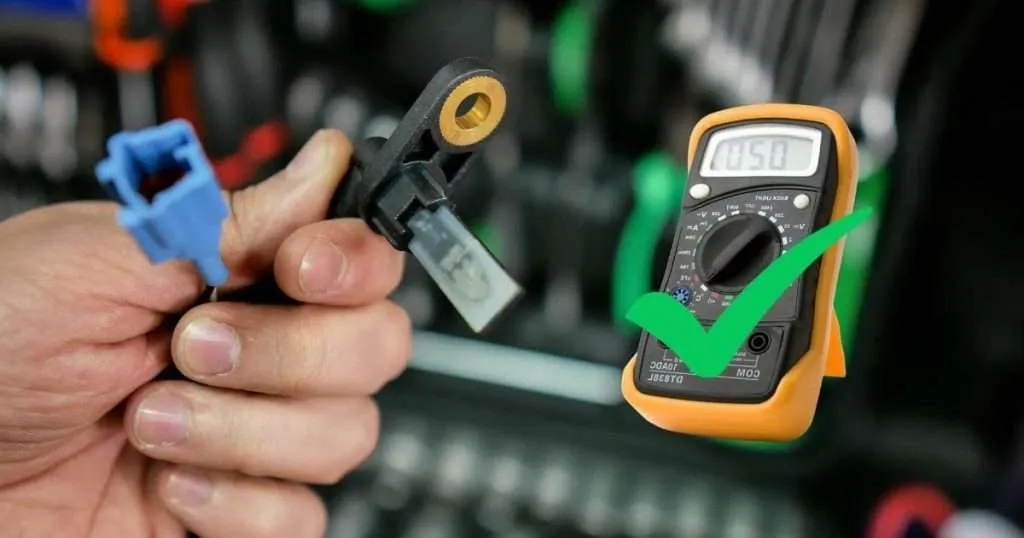
If you’re looking for how to test ABS sensor with a multimeter, follow these steps to properly test it before installing it into your vehicle’s circuit board.
An anti-lock braking system (ABS) sensor is one of the essential components of your vehicle’s brake system. It helps detect the speed at which you are traveling.
It then determines if you are stopping too quickly or too slowly to calculate how much pressure ought to be exerted on the brakes so that you can maintain control of your vehicle during an emergency stop.
Let’s continue toward testing.
How to test ABS sensor with a multimeter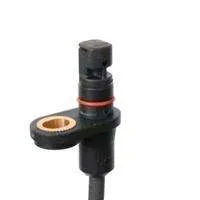
The procedure to test the ABS sensor is relatively straightforward. First, you’ll need to locate the sensor. It’s usually located near the wheel on the car’s frame once you’ve found it, following these steps.
- Ensure the engine is shut off before there are no obstructions in front of the sensor.
- Disconnect any cables attached to the sensor.
- Connect a multimeter set to read ohms between two points on either side of the sensor.
- Start up your engine and see if any numbers appear on the multimeter,
- Also, test the voltage and continuity of the ABS sensor and compare them with the recommended optimum readings.
Visually inspect the sensor.
Before you break out the multimeter, it’s always a good idea to take a quick visual inspection of the sensor. Check for any apparent damage, corrosion, or debris interfering with the sensor’s operation. If everything looks good, proceed to the next step.
Set up your multimeter. 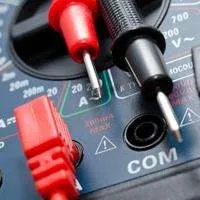
You will need to connect your meter across the two terminals (to measure voltage) and set the meter to measure AC volts, DC volts, resistance(ohms), and continuity.
Connect one lead from your meter on one sensor terminal and use another tip from your meter on the other terminal. The needle should move in one direction when connected at this point.
Check the resistance of your abs sensors.
With your multimeter in hand, you should check the resistance of your abs sensors first. Set multimeter to ohms (Ω) sign
First, attach your multimeter’s positive probe(red) to the positive terminal on your sensor and then touch the negative probe(black) to the negative terminal.
If you don’t see this reading, or if the assignment is infinity, the sensor is likely faulty and needs to be replaced. Keep in mind that there may also be wiring issues. Unplug the sensor from its wire harness and ensure it has power at both terminals (positive & negative).
If there is power at both terminals, you must troubleshoot the wiring harness between your sensor and the fuse box (assuming everything else checks out).
Check continuity in your abs circuit.
If you want to check for continuity in your abs circuit, set the multimeter to a diode or wave symbol. First, disconnect the negative battery cable. Next, locate the abs sensor and remove it from the vehicle.
Once the sensor is in hand, use the multimeter to test for continuity between the sensor’s two terminals. The sensor is operational if there is continuity. Correctly. If there is no continuity, the sensor is faulty and needs to be replaced.
You can also check that the wires are plugged into the proper connectors by using a multimeter on each terminal at one end of each terminal to see if they are connected.
You could assist by utilizing a multimeter on each terminal at both ends of each harness to ensure they are not shorted together or touching ground elsewhere on the vehicle. When testing for continuity, if the multimeter says OL or Open Loop, there is something wrong with either the sensor or the wiring.
Confirm power
You’ll need to check that the sensor is getting power and ground. To do this, you’ll need to use your multimeter. Start by selecting the DC Voltage setting on your multimeter.
Black probe to the ground (any metal part of the car that’s connected to the negative battery terminal). Connect the red probes to each wire going into the sensor.
You should see around 12 volts. If you don’t, there’s a power supply problem. Examine all fuses in the fuse box under the hood and any loose connections in the wiring harness close to the connection point with the battery. Finally, if none are responsible for the lack of power, take it to a mechanic for help.
Evaluate voltage
Now that you have the multimeter hooked to the sensor, it’s time to test it. Check that the multimeter is on the correct setting, and then touch the probes to the corresponding wires.
You should get a reading of around 5 volts. If not, check your connections and make sure you’re in the right setting. If following, everything appears to be so that, proceed.
The continuity test is essential because if there are any breaks in the circuit, the ECU will detect this and go into fail-safe mode. To conduct this test, disconnect one wire from each sensor side and put one probe on each end.
You should hear a tone as soon as you start testing if there are no breaks in the circuit or if nothing happens circuit is incomplete (wires are damaged).
Conclusion
If your vehicle’s ABS is giving you a complex system, one way to test the sensor is with a multimeter. The tools needed for this are not numerous.
The sensor functions correctly if the multimeter readings are in the recommended range. However, if nothing appears on the screen or you get an error message, it may be necessary to replace the sensor.
Related Guides:


