Do you know how to use a multimeter to test the voltage of live wires safely? In this article, you will learn a set of procedures to test the voltages of live wires.
A multimeter is a valuable instrument for measuring voltage resistance or amperes that can help you evaluate the condition of wires and current flow in any circuit.
Let’s start with the basics:
Live Wire
A live wire is essential to a circuit as it carries high voltage current from a power source to a circuit and can cause severe hazards if touched directly. Earth wires are used in electrical circuits to prevent shock and fatal accidents.
Live and neutral wires can be identified by voltage difference, such that a multimeter reads 120 or 240V in the live wire while near 0V in the neutral wire. In the live wire while near 0V in the neutral wire.
What is a Multimeter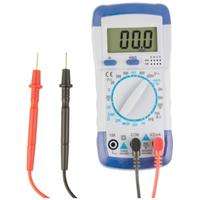
The voltage, resistance, continuity, and electric current are measured using a multimeter.
The four major parts of a multimeter are:
- Display: The screen that shows the measurements.
- Knobs or Dial: Select the range of measures.
- Probes: A red and black lead connects to the ports.
- Ports: Where the probes are connected, such as COM and VmAΩ labeled ports.
How multimeter works
The multimeter has two voltage settings for measuring direct current (DC) and alternating current (AC). Consider these two modes to measure voltage.
To measure voltage, we connect one probe to the live wire and the other to the ground wire in a circuit.
Rotate the dial to AC volts, DC volts, Ohms (resistance), or Amps (current) to use a multimeter in different tests.
Below we’ll describe step-by-step how to use a multimeter for voltage measurement.
How to use a multimeter to test the voltage of live wires
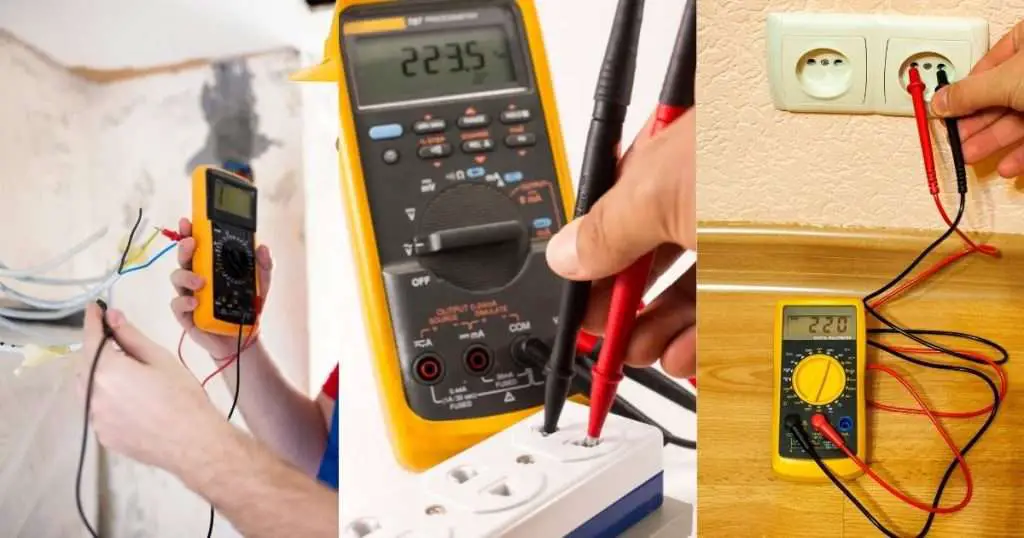
Using a multimeter, we can measure the voltage of a live wire quite easily. Set the multimeter to AC voltage mode (A〜). Connect the red probe to the live wire and the black probe to either ground or neutral, and you’ll get voltage on the multimeter screen.
Step 1: Safety Measures
Using a glove is essential as we’ll work with high-voltage cables.
To check for any live wires, use a voltage tester. It detects the presence of voltage by producing light, a buzz, or a chirp. A voltage tester also helps check the voltage in wires hidden behind a socket.
You can also identify a live wire with a color that is mostly brown or black.
Also, inspect for damage in probes and multimeter. These measures will prevent inaccurate readings and other risks.
Step 2: Set up the multimeter
To measure the voltage of a live wire, set your multimeter to voltage. Rotate the dial to the V sign, with a straight line to measure DC and a wavy line to measure AC.
As the home power supply is always AC, we select the AC voltage setting labeled AC or A〜.
Select the DC voltage setting if you have to test a circuit getting power from a battery.
Step 3: Connect probes to the multimeter.
The black probe (testing cables) is connected to the COM-labeled port, which measures the circuit’s ground (negative). Then, the red probe is attached to slot VmAΩ, which measures the voltage, resistance, or amperes (current).
Step 4: Test the live wire voltage
Turn on the power supply, connect the red probe to the live wire, and the black probe to the earth wires, and you’ll get a reading on the multimeter screen.
Evaluate multimeter reading
The wire has no current flow if the multimeter reads zero during testing. It could be due to incorrectly plugged probes or broken wires.
The presence of voltage is an indicator of a live circuit. According to your home electrical distribution, the multimeter must read 120 or 240 volts if the wires are in good condition.
If you get a negative voltage, reverse the black probe to red and red to black.
Test voltage of live wire in a switch
Unscrew the switch cover and turn on the power supply. Connect one probe to the ground wire and the other to the live wire.
The average reading for the switch voltages is around 120 or 240V. Any lower or higher voltage could be an indication of a wiring problem.
Test voltage of live wire in a Socket
To test live wires in a 3-prong socket, insert a red probe in the live socket (right) and the black probe in the neutral (left) or ground socket(top or bottom).
If you want to test neutral wire in a socket, insert one probe into the ground terminal (top hole) and the other probe into the neutral terminal.
In any circuit (switch or socket), the live wire should have around 230-240 V and close to zero on the neutral and earth wires.
Test voltage of a naked wire
The testing voltage on naked wires requires more precautions, as touching with a bare hand can cause severe risks. You can use a metallic object nearby to act as a ground reference.
In three-circuit wiring, one wire is live, and others are ground and neutral
If you do not have a ground reference, measure the possible voltage difference between live-neutral and earth-live wires. Both tests will give you live wire voltage.
Conclusion
Using a multimeter, we can identify malfunctions that cause electric hazards, injuries, and even death. We can prevent them by evaluating live wires via voltage tests.
Safety measures are necessary to measure the voltage of the live wire. Insulate your tools, check your surroundings and seek assistance from a professional.
A multimeter is more than just a tiny box and is quite a helpful tool for beginners to professionals.
Related Posts


