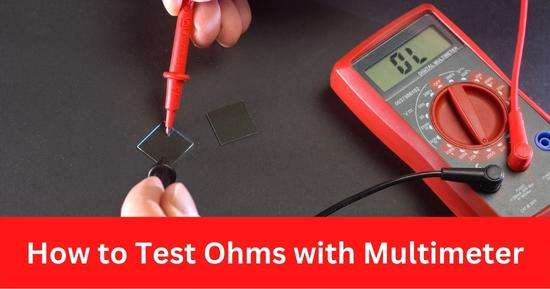
This post will teach you how to test ohms with a multimeter. Resistance(Ohm) measurement helps to identify a conductor’s condition to carry current. Resistance increases when there is less current in the current or faces challenges to pass through the circuit.
The lower the resistance, the higher the current flow will be. Testing the resistance is important because it changes over time.
The changes occur because of factors like dirt, corrosion, increasing temperature and voltage. So whenever your circuit has any problems, the first thing that comes to mind is to check the resistance of the circuit.
Minor changes don’t cause many problems, but if the difference is big, it will harm the circuit and the appliance. A multimeter can quickly test any circuit and component’s resistance value.
Different circuits and conductors have different ranges of resistance at their ideal functioning.
A multimeter is a combination of ohm meter, voltmeter and amp meter. So you don’t have to get each tool separately.
How to test ohms with a multimeter
Here we are giving you the quick steps to follow in testing the Ohms value with a multimeter.
- Set the multimeter settings on the resistance or Ohms symbol ‘Ω.’
- Select a range above the testing circuit.
- If your multimeter has an auto-ranging function, it automatically detects any range.
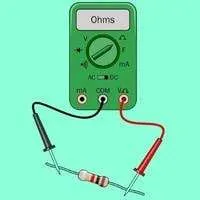
- Connect the multimeter’s leads with both ends of a conductor or circuit you want to examine.
- Check the value on the multimeter display.
- Compare the multimeter value with the ideal resistance range of the tested circuit.
Follow the step-by-step guide below to understand how to check ohms with a multimeter:
Step 1: Precautions
While following any procedure and using an electrical device, it is essential to keep the precautions in mind. So while testing the Ohms with a multimeter, you must consider the following preventive measures.
- Apply solder flux to clean corrosion or dust from the testing points(terminals).
- Wear gloves to prevent any harmful chemicals.
- Turn off the power supply of the testing circuit, as ohms can be measured without current.
- Please do not touch the metal parts of the testing probes, and don’t let them touch each other. Otherwise, it can result in inaccurate readings.
Step 2: Turn OFF the circuit
Turning off the circuit is the most important thing here because of safety. Before proceeding with the procedure, ensure that the Circuit is OFF so that no other component can interfere with the test.
Step 3: Set the multimeter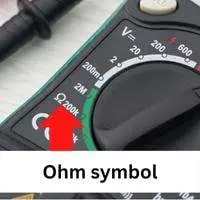
Inserting the leads will start the test automatically. So for this, you have to insert the multimeter’s leads in the exact ports. First, you must insert the Black lead in the COM port and then the Red lead in the Voltage-Ohm jack.
Remember that the connection between the leads and the circuit should be good to test the exact Ohm value.
Now set your multimeter to the ohm symbol(Ω), which is the resistance setting symbol. Select the ohm range above the circuit you are testing. For example, if you are testing 20k resistance, set your multimeter to 20 k ohms or above.
Step 4: Check Multimeter accuracy
It is essential to check whether the multimeter has been set accurately or not. For this, you have to examine the display screen. When multimeter probes are not connected to any circuit or each other, you will see an OL with an ohm sign.
After you connect both probes to each other multimeter should read 0 ohms. As multimeters, probes are designed to accurately measure reading, having their own internal resistance of 0 ohms.
Step 5: Connect probes to the circuit
Now it’s time to measure a circuit’s Ohm (resistance). Connect the metal ends of both probes to both ends of the circuit whose resistance you want to measure.
Resistance is non-directional, so you can attach probes to a circuit in any direction.
Step 6: Compare multimeter reading
Now it’s time to check whether the multimeter’s reading of a tested circuit is within the ideal resistance range of that circuit. It’s essential to compare the multimeter reading to identify a problem in case of high or low resistance than the perfect range.
Frequently Asked Questions
-
How does an ohmmeter work?
An ohmmeter sends a tiny current to a circuit through its battery via the red probe. After competing for the circuit (loop), the current returns to the multimeter through the black probe.
With the current flow in the circuit, the multimeter detects how much resistive force(resistance) is against the current in the tested circuit.
If the tested circuit is broken, the multimeter will display OL due to an open loop or circuit.
-
What is the lowest ohm setting on a multimeter?
200 ohms is the lowest setting on most multimeters. However, some multimeters have 20 ohms or 600 ohms as minimum units.
-
What are the different Ohm settings on a multimeter?
- The first step is to choose the ohm setting.
- Then you can select the range in which the testing circuit’s resistance lies.
- You can select from 20 to 2000K ohms to more. Different multimeters can have different ranges.
- If your multimeter has an auto-ranging function, you can select it to detect any range.
- You can also use the min-max range to measure resistance in a specific range.
-
How do you read 20k ohms on a multimeter?
- Set your multimeter to an ohm sign for resistance setting. Select a range below the ohm sign above 20 K ohms, such as 20 or 200k ohms.
- Now your multimeter is set to measure 20k ohm resistance. Connect both multimeter probes to both ends of the circuit.
- If your multimeter is set to 20k ohms, the multimeter will measure resistance 20k ohms or less.
- If your multimeter is set to 200K, the multimeter will read from 200K and less.
Conclusion
Testing the Ohm value using the multimeter helps us know whether the electrical circuit is broken or complete. If you get the infinity reading, it means that the circuit is open. Zero readings are the identification of the closed circuit. By getting the readings, you will know the cause of the problem.
So testing the Ohm of the circuit and any component will somehow lead you to the solution to your problem. By following the testing procedure, you will realize whether the resistance is the main cause of the problem, or you must also check the other factors.
Hopefully, this post will help you to test ohms with a multimeter.
Related Guides:


