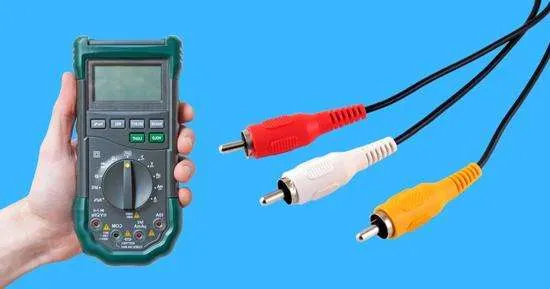
In the 1940s, a famous American corporation, Radio Corporation of America, launched the RCA connector. You will know where to use these cables, but sometimes you don’t know how to operate them correctly, and because of this, different faults occur in these cables, which need to test RCA cables with a multimeter.
The faults like Short Circuits and Open circuits may damage your RCA cable, which ends up breaking down the cable’s insulation, which is a red signal for the health of your cable. Suppose you see any breakage in the wire and your cable is giving a bad experience and not transmitting the audio and video signals efficiently. In that case, it is time to check it immediately. But what is the purpose of preventing them if they have been damaged now?
Most people think that if the RCA cable is causing any problems, then it is time to replace it. But this is not always the right choice unless you know the cause of its damage.
A multimeter will be a rescuer for you in this situation, and you can use it to test your RCA cable. It will help you realize the location and the reason for the fault damaging your RCA cable. After this, it will be easy for you to decide the future of your RCA cable.
Why test RCA cables?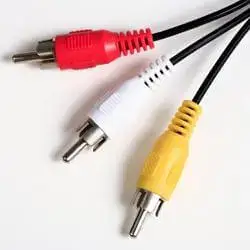
It is essential to test the RCA cables because there are some faults that you cannot recognize on your own. You can check the RCA cables by using gadgets like multimeters.
A multimeter will help you to find the exact location of the problem. After seeing the real reason, you can solve that problem and restart using your previous RCA cable without replacing it with a new one.
Here you are advised to use the multimeter because it is a handy gadget. You don’t have to call any professional to do this task because the multimeter will take a few minutes and precautions to do this for you.
Here we give a procedure you can follow while checking the RCA cable with the multimeter. First, you should know about the basic terms and parts of the RCA cable.
Parts of the RCA cable
An RCA cable has the following parts.
- There are two plugs in the RCA cable.
- There is a center pin called the male plug, and it has a band around it.
- There is a hole where the pin has to go.
- This plug is called the female plug.
How to test RCA cables with a multimeter?
You can follow the quick steps to have a general overview regarding the steps you have to follow while checking the RCA cable with the multimeter.
- Set your digital multimeter on the AC voltage dial.
- Turn the volume to complete so the RCA cable can get powerful signals.
- Now measure the AC voltage by using the multimeter.
- Check the screen for the results.
Step-by-step guide to test RCA cables with a multimeter
- First, you have to set your multimeter for the corresponding test.
- As you check the RCA cable, you have to take the dial of your multimeter on the AC voltage point.
- After setting the multimeter, look for the frequency of the signal of the RCA cable.
- Put the device’s sound to which the cable is connected on full so that the RCA cable can get powerful signals.
- This will help you to check the condition of your RCA cable correctly.
- Now click the multimeter’s probes with your RCA cable’s male and female plugs.
- Check the AC voltage of these plugs.
- If you are testing the car’s RCA connector, set your multimeter to DC voltage.
- Check the results on the screen.
- If a continuous band of up and down voltage displays on the multimeter, your RCA cable is fine.
- You will get very low readings if there is any fault in the RCA cable.
- If it occurs, then it is an indication of the fault in the RCA preamp output.
- Also, measure the resistance between both ends of your RCA cables. RCA cables should have minimum resistance for better audio quality.
How to prevent the RCA cables from damage?
Here we are giving you the options which you can choose to save your RCA cable from damage in the future.
- Suppose you use a nickel-plated cable to prevent your connector from getting corrosive. In that case, it will help you in this regard but will affect the quality of the signals also.
- Suppose you are using silver and copper connectors for better signals. In that case, it has relatively better conductivity but is not always the best choice.
- Corrosion will not only damage the cable but will also interrupt the signal transmission.
- If you want to protect the connector from corrosion and high signal quality, go for the gold-plated one.
- It will cost you more than silver or copper, but you don’t have to face the troubles of rechecking RCA cables after you buy the gold one.
Conclusion
So how to test RCA cables with a multimeter? RCA cables are widely used connectors that have color-coded versions. It connects the audio and video parts of the devices like gaming consoles, cable boxes, VCRs, and speakers. But sometimes people find faults in its signal transmission efficiency. This may occur because of many reasons.
But the simple and easy solution for this is the multimeter. You can use the multimeter and find out the problem with your cable. Follow the procedure given above to efficiently check your RCA cable and find whether there is any electrical issue in your RCA cable. If there is any physical damage, that turns your cable into a defaulted one.
Related Guides:


