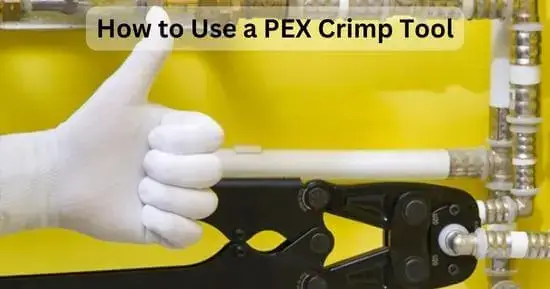
Want to tackle a plumbing project on your own? A PEX crimp tool can help you to create secure connections between PEX pipes and fittings like a pro. Our comprehensive guide will show you how to use a PEX crimp tool and give tips on selecting the right tools and fittings, crimping connections, and ensuring they’re secure for all your plumbing needs.
PEX pipes are well-known plastic pipes that are used for different purposes. So while installing PEX pipes, a very highly known PEX crimp tool is used for this purpose. As it is clear from the name, this tool is used to fit two PEX pipes together.
Although other pipes made up of materials like steel and copper are also available in the market, plastic pipes have some advantages over them, which is why these PEX pipes are used the most in plumbing.
The PEX pipes are used the most because it is easy to fit them and cut them in any size according to the need. Moreover, they are rust-free, so they do not need much care. The other thing which fascinates people about these pipes is that they are pocket friendly and lightweight. So talking about the PEX pipes, it is important to know how to install them.
Whenever you are up to fixing two PEX pipes together, you will need a PEX crimp tool. It is a simple and easy-to-use tool, but you need a proper guide about its parts and working technique so that you can do any welding process easily by using this tool.
Parts of a PEX crimp tool
A PEX crimp tool consists of the following parts:
- Two Crimp jaws
The first part of the PEX crimp tool is its two crimping jaws used to hold the pipes. Two pipes are fitted in these jaws to be crimped together.
- Two Handles
The second part of a PEX crimp tool is its two handles. Two Handles are pressed together after fitting the pipes in the crimp jaws. These handles help to exert pressure on pipes. If less pressure is exerted on the handles of the PEX crimp tool, they will not crimp the pipes together.
How to use a PEX crimp tool?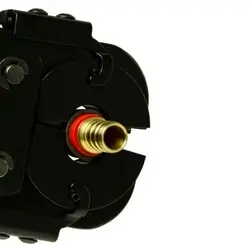
Tools required:
PEX crimp tool is used with a proper technique, but first, we should know about the tools and materials required to use the PEX crimp tool. These are:
- PEX crimp tool
- Crimp rings
- Gloves
- Jigsaw
- Connector joint
Here is a quick steps overview to use a PEX crimp tool:
- Cut the PEX pipes with equal edges by using the jigsaw tool
- Choose the crimp rings according to the diameter of the pipes
- Slide the crimp ring from one edge of the pipe and fit it where you want to connect.
- Take the connector joint and slide it into the pipe with the crimp ring
- Fit the Jaws of the PEX crimp tool around the sides of the crimp ring
- Exert pressure on the handles of the PEX crimp tool to crimp the pipes together.
- Repeat the steps for the second pipe.
How to use a PEX crimp tool (step-by-step explanation):
Step 1: Cut the PEX pipes
The first step is to cut the PEX pipes, which you will crimp using the PEX crimp tool. In this case, you have to be precise while cutting the pipes because you have to cut them at the right length, and both pipes should have equal length and diameter.
Another important thing is that you have to cut the edges precisely. If the ends are unequal, you will not be able to crimp them correctly. You can use the jigsaw tool to do this task. Now move towards the next step.
Step 2: Choose the crimp rings
The thing that often needs to be addressed while using the PEX crimp tool is buying the right crimp ring. Otherwise, it will not be possible for you to crimp the PEX pipes together because these crimp rings help the PEX crimp tool to do its task, so you have to measure the diameter of the pipes you are going to climp and then buy the exact diameter of crimp rings for crimping them together.
Buying appropriate diameter crimp rings will result in a successful task.
Step 3: Important Tip
Most of the available PEX pipes have a diameter of around ¾ or 1 inch, so you can also buy a crimp ring of this diameter.
Step 4: Install the crimp ring
Now you have to slide the crimp ring from one edge of a pipe and stay sliding till the exact position arrives where you want to crimp the two PEX pipes together. When you reach the exact position, then stay the crimp ring there.
Step 5: Important Tip
Don’t crimp the PEX pipes at the edges of the pipes because it will not be beneficial as it will not give the pipes the actual grip they need.
Step 6: Slide the connector joint
Now you have to slide the connector joint along with the crimp ring as it will help the PEX crimp tool to crimp the pipes together with the help of a crimp ring. So the connector joint is also an important thing in this regard.
With an appropriate connector joint, it will be easier for you to connect the pipes using the PEX crimp tool. So get the right diameter Connector joint before fixing the PEX pipes together.
Step 7: Fix the Jaws
Now we are moving towards the final step of this procedure, which is to fix the Jaws. It means that you have to fix the crimp jaws of a PEX crimp tool around the crimp ring as you will fix them together. Open the Jaws to an appropriate diameter to fix the crimp rings in between these jaws.
Step 8: Exert pressure on handles
Now you have to grip the handles of the PEX crimp tool strongly as you are going to exert pressure on these handles. So press these handles with big pressure, and don’t stop until you hear a loud crimping sound from your PEX crimp tool.
It will sign that both the PEX pipes have been crimped accurately. Try this step again if you have not listened to any clamping sounds.
Step 9: Repeat the steps
You have to repeat all the steps for the other pipe, also. Use an appropriate diameter of the crimp ring as you did for the first pipe and slide it over the PEX pipe to a normal length, then slide the connector joint from the edge of the pipe with the crimp ring as well open the jaws of the PEX crimp tool.
Place the jaws of the PEX crimp tool around the crimp ring and exert pressure on the handles. This will help you crimp the other pipe as well.
Step 10: Check the fitting connection
You can use the crimp gauge to check whether you have done your job well. The crimp gauge usually has two sides; one is known as “go,” and the other is “no go”. You have to slide the “go” side over the crimp ring.
Give a check to both the PEX pipes. If the “go” side gets to slide over the PEX crimp ring and the “no go” side cannot, the connection is good, and you have done your job well.
And if the results are not the same as explained, then the connection is not good. Then you have to check the diameter of the crimp rings and again have to clamp the pipes. You might not have exerted the appropriate pressure on the rings, so they have yet to get crimped.
Final verdict
The PEX pipes are cross-linked polyethylene plastic pipes. People often need to learn the exact place where they have to use these PEX crimp tools. These tools should be used over these PEX pipes. This is the appropriate place for which these tools have been made.
By following the exact procedure and using the right tools, including the crimp ring and connector joints, you will easily connect the two PEX pipes. It would be best if you were precise in selecting the exact diameter crimp rings, and then by giving the proper pressure upon the handles of the PEX crimp tool, it will be easy for you to do this task.
Related Guides:


