Test an Armature with a Multimeter is one of the basic skills you need to know as a technician. In fact, you can use a multimeter to test an armature with ease at home. This step-by-step guide is perfect for beginners!
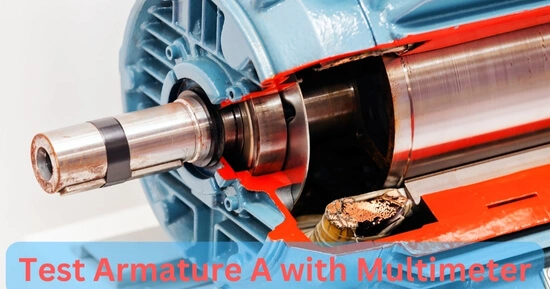
The armature is one of the essential parts of an AC motor that offers the electric current to the motor. If any problem in the armature occurs, it can lead to a faulty supply of electric current to the motor, and as a result, you will not get the correct output from the motor.
To avoid this type of condition, you can test the nature of your motor or generator using the digital multimeter. Any problem in the armature winding can generate different issues in the motor. The armature is present in almost all types of motors or generators to control the adequate supply of electric current to the motor. However, two types of armature perform differently.
Types of the armature:
Now there are two types of armature depending on the size of the AC motor in which they are installed.
- The type of armature installed in the small motors is the one with an iron core. A number of electric wires are wound around that iron core from which the electric current passes. The armature of the small motors is placed on the drive shaft.
- The second type of armature is the one that is installed in the big motors. This type of armature is called the stationary armature; it means it does not move. When the electric current is passed from the armature wires, the magnetic field is produced, and as a result, the torque of the motor increases.
No matter what type of armature is present in your motor, you must test them using the same procedure. Using the digital multimeter for this purpose will be preferable because it can provide you with the best results.
Working Principle of armature:
When an electric current is supplied to the motor, the armature rotates, because of which a magnetic field is produced. The relative motion of the field and the armature produced the electromotive force.
When we start the motor, the armature converts this electrical power into torque. This happens when the armature current and the electromotive force oppose each other. The shaft delivers mechanical power in the form of torque.
How to test the armature with a multimeter?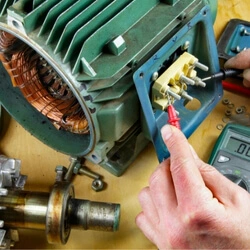
Now, if you are ready to test the armature of your motor using the digital multimeter, then you have to follow the basic guidelines below.
Material required:
- Rubber gloves
- Digital Multimeter
- Screwdriver
Preventive measures:
Wear rubber gloves before starting to test the armature of your motor. It will save you from any electrical shock while testing the armature.
Here are the (quick steps) to test an armature with the multimeter:
- Loosen the nuts of the motor by using the screwdriver.
- Turn on the digital multimeter.
- Set the digital multimeter on the resistance settings.
- Turn on the motor
- Connect the digital multimeter wires to the armature coil’s brushes.
- Take the resistance readings of the commutator bar windings of every coil.
- Note the resistance readings
- Compare the resistance values.
Below (brief explanation) test an armature with the multimeter:
-
Loosen the nuts of the motor:
To reach out to the armature, you have to lose the nuts of the motor from that part so that you can access the armature easily. For this, you can use a screwdriver.
After accessing the armature now, you have to move toward the next step
-
Turn on the digital multimeter:
The first step of this procedure is to turn on the digital multimeter to start testing the armature of your motor.
-
Set the digital multimeter on the resistance settings:
To test the armature using the digital multimeter, you have to check the resistance value of the armature coils’ windings, so you have to set the digital multimeter on the resistance settings.
You have to turn the rotator of the digital multimeter towards the ohm’s option. Now your digital multimeter is ready to test the resistance of your armature coil windings.
-
Turn on the motor:
The main step of this test is to turn on the motors so that the electric current can get started passing from the motor, and then you will take the resistance readings of the wires easily.
Without turning on the motor, you cannot test the armature of that motor, so you have to perform this test at a place with an electric supply available.
-
Connect the wires of the digital multimeter to the brushes of the armature coil:
Now you have to connect the digital multimeter to the armature to start the test. For this, you have to connect the black and red wire of the digital multimeter with the corresponding brushes of the armature motor.
-
Take the resistance readings of the commutator bar windings of every coil:
You know that every armature coil contains two commutator bars. The windings are connected between these two bars. You have to take the resistance value of these windings one by one.
-
Note the resistance readings:
In this step, you have to note the resulting resistance readings of all the windings one by one, which you can see on the digital screen of the multimeter. You have to note down all the readings carefully. Noting down the readings is necessary because they will help you find the root cause of the fault in your armature at the end of the test.
-
Compare the resistance values:
Now you have to compare all the resistance values. These resistance values should not have much difference between them. If there is a big difference between these values, then there is an issue with the windings, and you have to let them be checked out by a professional electrician or replace them with new ones.
-
Results:
Now there are the Four possible results you will get at the end of your test, and the possibilities change with each result.
First possibility:
If the resulting resistance readings are higher than each other, then there is an issue in the winding of the coil of the armature. So, in this case, you have to change the windings of your armature.
Second possibility:
The second possibility is that all the resistance readings are similar. It means that your armature is in good condition, and you do not have to change anything in your motor.
Third possibility:
If your resistance readings are lower than each other, then a short occurs in the windings of your armature coil. In this case, you have to let them checked by a professional electrician, and you may have to change the windings of the coil of your armature.
Fourth possibility:
It is a dangerous one. If the resulting resistance value fluctuates too much and the difference between these fluctuating readings is big, then it means that some wire is broken down in the circuit, and your circuit has been damaged. In this case, you have to change the whole circuit and call a professional electrician.
Final verdict
AC motors often get significantly impacted by any problem in the armature. So if you see any fluctuation in the output of your electric motor, then this is the time to check the condition of your armature.
If your electric motor usually has been working for a long time, then you should also test it by using the above-explained procedure because it might need a repair soon, so you will quickly know the cause of the problem.
It is always beneficial to check your electrical gadget after some time because it helps you to find out which of your electrical gadgets is going to get faulty so that you can start using that one more carefully. This way, it will be easy for you to find the better repair option for them.
Frequently Asked Questions:
What procedure do I have to follow to test the motor of my generator?
You can follow the same testing procedure explained above. This testing procedure is the same for all types of the armature, no matter if they are installed in the small motor or the big motor.
What do I have to do if all the resistance readings of the windings of my AC motor are the same?
In this case, you don’t have to do anything because this is a sign that the armature of your electric motor is working well. If your electrical motor is still causing any trouble, then you should check the other parts of your motor instead of the armature.
Can I test the AC and DC motors using the same procedure?
Yes, you can follow the same testing procedure for all electric motors. Because in all of them, you have to test the resistance of the armature windings. So, this process applies to both of them.
Related Guides:


