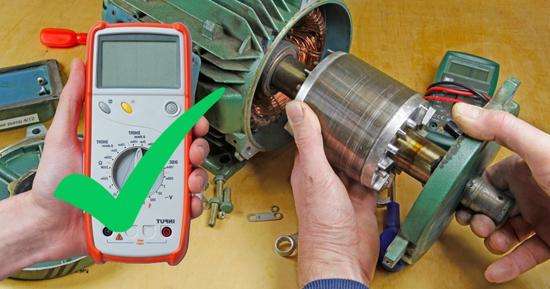
Single Phase motors can be efficiently tested using a multimeter. Although there are many ways to test defaults in your single Phase motor, using a multimeter makes your task becomes easy.
It is also necessary to check your Single Phase motor at regular intervals to determine whether there is a fault. So you must always have a trusted tool. In this lesson, you’ll learn how to test single-phase motors with a multimeter.
What is a Single Phase motor?
A single Phase motor is a machine that converts electrical energy into mechanical energy. It has relatively low torque, although the sizes of the engines vary. There are three main parts of the Single phase motor.
- Start winding
- Common connection
- Run winding
It only produces the alternative field, so no magnetic field is made here. It is a rotating machine that uses a capacitor and then completes its work of converting electrical energy into a mechanical one.
Purpose of using single phase motor:
Single Phase motors are used in electrical machines and household items like compressors, refrigerators, fans, pumps, and portable drilling machines with low horsepower. Then these motors convert the electrical energy into mechanical energy of these household items.
How to test a single-phase motor with a multimeter?
It is essential to test your single-phase motor with a multimeter or any other method at regular intervals. People often think that it is a small piece of equipment, so there is no need to check out its performance because it will not be affected by any factor. But the point of attention here is that despite its small size, it is still vulnerable to different faults.
If the motor starts getting overheated, it will become dangerous for the item in which they are present. Other defects can affect its efficiency badly.
Sometimes, the Single Phase motor doesn’t even start because of some failures. So, it is necessary to check out the default and its cause to save your equipment from further damage.
Following the process accurately will make you realize the exact fault, and it will be easy to find a suitable solution.
-
General inspection
General inspection includes some physical damages. Look at your motor and see if there is any damage like burn and breakage present anywhere or not. Then it comes to look upon the condition of the bearing.
If the bearing is running smoothly, then it is ok and if there is any problem regarding the movement of the bearing, replace it immediately.
-
Test resistance and earth continuity
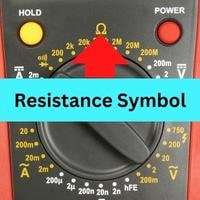
Now it’s time to check single-phase motor resistance. Here you have to test the resistance level between the earth and the motor frame.
The motor is in good condition if the resulting readings come under 0.5ohm. Still, if any of the readings exceed this limit, it is sure that your motor is faulty.
-
Test the power supply of the motor
The critical step is to test the power supply, which should be between 208 and 230V. The correct amount of voltage is essential for the motor to work efficiently. Set your multimeter to AC voltage and check the input voltage.
-
Test the winding resistance
Single-phase motors have three main terminals: S, C, and R. To check single-phase motor winding; we’ll measure resistance in all terminals with a multimeter. Check multimeter readings according to the following rules.
- The maximum resistance reading should be between the Ohms reading and the S and R.
- The minimum reading of resistance should be in between the Ohms reading comes between the C and R
- The Ohms readings of C and S should be between the Ohms values of S to R and C to R.
- Test the insulation resistance:
You have to use an insulation tester or a megohmmeter to test the insulation resistance between the earth and motor winding. The voltage of the tester should be 500 volts, then make the motor winding and ground into direct contact with each other.
If your motor is in good condition, the results will come to around 1mega ohm. Still, if the results do not correspond, your motor is faulty.
-
Test the running amperage
This is the last step of inspecting your Single phase motor using the multimeter. First, you must test the FLA (Full Load Amps) using any appropriate tool like a clamp-on meter.
Note down the readings. Now compare the readings with the motor nameplate FLA. If there is a deviation in the results, your motor has a default.
What to do if the multimeter identifies some defaults in the Single phase motor?
Look for the type of default. Replace any wires and other small parts of the Single phase motor, such as the bearing and shaft, if there is a default. Still, suppose there are other issues in the readings and the resistance values.
In that case, the only option is to replace your single-phase motor and buy a new one to save your household items from future damage.
Conclusion
Suppose the Single phase motor of any of your household items is not working smoothly, and you are facing any problems. A multitasking multimeter will allow you to determine the type of default in your Single phase motor, making it easier for you to manage a solution to the problem.
Check out your Single phase motor’s winding resistance, total power supply, Earth continuity, amperage, and resistance. After performing these tests, you will realize your motor’s default, which is very beneficial.
If the fault is correctable, replace the faulted part of your machine. Still, if the defect is in the total power supply and the readings, you must change your Single phase motor and buy a new one.
If you still have questions about testing a motor, ask in the comments.
Related Guides:


