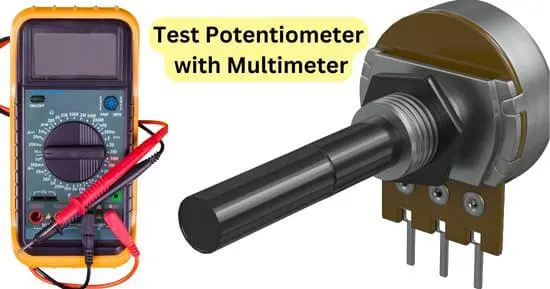
Learn how to test a potentiometer with a multimeter in this guide. It’s a handy skill for fixing toys, electronics, and more; when we talk about testing the potentiometer, it means that we will test the resistance here because the potentiometer has a strong relationship with the resistance value.
The potentiometers are used in different substances for different purposes. They are used in toys, speakers, and electrical gadgets that give lightning effects.
Sometimes they get damaged and stop working because we have to replace our speakers. We do not know that if these potentiometers are damaged, then we don’t have to buy a whole new gadget. We can only replace this potentiometer and renew our toys and speakers easily.
If you have also got stuck in this condition, it is important to know how you can test the potentiometer by using the digital multimeter so that you do not need to buy the new gadget every time.
Components of the potentiometer: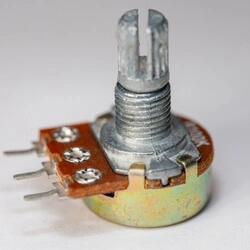
Before moving towards the testing procedure, we should know about the components of the potential meter so that we cannot get in trouble while performing the test.
- There are four components in all types of potentiometers
- The three components among them are called the connectors.
- Two of the three connectors are called the end terminals, and the third is called the wiper terminal.
- The fourth component of the potentiometer is the controller knob.
- The resistance of the end terminals is not adjustable.
- The resistance of the wiper terminal is adjustable
- In some potentiometers, the end terminals are located on one side, and the wiper terminal is located on the other side. In some potentiometers, the wiper terminal is located between two end terminals.
So it is clear from the components of the potentiometers that it does the work by adjusting the resistance in different electrical gadgets.
Now we will move towards the testing procedure of the potentiometers by using the digital multimeter.
How to test the potentiometer using a multimeter?
Material required:
Before starting the test, you must have all the tools and materials which are going to be used during the test. Here we are giving you a list of a few materials you should gather before starting the testing procedure.
- Potentiometer
- Digital multimeter of the higher resistance value
- Two alligator clips
Testing procedure:
Quick steps:
- Find out the total resistance value of the potentiometer.
- Set the higher resistance value on the digital multimeter
- Connect the leads of the digital multimeter with the end terminals of the potentiometer by using the alligator clips
- Note the readings
- Compare the results.
- Connect the leads of the digital multimeter, one with the end terminal and the other with the wiper terminal of the potentiometer, with the help of alligator clips.
- Note the readings.
- Compare the results.
Below we explain the whole testing procedure step-by-step to understand the procedure better.
Find out the total resistance value of the potentiometer:
The total resistance value of all the potentiometers can be different. This value is given by the company itself, which you can see on the potentiometer at any point. It can be 2k, 4K, 6k, and any other depending upon the gadget in which the potentiometer is located.
So the first step of this procedure is to look at the total resistance value of the potentiometer. After finding out the total resistance value, note it down because it is a very important step of this testing procedure.
Set the digital multimeter:
Now you will perform a test for checking the potentiometer using the digital multimeter, so you have to set your digital multimeter for the corresponding test. For this, turn the dial of the digital multimeter towards the resistance option. Now the multimeter is ready to test the potentiometer.
Set resistance on the multimeter:
After setting the digital multimeter on the resistance option, now you have to select a range for the test. Make sure that the range you choose on the digital multimeter should be higher than the total resistance value of the potentiometer.
Connect the leads using alligator clips:
The potentiometer has three terminals. Two of them are called the end terminals, and the other is the wiper terminal. So at the start of the test, we have to connect the leads of the digital multimeter with the end terminals of the potentiometer, which we can do by using the alligator clips.
You can also do this procedure without using the alligator clips but using them will be more beneficial for you.
Make sure you connect the leads with the end terminals, not the wiper terminal. If you are still determining which one is the end terminal and which is the wiper terminal, you can connect the leads in each terminal one by one. The end terminals with the same resistance value will be the two terminals.
Check the results on the multimeter screen:
You will get the end terminals’ resistance value on the multimeter’s digital screen. Suppose the resulting reading is close to the actual total resistance value of the potentiometer. In that case, it means that the potentiometer is working correctly. If the resistance value is greatly different from the actual resistance value of the potentiometer, it means that the potentiometer has been damaged.
Important note:
Also, try to rotate the controller knob of the potentiometer and ensure that the readings of the resistance value on the multimeter do not change. If the resistance value is changing, then it means that you have not connected both of the leads with the end terminals. One of your leads is connected to the wiper terminal; that’s why the resistance value is changing while rotating the controller knob.
Connect the leads with the end terminal and the wiper terminal:
Now you have to disconnect one of the two leads you had connected with the end terminals of the potentiometer and now connect this lead with the wiper terminals. It means that now one lead of the digital multimeter is connected to the end terminal of the potentiometer, and the other lead of the digital multimeter is connected to the wiper terminal of the potentiometer.
Remember to use the alligator clips to connect these leads because it will help you strengthen the connection.
Take the readings of the total resistance value:
Rotate the controller knob and look at the digital screen of the multimeter. If the resistance value changes while rotating the controller knob, then it means that you have conducted the test properly and your potentiometer is in good condition.
If all the resulting resistance values are in a specific range, then the potentiometer is in good condition. Some wires may be damaged. For this, you can do a physical inspection of your electric gadget.
Final verdict:
The potentiometers are used to change the resistance of your electric gadget. If your gadget is not working correctly, then it might be possible that its potentiometer has got damaged. For this, you can check your potentiometer by following the guidelines we have given you in this article. For this test, you have to arrange the digital multimeter, and you can easily perform the testing procedure and test your potentiometer.
You can perform this test two or three times to better evaluate the potentiometer. Make sure that the results match all the time, and if you get different readings every time, it means that your potentiometer is damaged, and you have to buy a new one for your electrical gadget to work normally again.
Frequently asked questions
What range digital multimeter do I have to use for the potentiometer with a 1K total resistance value?
For a 1000 ohm potentiometer, you have to use the digital multimeter with at least a 2000 ohm resistance value.
How can I set the multimeter at the resistance settings?
To set the multimeter at the resistance settings, you have to connect the red jack of the multimeter at the resistance port and the blackjack of the multimeter to the COM port. Now the multimeter is ready to test the resistance.
How can I know which one is the wiper terminal?
The terminal whose resistance value changes is the wiper terminal so that you can connect the leads with the different potentiometer terminals one by one. By rotating the control knob, you will know at which terminal the resistance value is getting changed. That one will be the wiper terminal.
Can I test the potentiometers without using the alligator clips?
You can also check the potentiometer easily without using the alligator clips. The alligator clips only help to connect the leads of the digital multimeter strongly with the terminals of the potentiometer. If you do not have the alligator clips, then it is ok. You can perform this test without them, also.
Related Guides:


