This article will show you how to check a contactor coil with a multimeter. Contactors are in great use because of their ability to switch electrical power. Technology is getting more advanced day by day, but the usage of these electrical gadgets for controlling electrical power remotely is the same. Because of this, the same issues occur repeatedly, but we have to sort them out because we have no other option.
Contactors help us control electrical equipment like electrical motors, thermal evaporators, capacitor banks, lighting, and other electrical loads by controlling the electrical connection between the power supply and load.
The contractors use low voltage but deal with high voltage matters. The range of its limit depends upon the size and capacity of the contactor. If you have a contractor of 23 and 24 volts, then it can manage the electrical motor of 230 volts.
No matter the contactor’s size and capacity, the issue can occur in any of them.
For this reason, here we will tell you how you can check your contactor coil to see if it is having any trouble working.
Requirements of the test:
If you are going to test your contactor coil, ensure you have the following essentials.
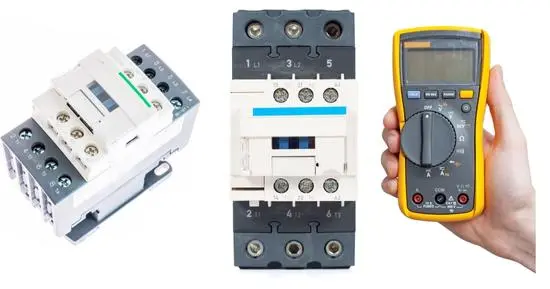
- A digital multimeter
You should have a digital multimeter with proper working ability because if your multimeter is faulty, then there is no way to the accurate results for your test. So arrange a multitasking digital multimeter for this test.
- A marker
Here you have to take a marker with you also. The reason behind this is that we know that contactor coils have different connections and wires. While checking them, we have to mark them separately with the marker so that we can check them accurately one by one.
It will not be suitable to rush for a marker while checking the contactor coil. That’s why make sure you have this with you before starting the test.
- Electricity supply
Start testing the coil where there is a proper electricity connection available. If there is a load shedding and you don’t have electricity available, then you cannot perform this test.
- Clear tape
The clear tape will also be required here in this test because, again, you have to separate wires from each other to inspect quickly.
- Proper attention
Last but not least, you should be attentive while doing this test. Any negligence can not only make your test results faulty but can also harm you. Keep in mind that it is a matter of electricity.
Table of Contents
ToggleHow to check the contactor coil with the multimeter?
First, we will talk about the steps you have to follow here:
- Turn off the power supply to your contactor.
- Mark the wires.
- Make a multimeter ready for the test.
- Check the leads now.
- Now again, change the settings of the multimeter towards the volt.
- Make direct connections.
- Test the leads again.
- Check the results.
We will briefly discuss the whole procedure for your better understanding so that you can read this procedure from here and easily imply it while checking your contactor coil with the multimeter.
Step 1:
Step 1 is to stop the supply of electricity and voltage to your contractor, or you can also turn the circuit breaker off. Now take all the wires out. Take clear tape and write L1, L2, and L3 on them. Place these taped on the respective wires.
Step 2:
There are two sides available in the contactor. You must pull out all the wires from the L and terminal sides. As you have done in the first step, you must mark the terminal side wires again.
This time you have to Mark them T1, T2, and T3. You are doing this because you have to separate all the wires for better inspection, and it will also help you to proceed with the test quickly.
Step 3:
Now, this is the time to turn your multimeter on. Multimeters have different setting options, so you have to set it at the symbol of ohm, where it can read out the resistance.
There are two leads available, the red one and the black one. You must connect the black lead to the common and the red one at the ohm. Touch these leads with each other to make sure that the multimeter gives the reading of zero ohms this time.
Step 4:
Now put the black leads towards the terminal side and the readers towards the L-side and test both sides. Now this time, If you get zero readings, it means your contact is in good condition, but if it does not show the zero reading, then it is a sign that your contact is in bad condition, and the only option available for you is to change it as soon as possible.
Step 5:
The other possibility if you are not getting the zero ohm readings can be the improper voltage connection, or it is also possible that the contactor coils are not placed accordingly. In this case, check the contactor coils’ arrangement and the contactor’s electricity source.
If you hear the clicking sound, the voltage connection is good, but if you do not listen, there is an issue with the electricity supply.
Step 6:
Now change the multimeter’s settings by turning the selector switch towards the voltage option. Now you have to connect the red probe with the voltage connector. Ensure all the leads have a direct connection with all coil connectors.
Suppose you get the result readings to the actual reading of the voltage you are supplying. In that case, the contact is in good condition, but if you give the proper voltage but the connector coil is not getting closed, you have to turn off the electricity supply.
Step 7:
Now, switch the multimeter towards the ohm option and touch all the leads with the coil connectors. Suppose the multimeter gives a reading between 10 to 100 ohms. In that case, your contact is working correctly, but if the multimeter shows variable readings, you have to change your coil as it cannot work anymore.
Conclusion
So how to check a contactor coil with a multimeter? Contactors have a wide range of types, and every type has a different specificity. The final results can fluctuate according to the capacity of these contactor coils. Still, checking any contactor coil with the multimeter will be the same as we have explained above.
So follow the whole process carefully and check your contactor coil by yourself as the procedure is very simple and requires a little time, so make sure that you take the test correctly and follow the above-given instructions. If your contactor coil is not working properly, try to go for the one with more capacity, or you can also go for a different company for a better experience.
Related Guides:


