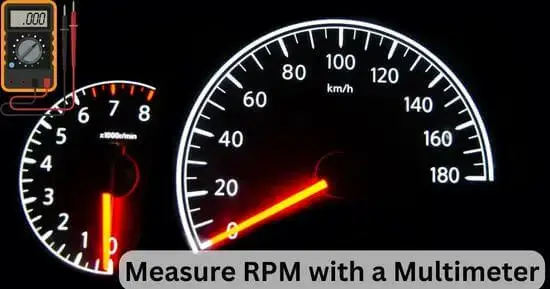
Learn how to measure RPM with a multimeter in this guide. It’s essential for maintaining rotating equipment. We’ll show you the steps for accurate measurements.
RPM is the value of any engine’s (revolution per minute). It is also an essential factor for the better working of the engine. Like all other vital parts of any engine, the RPM value also significantly determines the engine’s condition. Whether it is a motorbike engine, a car engine, or the engine of any other thing, it should have a specific value of rpm under a determined range.
People often need to pay more attention to the importance of the RPM if their automobile shows unusual behavior. But the reality is that the rotation of your engine coil is on which the full speed of your automobile depends.
And if you don’t pay proper attention to this factor, you will have to face a severe problem in the future. So keeping rpm under a specific range is important for the health of any motor.
Working of RPM
The reason why RPM is essential is the working of RPM. The rpm value fluctuates with the increasing or decreasing speed of the engine. So if you are driving a car or any other automobile, you put pressure on the pedal to increase the speed.
As a result, the rpm value also increases, and similarly, when the speed of the automobile decreases, the rpm value of the automobile also decreases.
But what if the automobile’s speed is decreasing, but the rpm value is not decreasing as it should be? So, in this case, you should rush towards measuring the rpm value of your engine as it will help you to catch any problem at its initials. So pay attention to this type of condition, and by using proper guidance, measure the RPM value of the engine correctly.
Signs of faulty rpm
The sign your motor shows which leads you towards testing the RPM of your engine by using the multimeter is the unusual fluctuation of the RPM whenever you put pressure on the pedal of the automobile.
So if you see that after pressing the pedal, the RPM is fluctuating unusually and the value is changing unpredictably, then it is a sign that you have to measure the RPM by using the digital multimeter so that you can understand the leading cause of this fluctuation because the fluctuation can occur because of so many other reasons also.
So before moving towards any professional and replacing your motor with a new one, it will be beneficial to give a Proper check to your automobile by measuring its rpm value.
How to measure RPM with a multimeter?
Suppose you are worried about the unusual fluctuation of your engine’s RPM. In that case, it is time to properly check the RPM so that you can understand the main reason behind this.
After that, you can solve the problem quickly. The digital multimeter for this task can help you perform this fast and provide accurate results.
Material and tools required:
- Digital Multimeter
- Protection gloves
- Calculator
- A wire piece of 4 inch
Preventive measures:
Before moving towards the procedure, you are advised to wear protective gloves whenever you are going to touch the wires and are going to measure the RPM of your engine because health is more important than anything. So keeping this all in mind, make sure of your safety first.
How to measure RPM with a multimeter (quick guide)
- Disconnect both the red and black probes of the digital multimeter from it.
- Take a piece of wire and remove its insulation from one end
- Take a bare wire and give it U shape
- Connect this wire with the red probe of the digital multimeter
- Turn the digital multimeter
- Set the digital multimeter to measure the frequency by turning the selection knob of the digital multimeter towards the hertz symbol.
- Now you have to start the engine and keep it ON for 1 min
- Now take the digital multimeter near the spark plug wire of the engine
- The digital multimeter will take frequency readings of 1 minute.
- Now you have to multiply the resulting reading by 60 seconds, the alternative number of the 1 minute.
- Repeat the steps 2 to 3 times and note down the degree of fluctuation in the resulting frequency values of the digital multimeter.
- No difference between the readings given by the digital multimeter indicates that the engine is working well and performing well.
How to measure RPM with a multimeter step-by-step guide
Here is the step-by-step guide to measuring RPM with the multimeter:
Step 1: Set the wires
To set the wires on the digital multimeter and to make it able to measure the RPM value of the engine, you have to disconnect both the red and the black probe of the digital multimeter from it and place it on the side. Take a wire 4 inches long and remove the rubber insulation from one end. Take the bare wire and give it u shape by turning it. Connect this turned wire with the red probe of the digital multimeter.
And now, the digital multimeter is set to measure the engine’s RPM.
Step 2: Turn the multimeter On
To measure the RPM value with a digital multimeter, you have to turn on the digital multimeter. Do not let the digital multimeter on idly. Just turn it on whenever you are going to start the measuring procedure. Turn it ON by rotating The dial towards the ON option.
Step 3: Set the digital multimeter
After turning on the digital multimeter now, you have to set it according to the type of measurement you will make by using the digital multimeter. So here, you will measure the RPM value of the engine.
So for this, turn the selection knob of the digital multimeter towards the frequency symbol; in this way, the digital multimeter will get ready to measure the RPM value of your engine. The symbol for the frequency is hertz, so look for the symbol and then turn the knob toward it.
Step 4: Turn the engine ON
To measure the RPM value of your engine, you have to turn on the engine so that the digital multimeter can start measuring the frequency of the engine rotation. Keep the engine turned on for 1 minute and make the connection between the digital multimeter and the engine stable so that the digital multimeter can measure the frequency of the engine for 1 minute undisturbed.
So for this, you have to take the digital multimeter bare wire near the spark plug wire of the engine. But make sure that both these wires should not touch each other.
Step 5: Calculate RPM value
The digital multimeter will calculate the frequency of the engine for 1 minute. To convert the frequency value into the RPM value, you have to multiply the resulting frequency value by 60 seconds using the calculator. As a result, you will get the RPM value of your engine.
The RPM value you measured by using the frequency of the engine of 1 minute is the standard rpm value of your engine. Although the average RPM value changes according to the type of engine the RPM you measure so, move towards the final results according to the specificity of the engine of which RPM you are measuring.
Step 6: Repeat the steps
If your engine has a problem or you want to test the RPM value of your engine, then you can repeat this step 2 to 3 times. If there is a great difference between the resulting RPM value of your engine, then you have to check your engine by a professional, and if there is no big difference, then your motor is working well.
Final verdict
Digital multimeters are the best for measuring and testing many electrical tools and appliances. By understanding the exact procedure of measuring different calculations using the digital multimeter, you can quickly troubleshoot and test all home appliances at home.
Measuring Rpm Value is easiest when you do it with the help of the digital multimeter. With limited tools and materials, you can measure your engine’s RPM with the digital multimeter in 1 to 2 minutes.
Related Guides:


