Hello to everybody who has a new build home and is about to set up a garage or someone who has a garage but is deciding to transform it somehow. If you need to run overhead electrical wire to your garage, it may look easy to run the wire, but you must ensure that you follow the correct process to avoid any issues and repairs. This step-by-step guide will show you how to do it.
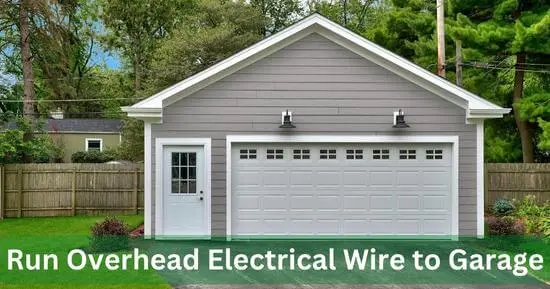
Run Overhead Electrical Wire to Garage
Here’s your complete guide on how to run an overhead electrical wire to the garage. We know it is a hectic task, and you must be worried about local building laws, exposed wires, water commodities in your place, insulation, weather conditions, drilling, paneling, and type of wires and breakers.
And you want to ensure everything runs smoothly because an electric shock is the worst nightmare. But not anymore; this article will provide you with solutions to all the technical problems you are so concerned about.
-
Ensuring room for the wire to run:
So your house walls should have a rigid sheetrock covering, and you should frame them to support and protect the wires, which says wires shouldn’t be passing through joists and studs. This is called framing.
While you are working on how to run your wire through overhead to your garage, you should make clear that the wires are not coming in contact with any windows, doors, or patios. Be sure to get rid of all the other objects that might become an obstruction in the wire route.
-
Planting the wire in the box:
You need to remove 8cm of the plastic sheath covering the wire from an end and thus route the wire through the grommet of the electrical box.
Ensure that the plastic sheath at the end of the conductor extends 1.5cm into the box. The wire needs to be penetrated about 8 inches into the box and 1.5 cm from the front and back of the frame.
-
Ensuring a safe route:
Ensuring a safe route for wires is very important. Make a route that would not come in contact with any doors, windows, or patios. If other wires are coming your way, map out another route. Otherwise, ensure that the two wires do not come in contact with effective insulation.
Remember to eliminate all the loose objects, such as small cabinets or shelves, coming in the route. The least we want for you is to get an electric shock while taking a book from the shelf. Protect the wires that you are working with. This will keep you safe from facing any mishaps later.
-
Installation of wire through the wall:
After inserting all the boxes, take 8cm of coiled cable, run the cable and leave about 1.5 inches of the coiled cable in the box. Repeat the same procedure for all the boxes. Then secure the boxes with clips. Wrapping the wire should be avoided. Clamp the wires at 8 inches from the can and 12 inches if they have not been clamped earlier.
Now that every precautionary measure has been checked off. You are all set to install the wires through the drywall. Cutting into the garage should be made at an angle that leaves enough slack at both sides and provides enough room for the wire in case any repairs are to be made. Now we move on to hanging our wires carefully.
-
Wire connection:
Wire connection should be done carefully; it’s okay if it takes a little longer. We suggest you connect one wire at a time before moving to the next one.
Measures to take while installing surface wire in a solid wall:
Surface wires in solid walls should be protected with PVC conduit. Keep the ratio of 1/2 inch conduit for one cable and 2/3 for two cables. Adhere to the box with the wall with a backing plate. Do not let the cable run through any cuts.
-
From the house to the garage:
To run an outdoor cable, dig an 18-inch deep trench. The PVC cable and substations ratio should be 1/25 inch for 100 amp substations. Direct the wires from the garage to the main junction using a 90-degree plug.
After running the conduit through the exterior wall and installing the flush box, use PVC LB connectors. Apply the same procedure for the header box. To connect the wires, route the black, red, white, and green wires to the main distribution box.
The red and black wires should be connected from the side panel to the main panel, the white wire to the light switches, green wire to the ground rod, which is then directly connected to the base panel.
The main switch needs to be in the main position. Connect red and black wires to the screws of switches, white wire to the neutral wire, and green wire to the ground.
Check the correct, current passing through the sub-centers using a voltmeter. A 13 feet pipe with electricity should be installed at the house and the garage. We advise you to call an electrician for this part.
Conclusion:
Now that we have given you the complete guide on how to run an overhead electrical wire to the garage, we would like to conclude that before installing such a system, read all the regulations and conditions about local building codes and seek permission from the authorities if you need to.
Never run an electrical wire through any water commodity such as Jacuzzi, swimming pool, etc.
If you are not good with installing pipes, pipes, and poles, please hire professional help.
Related Guides:


