Today’s life is impossible without electricity. But as far as the benefits of electricity are concerned, they can also need us in an accidental situation if left unchecked. Electric shocks and short circuits are The most common incidents with electric appliances or switches. Their impact can vary from no effect to a big disaster if not paid attention to it. If you think you are always safe while unaware of all the electric chaos in your electric switches and connections, you are at a big fault. Let’s test fault loop impedance with a multimeter.
Table of Contents
ToggleWhat does fault loop impedance stand for?
Fault loop impedance is also one of the possibilities when we talk about electrical safety issues. It is very clear if we try to understand this condition by its name. As a loop stands for circuit and an impedance stands for resistance, it means fault loop impedance stands for the condition when the resistance of the circuit is under faulty conditions. But is it that simple?
So, when we talk about false conditions, it means the condition of the short circuit. When we say there is a faulty loop condition, the whole circuit from which the current will pass is under faulty conditions, which can lead to a disaster for your and your appliance’s safety.
Types of short circuits:
So, there are two types of short circuits to which a fault loop impedance is concerned. These are phase-to-earth short circuits with different processes to check and can be caused by different issues. The other one is a phase-to-phase short circuit.
Both these have some differences in them. When we get attention to the fault loop impedance, we mostly go with the first option, the phase-to-earth short circuit. It has a reason. The size of the earth wires is smaller than the size of the other active wires. So, the amount and the resistance level in the phase-to-earth short circuit will be more than the resistance in the phase-to-phase short circuit caused by the fault loop impedance.
The reason for testing fault loop impedance:
Sometimes, deciding whether this is the time for you to test the fault loop impedance is difficult. The easiest way is to ask yourself the best time to test the fault loop impedance. Fault loop impedance is an overall circuit test. So, to avoid any circuit inconvenience, you should perform this test.
If you don’t do so and, unluckily, a fault goes undetected, then it can lead to damage to the whole circuit by catching fire and ruining your setup. This will make your workplace or home an unsafe place, which is a very miserable thing. If the fault is kept intact for a long time, it can lead to a big fault, which will not be the task of a single person.
How to test fault loop impedance with a multimeter
Preventive measures:
Whenever you start testing a fault loop impedance with a multimeter, there are some points you have to keep in mind. As already mentioned, fault loop impedance is a whole circuit test, and it can ultimately affect the condition of your electrical connections. The possible list of effects is:
- The support system can get turned off because of no current reaching it.
- Disconnection of a group of circuits.
- RCD runs off.
- Disconnection of distribution board.
So, to avoid these conditions, you can keep in mind some other options by which you keep giving some adequate amount of current to these home essentials so that your support system doesn’t turn off and all other systems of your home or workplace keep running. You should provide this electric current to prevent the RCD from getting tripped unintentionally.
Accept that the other basic preventive measures are avoiding direct electrical contact and wearing protective glasses and gloves to save yourself from an accident.
Materials required:
- Protection glasses
- Protection gloves
- Digital Multimeter
- Earth fault loop tester
How to test fault loop impedance with a multimeter (step-by-step guide)
Find the socket:
The first step is to find and identify the socket you want to test using the digital multimeter. It can be the outermost socket in most of the cases.
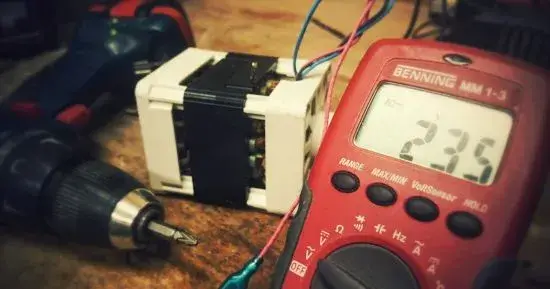
Turn ON the digital multimeter:
As you will test the fault loop impedance, the second step is to turn ON the digital multimeter for this task. Don’t press different buttons on the digital multimeter for this. Just press the ON button to start your testing procedure.
Connect the leads:
This is the time to connect the test leads to test fault loop impedance. So, connect the test leads with the earth, neutral, and line terminals. For this, you can use the earth fault loop tester.
Set the digital multimeter:
Now, you have to set the digital multimedia at the no-trip settings so that the RCD does not trip, and you can get your corresponding results.
Calculate the value:
Now, this is the time to calculate the Zs value for all the circuits one by one. Remember to set the digital multimeter corresponding to the need. This will help you to identify the Zs value of your circuit, by which, in the next step, you will know whether your loop impedance is faulty.
Compare the results:
After getting all the readings, you must compare your results with the actual values. Compare these values with the specified Zs values given by the NEC. If your resulting values are within that specific range confirmed by the NEC, then you don’t need to worry about anything because it means that your loop impedance is working well, and you don’t need to worry about anything.
But if the values are very different, then it is the ultimatum for you to get it checked through some professional because it will lead to a short circuit soon, so in this case, you have to arrange something to stop it from doing so.
Final Verdict:
Making electrical connections is everyone’s need, but to make sure that you have done all your work properly and there is no fault in the circuit, you have made the best solution for this day’s loop impedance testing as we make the circuit with the earth so here you can say it an earth loop impedance testing procedure. This is a point of concern most of the time because a fault in it can cause a short circuit, accumulating enough heat energy to catch fire and burn things.
So, you don’t want to face this kind of condition, or you want to save your expensive appliances from getting damaged because of your negligence. Following proper guidance regarding testing a fault loop impedance can rescue you under this condition.


