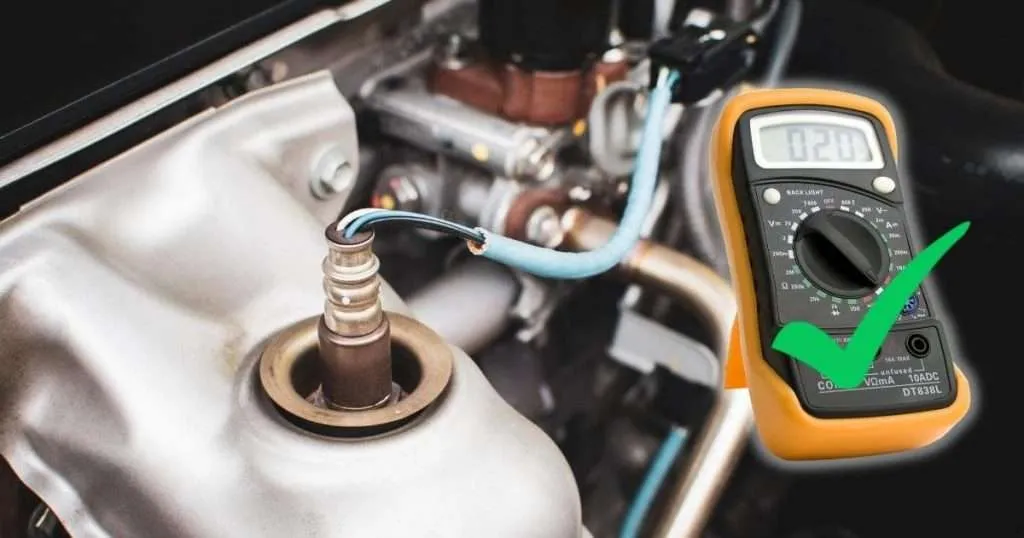
You can test the o2 sensor with the help of a multimeter. Most heaters consist of internal resistance from 10 ohms to 20 ohms.
The o2 sensor is a small device consisting of the sensor tip placed in the exhaust fan to measure the oxygen in the exhaust emission. It plays a crucial part in preventing the emission of numerous hazardous gasses into the environment.
If the air increases in the engine, the measurement is about 200 mA to 300 mA. When you are testing the o2 sensor, it will be an excellent o2 sensor if it has a range of 0.001 to 0.200 volts. The fuse is located in the oxygen sensor. Every fuse needs to be checked.
Let’s discover this in detail:
What Is Oxygen Sensor
O2 sensors, also known as Oxygen or lambda sensors, are handy portable devices used to measure the amount of unburned oxygen in the car’s exhaust. It coordinates with the ECU to ensure the best air-to-fuel ratio.
Types of Oxygen Sensors
These oxygen sensors are classified based on the number of wires connected. Some of them have a pair of wires, a few come with a trio of cables, and the most popular type is one with four wires. This gadget can be tested with many tools like a multimeter/voltmeter, clamp meter, oscilloscope etc.
There are many types of O2 sensors available in the market, but three significant kinds of Oxygen Sensors are listed below:
-
Zirconia Oxygen Sensor
It is the most commonly used sensor, either heated or unheated. It is used to measure the heat coming out of the exhaust. As the exhaust gets heated slowly, the speed of the sensor is also low.
-
Wideband 02 Sensor
This is a new-day invention. It produces an appropriate ratio of thick and thin mixtures to keep the engine balanced.
-
Titania 02 Sensor
Titania oxygen sensor is a ceramic-made sensor usually used in a few car models. It works differently as it keeps the fuel and resistance ratio inversely proportional. Meaning that when the density of the fuel is rich, it reduces its resistance, and when the fuel density is lean, it increases its resistance.
Why Use an Oxygen Sensor
An oxygen sensor measures the oxygen in the air and exhausts the fume from its combustion chambers. Experiments have proven that oxygen sensors should be checked before installation or during the plant’s work.
Moreover, a multimeter can be a good alternative if the scan tool is not working. The readings provided by the multimeter are essential for the ECU, which is short for the Engine Control Unit of the vehicle. In this way, ECU can manage the fuel-oxygen ratio of the car accordingly by fixing it on time.
The process of checking Oxygen sensors with a multimeter has been discussed below.
Oxygen Sensor and Multimeter
Here are quick steps to check the O2 sensor with a multimeter, need to follow the following steps:
- First, see the heating element by turning on the ‘Resistance Mode’ on the multimeter.
- As most of the multimeters have internal resistance between 100 to 200 ohms, set the dial on 200 ohms resistance.
- Read the readings shown on the screen of the digital multimeter. To check if the reading is normal, it is suggested to consult a reading manual.
- For a self-heated oxygen sensor, it is compulsory to let its heating element cool.
- Now switch the multimeter to ‘Voltage Mode.’
- The widespread Zirconia sensor, a four-wired sensor, probes similar colored non-heating wires.
- Observe the readings on the multimeter; it would show some readings between 12V to 14V.
- The oxygen level is always inversely proportional to the voltage, which means that the lower the oxygen level, the higher the voltage reading.
- If it shows zero or nothing on the meter, it means that the heating element in the oxygen sensor is not working or the oxygen sensor is damaged. Hence, it indicates the performance of the multimeter.
Let’s explore this in more detail below:
How to Test O2 Sensor with a Multimeter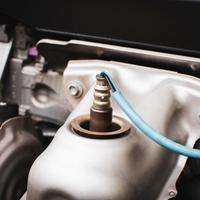
If something is wrong with the o2 sensor, it can cause faults in combustion and related functions. Resistance levels range from 15 to 20 ohms. There can be a faulty sensor that is open or has a low resistance.
The voltage which is produced by the o2 sensor is from 0.1V to 0.9V. The lean side has 0.1 V, and the high side has 0.9V.
If the voltage is in range, the o2 sensor is working correctly. If the system goes through an electricity problem, the bad o2 sensor drains the battery excessively.
The upstream sensor measures the amount of pollution in the exhaust from the engine and sends this data to the ECU, which changes the air-fuel ratio.
The downstream sensor measures the story of the contaminants passing through the catalytic converter. Fuel consumption has decreased, which suggests that the o2 sensor is malfunctioning.
- The ideal voltage that the o2 sensor reads is 0.4V.
- First, switch the resistance mode on the multimeter.
- Then connect between the ground wires or the heater power.
- Then read the reading displayed on the multimeter.
Testing of the o2 Sensor
When testing the oxygen sensor, you must know the type of sensor. One of the most popular kinds of oxygen sensors is the zirconia sensor. When testing the oxygen sensor, you need to be aware of the sensor type. The o2 sensor is placed on one of the two spots within the engine exhaust.
- Get the specific oxygen sensor that is needed for the o2 test.
- You have to use the multimeter for testing the o2 sensor.
- Please turn on the car and let it warm until it reaches the suitable operating temperature, which takes almost 20 minutes.
- Please turn off the engine after it reaches the required temperature.
- Connect the red probe to the oxygen sensor signal wire and the black probe to the suitable ground.
Test o2 sensor Heater
If you want to check the test o2 sensor with the multimeter using a signal wire test, follow the steps below.
Using a multimeter, use the following instructions to perform a signal wire test on the test oxygen sensor.
- Please verify that the engine is turned off first, and then check it again.
- After that, switch the digital multimeter to the ohm setting. Back probing the ground wire and the heater’s oxygen sensor is next.
- Then make the connection of the red probe of the digital meter with the heater hot wire and the black probe of the multimeter with the ground wire of the heater.
The sensor’s suitability can be determined in the following step by testing whether the multimeter reading is between 10 and 20 ohms.
Signs of the o2 Sensor Failure
Through these signs, you may know about the failure of the o2 sensor. The dashboard’s bright engine light has to be examined. It will start glowing when the sensor is bad.
If there is poor gas service, Test failure, or an older vehicle, the timing of the engine, combustion periods, and other crucial operations are affected by faulty sensors. It would be beneficial if you could monitor the stalling and the gradual acceleration.
Conclusion
By testing an o2 sensor, you will come to know if you have a terrible or suitable sensor so that you can fix it immediately. After testing, you can tell if the problem is with the o2 sensor or the other components, such as the o2 sensor heater. The testing of the o2 sensor verifies its proper function.
It assists in locating the damaged heating element. It helps regulate the fuel-oxygen ratio and is advantageous to the engine control unit system.
If the car has a faulty o2 sensor, it will run effectively, and the ECU system cannot read and correctly adjust the oxygen fuel level. There could be a chance of a loose connection within the oxygen sensor.
Related Guides:


