The Purge Valve works by removing fuel vapors from the charcoal’s combustion. A faulty purge valve causes a vacuum leak that affects the vehicle’s mileage and speed. We use a multimeter to test a faulty purge valve by measuring resistance and continuity to evaluate its functioning.
A Purge Valve is a small accessory used in cars near the engine or fuel tank that controls the amount of purged gasses from the canister.
Now head toward step-by-step testing:
How to test purge valve with a multimeter
The procedure is easy to follow without being a pro. Find your vehicle’s Purge valve’s exact location, and disconnect the cable to connect them to the multimeter’s connections.
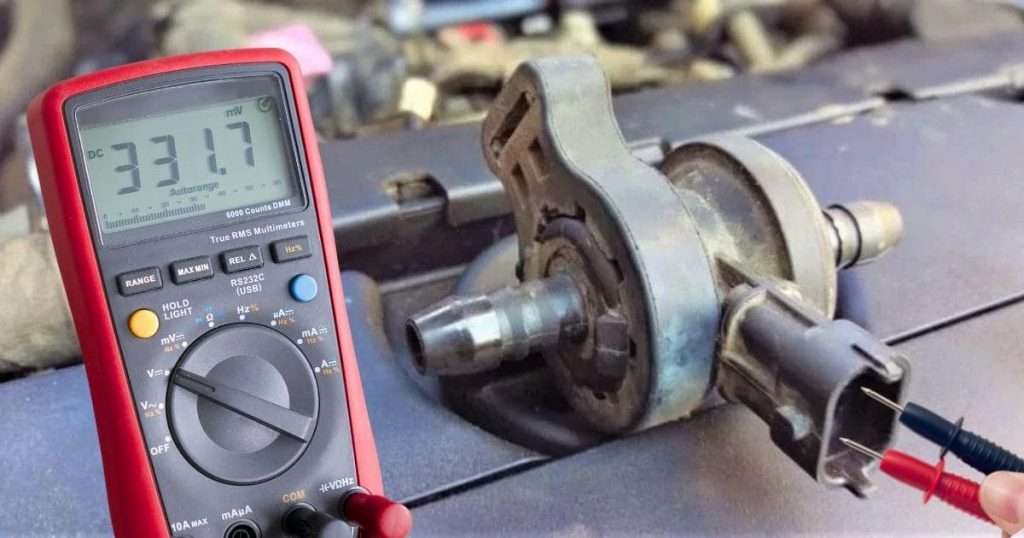
Set your multimeter to resistance and connect both probes to the valve power terminals. If the multimeter detects the resistance between 15-30 ohms valve is OK. Otherwise, read the value on the multimeter and compare them with recommended values of your specific model.
Also, test continuity between terminals of the valve. The multimeter will show continuity with a beep sound if a valve is suitable.
Follow this simple guide to evaluate your vehicle’s purge valve.
-
Locate and disconnect the purge valve
- The Purge Valve should be located under the charcoal canister, near the fuel tank or engine bay.
- Disconnect the valve from the vehicle by unscrewing the clamps at both ends.
- If it is still challenging to find, you can read the manual or search online for engine graphics specific to your vehicle to locate the purge hose.
-
Multimeter setting and connection
- Separate the valve from the vehicle.
- Set the multimeter to resistance mode ‘Ω.‘
- Now connect multimeter probes with both terminals of the valve.
-
Evaluate Readings
- Check the resistance when you have connected the purge valve with a multimeter. It should range between 15 to 30 ohms.
- If the values appear to be above or below, you have to replace the valve to ensure that it functions as expected.
Signs of a Faulty Purge Valve
If you’re keen to learn more about the procedure to check the purge valve’s condition using the aid of a multimeter and how to solve the issue, you must first be sure that the problem is related to the purging valve.
Here are some indicators that indicate the issue is in the valve
-
The engine’s light goes off.
A car engine can be involved in the solenoid’s purge and lights up in case of a problem. The checker usually indicates error P0446 or P0441 if the levels of vapor purge are changed.
-
Fuel’s Mileage may Decrease.
A vehicle’s malfunctioning EVAP system could cause a reduction in Mileage. Furthermore, it can result in the release and formation of gas vapors that are released into the air instead of being absorbed into the combustion chamber, eventually leading to high fuel combustion.
-
Failing at the Emissions test
According to the theory described above, a poor EVAP system and a damaged Purge Valve can cause an excessive release of fumes from the engine into the surrounding surroundings, which will cause the vehicle to fail the emissions tests.
Frequently Asked Questions
How would you test an EVAP Valve?
To test the performance of an EVAP valve, you’ll have to connect the valve to an air vacuum. While you hold and apply the pressure, you’ll observe that there’s not any pressure.
This is because it’s not in fumes any longer. The machine’s checker will show an error code of p0441, indicating a faulty purge valve.
Can a flawed Purge Valve ignite a misfire?
It is possible! Incorrect operation of the purge valve and the EVAP system can result in the unintentional and dangerous build-up of gas fumes in and around the vehicle. It may cause the car to malfunction if the problem gets worse.
Conclusion
A malfunctioning purge valve is risky and could land you in dangerous situations. Using a multimeter, it’s easy to determine if your purge valve is the reason for your vehicle malfunctioning.
The process is simple, locate a purge valve to measure resistance and continuity between its positive and negative input terminal and compare the reading with the recommended range.
If this article is helpful, give your feedback or a suggestion, or ask any questions in the comments.
Related Guides:


