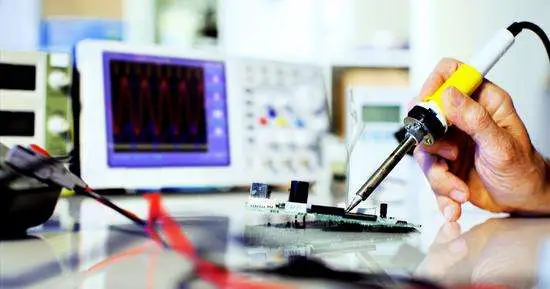
Soldering is one of the vital skills that you’ll need in most of your DIY projects. To become a pro in soldering your house circuits, you need practice. This post will share valuable tips and guidance on how to solder wires to connectors, battery terminals, or any metal. Tips are a bonus for you!
Let’s learn in detail.
How to Solder Wires to Connectors
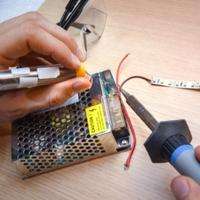
Please turn on the soldiering iron ad heat it up to at least 250 C. Hold the connector with your hand or with a vise. Peel and then place wires over the connector pins.
Get the solder (metal alloy) and melt it with the soldering iron tip(it must be hot). Spread the melted drops over the wires and connectors to make a joint. Melt the solder and apply it over the joint until the wires are strongly connected to the connector.
Follow the step-by-step guide below.
Step 1: Equipment required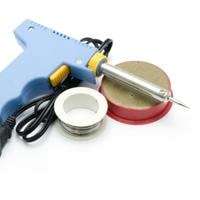
It’s not necessary to have all equipment available, and mainly you’ll need a soldering iron, solder (alloy to melt and make a connection), wires, and a connector.
- Soldering iron
- Connector
- Wires
- Solder (silver or aluminum alloy)
- Flame Solder (for other soldering tasks)
- Shrink tube
- Soldering vise (holding stand) and some alligator clips
- Wire strippers(optional)
It is highly recommended that you invest in a good soldering iron with an on/off switch and a heat control system if you plan to do a lot of soldering, but a regular one will work fine as long as it gets hot enough.
The only point is that a cheaper soldering iron will continue to bring troubles of damaging itself now and then, and you will have to keep replacing it, which I suppose you do not want!
To begin with, always use clean solder so that you get a clean product at the end. For this purpose, wipe the solder onto a clean sponge or give tap on a hard surface. This way, any solder sticking there from the previous soldering will shake off.
Step 2: Solder wires to the connector
- Bring some metallic wires to use as a solder (melting alloy).
- Peel the wires from one end to attach them with a connector.
- Place the connector in a vise.
- Place the naked part of the wire in the appropriate position (direction) on the connector.
- Heat the soldering iron up to 300 to 325 degrees Celsius at the start. You can raise the temperature afterward.
- Bring the solder right over that position.
- Melt a small amount of solder and the connector together (make sure you don’t melt the plastic part of the connector).
- Spread the melted solder over the joint (wires and connector pins)
- The wire will be connected to the switch right away.
Some Useful tips for Soldering!
- The tip of the soldering iron should be clean to avoid an untidy finish.
- Use a cone tip instead of a wedge tip for soldering batteries.
- Use high heat for a short time rather than low heat for a long time because there are more chances of destroying the equipment this way.
- You can either put the solder onto the wires or melt it first, then put the wires onto it and keep them steady until the wires are fixed.
- For excessive solder, use the heated iron to remove the excess.
- If you are working with two wires, wrap them with a shrink tube or electrical tape at the end of the process.
- Use goggles to prevent any hazards to your eyes.
- Place a smoke extractor or a small fan to remove any inhaled smoke.
How to choose the suitable soldering material?
Solder is usually a metal alloy that comes in several formulas. It may contain tin, copper, aluminum, or lead.
Solder comes in a 60/40 combination containing 60% tin and 40% lead. However, a solder can also come without lead, but working with this one is a bit more challenging.
It also comes in different diameters; a thick one and a thin one. A thinner one has the advantage of fitting into pinholes easily. It also provides you with some control over how much you are applying.
With a rosin core solder, you also don’t need to use additional flux because its core already has flux, which is an important soldering component.
How to solder wires to a circuit board?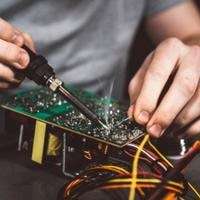
To solder a wire to a circuit board:
- Take a circuit board and wires to solder. Identify the spot on the circuit board where you will solder the wire.
- Heat your soldiering gun and rub its thin tip with any metal, such as a dishwashing metal sponge, to clear the tip from any previous residue.
- Flip the circuit board and place the wire at the desired connection point on the circuit board. Take a thin aluminum or steel wire(solder) that will melt and join the wire to the circuit board.
- Connect the solder gun’s tip to the aluminum or steel wire (solder) and the wire you want to solder on the circuit board. Steel wire will start to melt. Spread it over the circuit board and the main wire you have to connect.
You don’t need too much soldering to sell a wire on a circuit board. A small amount of melted metal will join the wire or any circuit board component.
How to solder a wire to the battery terminal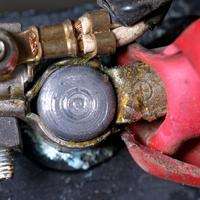
We’ll need a soldering flame gun to solder a wire to the battery terminal.
- Take a battery terminal you want to soldier, and place it in a vise(holding frame).
- Peel the insulation of wire about 1 inch with a cutter or scissors.
- Apply a few drops of flux on the bare wire end.
- Insert a piece of solder (slug or a piece of metal that melts and joins two components) into the battery terminal (eyelet) that’s fixed in a vise.
- Now turn on your soldering flame gun and take it closer to the battery terminal, and heat until the slug in it melts.
- After the slug melts, insert the stripped wire into the battery terminal and wait until the slug cools and the wire gets attached to the terminal.
- After the wire is soldered to the battery terminal, lose the vise and get the battery terminal out.
- Now place the part of the battery terminal where the wire is inserted into the crimper tool.
- Hit the metal on top of the crimper tool, and it’ll move down, tightening the battery terminal to the wire. Now you’ve soldered a wire to the battery terminal.
- Cut off a piece of heat shrink tubing and adjust it to the wire and battery terminal joint. Turn your soldering gun and heat the shrink tube until it fits(seals) the joint.
Frequently Asked Questions
-
How to solder speaker wires?
To solder speaker wires, first, peel the speaker wires. Turn the soldering iron on and rub its tip to clear any residue—warm a solder (melting material or alloy) with a heated soldering iron tip.
When the solder is melted, place the speaker wire on the speaker terminal and spread the drops of solder over the speaker terminal. Repeat until the wire is filled with solder, and then wait for it to cool down.
-
How to solder wires to a switch?
To soldier wires on a switch, take a solder (a metal that melts and joins two components) and the wires you want to connect to the switch.
Place wires on the terminal of the switch. Heat your soldering gun and connect its tip to the solder, and it’ll start melting.
Place the melted drops on the switch terminal (terminal and wire). Thoroughly spread the melted allow on the switch terminal(terminal joint with wire) and the wire. This way, you can solder several wires to the switch.
-
How to solder a wire to metal?
To solder wires on a metal, you’ll need solder (melted alloy), flux, and the rest of the work is almost the same.
Turn your soldering gun on and wait for its tip to heat. Apply a few drops of flux over the metal, as it’ll help to remove corrosion. The flux also makes the melted ally more liquid, filling every part of the joint.
Now place the solder (alloy) and wire to connect to the metal. Connect the gun’s tip to the solder, wire, and metal simultaneously. Spread the melted solder on the wire and the metal joint. Keep heating and spreading the melted alloy on the joint until the wire and metal are firmly connected.
-
How to solder lithium battery terminals?
Please don’t use a needle (thin) tip for soldering a lithium battery, as it may damage the cell. Use a soldering tip such as BC2 or K.
Take a wire, solder(metal alloy), and lithium battery. Place the wire on the battery terminal and melt the solder.
When the metal wire starts melting, spread the melted alloy drops over the battery terminal and wire until the wire is soldered to your lithium battery terminal. In this way, you can soldier as many batteries as you want.
Conclusion
Soldering can sound like quite a task for beginners. Still, once you get comfortable with the equipment and especially the heat used in the process, you have the solution to many of the disturbances going on with your electric connections.
Just remember the tips and tricks while you begin to make the cleanest, the finest electric connections! Good luck with soldering!
Related Guides:


