
Will it be amazing to test a photocell with a multimeter without pursuing others? Yes, you can try a photocell by using a multimeter. Photocell sensor is an electronic resource that auto-controls the light system of your home. But this photocell sensor must be fixed, causing your home light system to turn off unexpectedly.
Installing a photocell sensor in the light system of your home saves you a lot of money and energy. But the question is how to test a photocell with a multimeter to check whether the photocell is working correctly or not. You will find this article about testing a photocell with a multimeter. You will also find some tips about common problems with photocell sensors.
What is Photocell Sensor?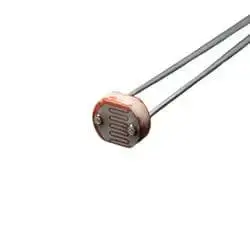
Photocell sensors are also known as photodetectors or dusk-to-dawn light sensors.
A photocell sensor is an electronic device interconnected with a transformer—Photocell Sensor auto-turns on and off the light of your home during a fixed time. A photocell sensor safely and securely conducts indoor and outdoor lighting in your home.
How does a photocell sensor work?
Before testing a photocell with a multimeter, you must know how a photocell sensor works. The working of a Photocell Sensor is slightly different from the timer switch. Photocell Sensors catch the sunlight to regulate artificial light.
A photocell consists of a semiconductor, which works based on incident light intensity. The light photons cause the free electrons of a semiconductor of a photocell to flow.
The semiconductor of a photocell has a high value of resistance. This increased resistance blocks current flow when no light falls on the photocell. When light falls on the photocell, the semiconductor of the photocell captures energy. The incident light frequency and the energy transferred is proportional to each other.
Methods to test a photocell sensor
If your photocell sensor is not working correctly, it will cause a massive cost and increase your electricity bill. Here are some methods to test a photocell sensor listed below.
- A digital multimeter
- A screwdriver
How to test a photocell with a multimeter?
- First, you must identify the photocell sensor’s two wires. Turn on the digital multimeter and set the resistance.
- Attach your meter’s red wire to one leg of the photocell. Similarly, attach your meter’s black wire on the other leg of the photocell.
- Use an alligator clip so that wires don’t slip from the leads of your photocell.
- After connecting the wires, set your multimeter. Put your hand over the photocell to cover it so that no light falls on the photocell.
- Note the reading on the multimeter by changing the resistance.
- Set the resistance low by changing the knob of the digital multimeter. Reading must be 100 ohms.
- Put the photocell near different light sources and record the resistance value.
- If the resistance value changes with the change in the source, your photocell sensor is working correctly.
- But if the reading on the multimeter stays the same with the change in source, your multimeter is malfunctioning.
Note: You must set the resistance before recording the reading each time to get a correct reading.
Test the photocell sensor with a screwdriver
- Point the photocell sensor towards the sky and disconnect the wires with the help of a screwdriver.
- Set the resistance of the multimeter to 12 volts.
- Attach the meter’s positive red wire with the photocell’s positive red wire.
- Attach the meter’s positive black wire with the photocell’s positive black wire.
Why should you test a photocell?
It is necessary to check whether your photocell sensor is working correctly. Sometimes your photocell malfunctioning causes you a vast budget loss. If the photocell sensor works appropriately, it will reduce your electricity bill. When you test your photocell sensor, it will help you to prevent spending huge costs on repairs.
Tips for dealing with everyday problems of photocell
Here are some tips that will help you deal with everyday issues of your photocell.
- There must be a strong connection of wire with the circuit of your lighting system.
- If your photocell is suffering from small cracks, replace them immediately.
- Clean the dust from your lighting system regularly.
- Do not put the sensors toward the reflection of sunlight.
- Always point the sensor downwards.
- Do not put your light sensor in an obstructed area.
- Check the battery of your photocell sensor. If the battery is not working correctly, replace it immediately.
- Your photocell sensor must receive direct sunlight to charge the sensor.
- Check the wiring and connections of your lighting system.
- Clean dust from the lens of the photocell sensor with cotton.
Conclusion
A photocell sensor provides you with the convenience of a safe and secure lighting system. A photocell sensor also helps in auto-turning on and off your lighting system. So you must ensure that your photocell sensor is working correctly or not.
This article provides you with all the information about how to test a photocell with a multimeter. Follow the tips and methods and save from spending huge costs on repairs by testing your photocell with a multimeter from time to time.
Related Guides:


