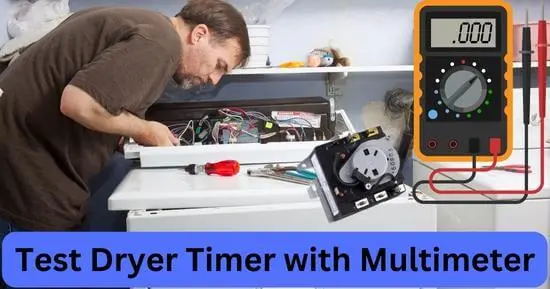
A dryer timer is an electronic device that controls the time for the dryer to start and stop. The timer is generally located inside the dryer, and inside the casing, in this article, we will guide you on how to test the dryer timer with a multimeter.
Driers are commonly used nowadays because we use them to dry our clothes after washing them. But as it is an electrical gadget, some issues can occur because it stops working efficiently. Some of the basic reasons for a dryer not working can be the default in its timer.
The dryer timer does a great job of regulating the period of the dryer’s cycle. We set a specific time for our clothes to dry by using this dryer timer, but what if, because of some issues with the timer, the drier stops giving us accurate results?
In this condition, we must know how to test a dryer timer so that we can do the test whenever we want and when we see that the dryer is causing trouble in drawing the clothes. For this, the digital multimeter will be the best choice, so here we will use the digital multimeter to test a dryer timer.
What is a continuity test?
The dryer timer helps the dryer timer motor by providing it with a sufficient amount of electric current whenever the cycle is going to start and similarly, it turns off the supply of electric current at the end of the cycle, so continuity has a great deal to do with it.
So whenever we are going to test a dryer timer, it means that we are going to do a continuity test for a dryer timer.
Symptoms of a damaged dryer timer:
Here we have listed some symptoms of a damaged dryer timer. You can physically inspect your dryer timer by using these symptoms.
If you see any of the symptoms given below in your dry timer, then it means that it needs a quick continuity test.
- The dryer is not drying the clothes at a specific period as it was before.
- The dryer is not starting even though you have regulated the dryer timer.
- The dryer is not stopping according to the regulated cycle.
These are some signs of a damaged dryer timer. Suppose your dryer timer is showing any of the symptoms explained above. In that case, you must follow the guidelines to test your dryer timer with the multimeter without delay.
How to test a dryer timer with a multimeter?
Important precautions:
As of now, you are going to test the dryer timer with a multimeter, so you have to follow some important precautions given below.
- Make sure that no power is getting supplied to the dryer motor.
- Do not put any clothes in the dryer.
- Make sure to dry your hands before starting the test.
Tools required:
- Screwdriver
- Marker
- Needle nose plier
- Digital Multimeter
Testing procedure: (Quick steps)
- Turn off the power supply to the dryer.
- Find the location of the dryer timer motor in the dryer.
- Remove all the wires from the dryer timer motor.
- Observe the wiring diagram
- Set the dryer timer to the normal dry option.
- Set the digital multimeter at Rx1
- Connect the leads
- Take the readings on the digital multimeter
- Compare the results
- Inspect the dryer timer motor
Brief explanation:
Now we will explain each step of the testing procedure briefly so that you can perform the test without any problem and understand the whole procedure step by step efficiently.
Step 1: Turn off the power supply to the dryer:
Before testing the dryer timer, you must turn off the power supply so that you cannot get any electric shock while checking the dryer timer any unnecessary power supply can also damage the wires of the dryer timer, so avoid providing any power supply to the dryer while checking it.
Step 2: Find the location of the dryer timer motor in the dryer:
To test the dryer motor, it is important to find its location, so you have to take off the front control panel of the dryer. You have to take the screwdriver and unplug all the bolts.
After unplugging all the bolts, you will get the dryer timer motor in your front for further inspection.
Step 3: Remove all the wires from the dryer timer motor:
Take the needle nose pliers in your hand and remove all the wires from the dryer timer motor. Do not pull them by hand. Take them out carefully and label them according to their position with the markers so that you can join them again at the right positions after testing the dryer timer motor.
Step 4: Observe the wiring diagram:
You can find the wiring diagram of your dryer timer at some point on the control panel. So please find it and observe it. It will help you to know the whole system of your dry timer. It will also help you to know what contacts should be closed and open at what amount of electric current.
Step 5: Set the dryer timer at the normal dry option:
Set the settings of the dryer timer to the normal dry option.
Step 6: Set the multimeter at Rx1:
As of now, you have to test the continuity of the dryer timer, so you have to set the multimeter to test the continuity. For this, you have to switch the dial of the digital multimeter at the option of Rx1.
After setting the digital multimeter, now you have to select the range for the test and set the range dial of the digital multimeter at 0.
Step 7: Connect the leads:
Now you have to connect the probes of the digital multimeter with the terminals of the dryer timer motor. So connect the two probes of the digital multimeter at the right positions.
For this, one probe should be attached to the wires you have removed, and a second probe can be attached at any point, according to your choice.
Step 8: Take the readings on the multimeter and compare the results:
After connecting the probes of the digital multimeter with the terminals of the dryer timer motor, you will get the readings you can see on the digital screen of the multimeter.
Suppose the readings you are getting on the digital multimeter are close enough to the given range of ohms at the dryer’s control panel.
In that case, it means that the dryer is not damaged, but if the resulting readings of the ohms are far different from the given range, it means that it has got damaged, and you have to replace the dryer timer.
Step 9: Inspect the dryer timer motor:
To test the dryer timer motor more deeply, you are advised to inspect it according to the wiring diagram. Look at the timer motor contacts while turning off the timer, and then inspect the positions of all the contacts.
Make sure the contacts are open and closed at specific points according to the wiring diagram. If you find similar conditions to the wiring diagram, then it means that the motor is working well, but if they are not similar to each other, then you also have to change your dryer timer motor along with your dryer timer.
Frequently asked questions:
Can I test the dryer timer even if I can’t understand the wiring diagram?
It is important to understand the wiring diagram properly because, without it, you will not know the problem’s point with the dryer timer. So make sure you understand the wiring diagram properly before starting the test.
How can I set the multimeter to check continuity?
In some multimeters, continuity is written as the option, but some write Rx1 instead of continuity. So check for both of the options. You can find anyone from these options in your multimeter. This will be the point that will help you to check the continuity.
Which model dryer timer should I buy as a replacement?
You have to buy the dryer timer of the same model you have used before because every dryer timer has its specificity, so you can keep the model the same. You can also discuss this matter with the experienced electrician in your area.
Final verdict:
You cannot replace your dryer timer alone because most of the time, the dryer timers are sold out along with the motor, so it is important to test the dryer timer along with its motor before buying a new one. It is easy to test the dryer timer with the multimeter, as it can easily measure any electrical tool’s continuity.
It is important to regulate the contacts of the dryer timer motor to make it work properly so the issue can occur in the regulator and the motor. So you are advised to test both by following the whole testing procedure in this article.
Related Guides:


