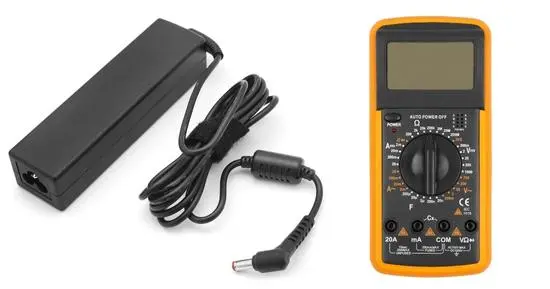
Testing Laptop Charger with a Multimeter is a good way to confirm that your laptop is charging properly. This is a simple and complete Guide on how to test a laptop charger with a Multimeter.
A laptop charger takes AC voltage from the outlet and converts it into DC voltage. Nowadays, most digital devices such as mobiles, laptops, tabs and watches operate on a battery power supply, and a battery only stores DC volts. So a laptop charger inputs AC power and converts it into DC output. The laptop charger’s output is your laptop’s input, so both should be equal to each other.
If a laptop charger is used with care, it can last for decades. But you can test it.
If your laptop charger is bad, the battery won’t charge. The laptop may not start without a charger. If you test the voltage output of the charger with a tester(multimeter), the voltage is not ideal, as mentioned on the charger.
A laptop charger has two main parts: a cord(input wire) connected to the plug goes to the transformer. The second part is the transformer, which converts the main AC voltage to the DC voltage required by your laptop. Most laptop chargers output 19V dc. So we will test the input and output supply of the charger using a multimeter. You can test a laptop charger safely with a multimeter.
Follow the step-by-step guide below:
Table of Contents
ToggleHow to test laptop charger with a multimeter?
- Set your multimeter DC voltage above 20V.
- Connect the laptop charger to the power supply.
- Attach the red probe to the metal pin inside the adapter.
- Attach the black probe to the laptop’s round (cylindrical) metal body (adapter).
- If your laptop charger is fine, the multimeter will read exactly or around what ideal voltage is labeled on the charger.
- If the voltage is very different, the laptop charger could be faulty:
- Also, test the charger’s input voltage by removing the input cord from the center(transformer).
Below we’ve explained each step in detail:
-
Have Safety measures
Before testing your laptop charger, you should have basic safety precautions. Wear insulated gloves as we’ve to test live wires carrying high voltage. Also, wear shoes and dry the surrounding area.
-
Multimeter Setting
Take your multimeter, and insert the black probe in the COM port at the bottom. Insert the red probe in the VmAΩ port.
First, set your multimeter to AC voltage, as we’ll test the input voltage of your laptop charger.
Set a higher voltage range as the home voltage supply is quite high(240V).
-
Test voltage of charger power cord(input)
Unplug the laptop charger power cord from the transformer(black box). It’ll have two or 3 female prongs(holes). Now plug the charger power plug into a socket(outlet).
Insert your multimeter into the power cord(female connector).
If your charger power plug and cord are fine, you should expect around 120 or 240 V readings on your multimeter per the home power distribution. You can expect a voltage difference(low or high) of 10%. The laptop charger’s plug or cord could be faulty if the voltage differences are high. Low voltage supply could also be an issue.
-
Test the laptop charger output voltage
Now it’s time to check the output voltage of your laptop charger. Most laptop charger output 19 volts DC, but you must check your charger’s voltage in the information printed on the transformer.
Connect the power cord back to the transformer and plug it into an outlet(power supply).
To test the laptop power adapter, set your multimeter to DC voltage above your charger’s output voltage. For example, if our laptop charger output is 19V, set it to 20 DC or the nearest higher range.
Gently insert the red probe into the laptop charger pin. The metal of the red probe must be attached to the metal pin inside the charger adapter(output connector). Don’t apply too much force, as it may damage your laptop.
Connect the black probe to the outer metal cylindrical body of the output connector(pin).
Check the output voltage on the charger’s transformer and compare it with the multimeter reading.
Suppose the ideal output voltage of your charger is 19V; you should expect exactly or around 19V.
However, your charger or transformer could be bad if the multimeter reads a strange reading(quite high or low).
Frequently Asked Questions
How to test a laptop charger without a multimeter?
To check if the power adapter is working without a multimeter, turn off your laptop and remove its battery. Now insert your laptop charger’s plug into an outlet(receptacle) and turn on the power supply.
If the light on the charger gets, the charger is getting power supply. Now connect the laptop to the charger. The charger is fine if your laptop starts without a battery.
How to check the laptop charger serial number?
You can check your laptop charger serial number labeled with other information on the transformer body. This serial number can be used to check different details, such as the charger’s compatibility, specs, and input and output.
How to test the laptop charger battery?
To test a laptop battery, disconnect it from the laptop. A laptop battery may have 6-9 terminals. The terminals at both ends(left and right) are negative and positive battery terminals.
We’ll use a multimeter to test the charger battery. Set your multimeter to DC voltage and attach both probes to the pins/terminals at the ends. Most laptop batteries output 11.1 -14.8 depending upon the number of cells, each outputting 3.7 volts.
Conclusion
Testing a laptop charger is quite easy. You must have safety measures and check your laptop charger’s input and output voltage. Inspect for damaged or loose wires, burn marks or smell in the charger.
Follow the complete guide above for testing your laptop charger.
If you are still doing anything complicated, ask us in the comments below.
Related Guides:


