This simple and easy tutorial guides you on how to test the laptop battery with the multimeter. The laptop has been an essential part of students’ lives, working men and women for a long time. People do many things like digital marketing, freelancing, business, assignments, and so many other things on laptops. That’s why laptops have become an important component of today’s life.
The things that come in daily use also have a great chance of getting faulty. Laptop batteries have a lifespan of between 3 to 6 years. No matter what laptop you use, its battery will get slow after a few years.
In that case, it is necessary to check your laptop battery using a convenient gadget like a digital multimeter. If your laptop battery is working slowly or because, for some reason, it is not getting started, then there is a chance that its battery is malfunctioning or there is a fault in the battery.
So, here you must check your laptop battery to make it clear if any problem with the battery is occurring or if any other component of your laptop is causing the problem.
In this article, we will guide you step by step on how to check your laptop battery using a simple digital multimeter. This step-by-step guide will help you to check your laptop battery anytime if your laptop is causing trouble in getting started.
The laptop batteries are chargeable. However, they have a longer lifespan than unchargeable batteries; for different reasons, these chargeable laptop batteries can also cause trouble and cause problems for starting your laptop.
Here is a list of some reasons which can decrease the lifespan of your laptop battery depending on the condition of your laptop battery. It is important to know these reasons to avoid them from occurring in the future.
Reasons which can cause problems with the laptop battery
These reasons are related to the daily routine of charging your laptop battery. People do not pay attention to this factor, but it is the most important thing that can cause your laptop battery to burn. The routines like:
- Leaving the laptop battery on charge overnight.
- Putting a laptop in a soft and comfy place.
- Charging laptop with a faulty charger.
- Charging the laptop battery unnecessarily.
- Putting the laptop on charge again and again.
Yes, these are the reasons which can even burn a laptop battery if you do it frequently. Whenever you buy any gadget, you should know how to use it properly, and if it is chargeable, then you should know how often you have to charge it.
So it is important to take the necessary instructions regarding charging electrical gadgets. People do not often do these things. That’s why gadgets like laptops cause problems for them.
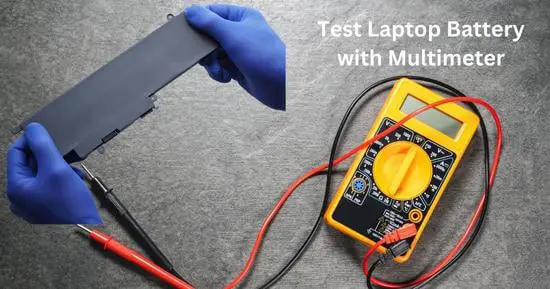
How to test the laptop battery with the multimeter?
Here we will give you a full explanation of the process of testing your laptop battery using the multimeter. So you have to follow the steps carefully to check the condition of your laptop battery.
Here is a list of the important steps you have to take in testing the laptop battery.
- Charge the laptop battery fully.
- Turn off the laptop
- Remove the laptop battery
- Turn on the digital multimeter
- Set the multimeter
- Connect the multimeter with the connector
- Read the readings on the multimeter
- Compare the results.
We will briefly explain each step so you can follow these guidelines properly and avoid getting into trouble while testing your laptop battery with the multimeter.
Step 1: Charge the laptop battery fully:
While testing the laptop battery with the multimeter, it is important to charge it fully because the readings you will get by using an uncharged laptop battery will not be accurate.
So the final test results will not give you an efficient result, so make sure you charge your laptop battery fully and then move further in the process.
The thing which you have to keep in mind while charging the laptop with the charger is that your charger should be working efficiently. Please do not use any faulty charger because it will cause a hurdle in your process of testing the laptop battery with the multimeter.
Step 2: Turn off the laptop:
After charging the battery of the laptop, now you have to turn off the laptop. As it is the matter of the battery so it is important to turn off the laptop so that you cannot get a shock or as the battery is going to be out, it is also important to turn off the laptop by yourself so that after taking out the battery, the laptop didn’t get a sudden shock.
Step 3: Remove the laptop battery:
As you are going to test the battery of the laptop, so you have to take it out from the laptop also. It is important to take out the laptop’s battery from the laptop because you have to connect the multimeter to the battery, and you also have to read out the battery’s voltage, which is written on the inner side. Most laptops’ voltage ranges from 9.6 volts, 10.8 volts to 14.8 volts.
It depends upon the type and the size of the laptop as well. So there are two reasons for taking out the laptop’s battery, which are both important.
Step 4: Turn on the digital multimeter:
As of now, you are going to test your laptop battery by using the multimeter, so you also have to turn on the multimeter for this purpose. A multimeter is also an electronic gadget, so you have first to turn it on and then it will be able to work for you.
Step 5: Set the multimeter:
You have to test the voltage of the laptop battery, so you have to set the multimeter to check the voltage. For this, turn the dial of the multimeter towards the voltage option. Now the multimeter is ready to test the voltage of the laptop battery for you.
Step 6: Connect the multimeter with the connector:
For those who do not know what the connector is, the connector is the point where the laptop’s battery interfaces. Now you have to connect the multimeter with the connector so that the multimeter can start testing the battery’s voltage.
We know that the battery of the laptop has two slots. The first is positive, and the second is negative. So you have to connect the leads of the multimeter to these two slots of the laptop battery.
You can connect any of the leads with any of the slots but make sure that both are connected accurately; otherwise, the multimeter will not be able to take the readings.
Step 7: Read the readings on the multimeter:
When you connect the leads of the multimeter with these slots of the laptop battery, then you will get certain readings on the multimeter. You have to read these readings from the digital screen of the multimeter and then move toward the next step.
Step 8: Compare the results:
Note the readings from the multimeter and how to compare them with the recommended voltage given on the inner side of the battery of the laptop; if the resulting readings are closer to the given voltage of the battery, then it means that your battery is working well and if these are the readings with a great difference then it means your laptop battery has become faulty.
The important thing you should know here is that the test is not over here.
The next step you have to do in this test which you can call the final step also, is that you also have to perform the whole procedure of testing the laptop battery voltage with the multimeter after the battery charge drops to 70 or 80%.
At this point, check whether the voltage you are getting in the result is satisfactory. Suppose the charging of the battery drops to zero. In that case, it is clear evidence that your laptop battery is not able to work anymore, and now you have to replace it and buy a new one for your laptop because, in the future, it will also cause trouble for the other components of your laptop.
Final verdict
The only component of your laptop which requires the most of your attention is the laptop’s battery, and almost 90% of the working of your laptop depends upon the strength of the battery. There are so many reasons which can become the reason for a faulty laptop battery.
You are advised to check all the reasons in this article to save your battery from getting faulty as long as possible. If your battery has started getting in trouble, follow the testing procedure given in this article by using the digital multimeter and check out the efficiency percentage of your laptop battery.
If its efficiency is less than 50%, then it means that it is going to be dead very soon, if its efficiency is less than 20%, then it means that it is no more worth it for you and your laptop, so you have to buy a new battery for your laptop, and this time makes sure that you do not repeat the previous mistakes in the matter of charging your laptop battery.
Related Guides:


