This article explains how to check a home thermostat with a multimeter. The steps include connecting the multimeter to the home thermostat and checking its voltage.
A thermostat is the main part of your heating or cooling system. It measures the surrounding temperature, which helps the whole system work according to your desired temperature settings. If there is a fault in the thermostat, it will fail the entire heating or cooling system. That’s why checking the thermostat for defects, such as low voltage, short circuits, or poor connection, is necessary.
A thermostat is an electrical component used in the cooling systems in your homes, central heating, vehicles HVAC, refrigerator, and water heaters.
In homes, a thermostat is installed in the air conditioning circuit (system) that measures the surrounding temperature. It enables the system to operate and keep the temperature according to the adjusted settings.
A thermostat has a thermistor(temperature sensor) that changes its resistance according to the temperature. These resistance values are used to detect the temperature in an area.
Thermostats are available in different styles and shapes, but digital and mechanical thermostats are the most commonly used types.
Digital or programable thermostats are accurate and easy to operate but are more costly.
While mechanical thermostats have two metal pieces having different expansion and contraction temperature ranges. The thermostat estimates the temperature from the change in metal’s expansion.
You should install the thermostat in a fresh air/ventilated area.
Signs of a faulty thermostat:
- Temperature is different from thermostat reading.
- AC or heater may not start when required.
- The heater/AC won’t turn off.
- An increase in electricity unit consumption.
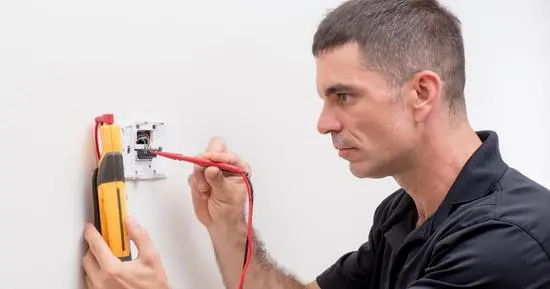
Check the thermostat with a multimeter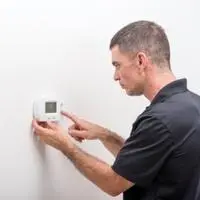
Follow Step By Step guide below:
- Reach the thermostat, turn off the power, and remove the cover.
- Set your multimeter to AC voltage.
- Attach multimeter probes to the red wire(R terminal) and the other probe to any other wires.
- You should expect the recommended voltage(ideal), such as 22-28V, for a 24 V thermostat.
- Also, check resistance in the R(live) and COM terminals. The multimeter should read around 0 ohms for a fine thermostat.
- You can test the thermostat by checking its power supply with a multimeter. A thermostat usually has four wires. Terminals are marked with R for red, y(yellow), g(green), and W(white).
- Set your multimeter to AC voltage above your thermostat voltage supply, such as 24V, 120, or 240V.
- Turn on the thermostat. Attach the red probe to the R(red) terminal and the black probe to any of the G and terminal.
- If your thermostat is 24V powered, the multimeter should read voltage between 22 and 27 Volts(a 10% voltage difference is acceptable).
- If you have removed the thermostat from your home central heating or cooling system, test continuity in the thermostat terminals. Set your multimeter to resistance(ohms) at a low range, such as 200 ohms.
- Connect both probes to the two terminals of the thermostat. If your thermostat is fine, the multimeter will read very little resistance(near zero).
- However, if the multimeter reads OL circuit is incomplete due to a loose/broken connection or damaged components.
Frequently Asked Questions
How to check thermostat wires for short?
You can test resistance in the thermostat wires(terminals) to identify short circuits. Please turn in your multimeter, and set it to a low ohm setting. Connect one probe to the R(red/live) terminal and the second probe to the COM terminal. If the thermostat is fine, you can expect very low resistance(near 0 ohms).
Also, test the voltage in the live wire and ground terminals. The thermostat wires are shorted out if the voltage drops too much.
How to test the thermostat for power?
The red wire(R) supplies power (24V) to the thermostat. This power is then supplied to other wires, such as fan AC.
Test voltage between R to G terminals for fan, R to Y1 for AC, and R to W1 for heating. Every wire should have the same voltage (22-28V) when tested with red(live) wire.
If the reading drops, the thermostat wires could be shorted.
How to test the car thermostat?
Remove the thermostat from the vehicle without wires. At room temperature, the round plate under the thermostat spring(coil) is closed (fir to body).
The opening temperature of your thermostat is written on the back.
Boil water at that temperature and put your thermostat in hot water. Take the thermostat out after some time, and if it’s fine, the metal plate will move innards pressing the coil.
Conclusion
So how to check a home thermostat with a multimeter? The lifespan of a thermostat is ten years, but you should test it for issues like improper wiring, short circuit, voltage drop, and discontinuity.
Pick up your multimeter and test the thermostat following the guide above.
If you still need help, ask us in the comments.
Related Guides:


