
In this guide, we’ll show you how to check a load cell with a multimeter, a handy tool for detecting any issues with your load cell’s resistance and voltage output.
Load cells work in a specific procedure in which all the load cells’ components produce an electric signal. Load cells are used in multiple appliances for a particular task they perform. The phenomenon at which the load cells work is that whenever an input force is applied to the load cells, the load cell sensor it and then converts that force into an electric signal.
Then this electric signal is converted into digital numbers with the help of a digital indicator. Because of the digital indicator, we can read the actual value of the signal produced by the load cells.
The electrical signals differ; a load cell’s output can change voltage, current, or frequency. The results and the type of change depend upon the type of load cell we are using and the amount of force that was applied as the input signal to the load cells.
Types of load cells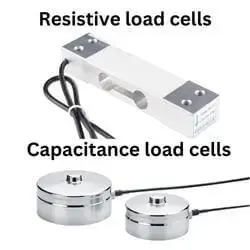
Like all other different electrical tools and appliances, the load cells also have two different major types:
-
Resistive load cells
This is the first type of load cell. The technique which is implied in the working of this type of load cell is called the piezo resistivity principle. We can understand from the name that resistance is involved in the working of the load cell.
The resistance acts as a middle path between the input and output force of the resistive load cells. The resistive load cell changes the amount of resistance when any input force is applied to it, and this change in resistance leads to a change in electrical values like voltage or frequency.
So the change in resistance gives rise to the production of an electrical signal in the form of a change in the output resistance or voltage.
-
Capacitance load cells
This is the second type of load cell in which the capacitance principles are used. So that change will occur in the form of the capacitance, which will give rise to an output signal change and run the system of the capacitance load cells.
Reasons for damage in load cells
The load cells are sensitive parts of an electrical system, and because of the regular usage of the load cells, there is an excellent chance for them to get damaged. Now different reasons can damage a load cell, or any negligence can lead to the damage of the load cell. So here is the list of signs and symptoms showing that the load cell has some issues.
- If the digital display is not showing the accurate readings
- The readings on the digital display fluctuate too much
- The value of the zero balance is strange
- No change in the display reading after applying the load
- The display is showing higher readings even after removing the load
If you are facing these issues with your load cell, then this is the time to check it with an appropriate tool like a digital multimeter. The load cells show these conditions because of corrosion, short circuit, overload, moisture, electrical surges, and broken load cell cables.
So before moving towards the testing procedure, it is essential to give a physical check on the condition of your load cell. If any physical damage is present there, then you have to replace it with the new one, and if no physical issue can be seen, then you can go for the next step, which is the testing of the load cells by using a digital multimeter.
How to check a load cell with a multimeter?
If the load cell is not giving the proper readings, you have to check it immediately because checking it early can also save you from big problems in the future. To check the load cell, the best tool is a digital multimeter; you have to bring a working digital multimeter, and then you can check the type of the issue of your load cell at home quickly.
To check the load cell by using a digital multimeter, you have to perform the two types of tests upon it as there is an excellent role of the resistance and the voltage in the load cells, so you have to complete the two tests on the load cell by using the digital multimeter. The first will be the resistance test, and the second will be the voltage test.
Tools required:
- Digital Multimeter
- Amplifier
- Protection gloves
Step 1: Preventive measures
Remember to wear protective gloves while checking the load cell using the digital multimeter, do not perform the test with wet hands, be precise in the steps, and do not touch the wires unevenly.
Step 2: Resistance test
The first test of the load cell is the resistance test, so for this, you have to follow these steps.
Step 3: Set the digital multimeter
The first step of this test is to set the digital multimeter, so for the resistance test, you have to set the digital multimeter at the MV settings. After this, you can move toward the next step.
Step 4: Clean the load cell
To test the load cells, it is essential to disconnect them from the instrument they are installed with. After disconnecting, you have to check the physical condition of the load cell to see if any moisture is present there. It would be best to clean thoroughly so that no dust or other things interrupt you while testing the load cells.
Step 5: Connect the multimeter
Now you have to connect the digital multimeter one by one between the set of wires of the load cells which you want to check with the digital multimeter.
Step 6: Results of the resistance
- The value of the load cell’s negative and positive signal wires should be equal.
- The value of the negative excitation wire and positive excitation wire of the load cell should be similar to each other.
- The insulation value of the cell wire and shield of the load cell should be higher than 20 megohms.
- The insulation value of the cell wire and load cell body should be higher than 20 megaohms.
Voltage test of load cell with the multimeter
To test the voltage of the load cell, you have to follow the following steps:
Step 1: Set the digital multimeter
To use a digital multimeter to test a load cell, you have to set the digital multimeter according to the corresponding type of test you will perform. So while checking the load cell voltage with the digital multimeter, you have to set the digital multimeter at the voltage settings.
Step 2: Take the load cell out
To check the load cell, it is essential to make it easily accessible. So for this, you have to take it out from the container and place it right in front of you on a clean surface.
Step 3: Connect the multimeter
Now you have to connect the digital multimeter with the positive and negative wires of the output terminal of the load cells.
Step 4: Connect the amplifier
To measure the voltage of the load cell with the digital multimeter, you have to connect the load cell’s positive and negative excitation wires with the amplifier.
Step 5: Take the measurement
After connecting the amplifier and digital multimeter at the appropriate terminals with the load cell now, you will get the value of the response signal of the load cell.
Step 6: Put the load
At last, you have to put a certain amount of load on the load cell and then check the amount of the response signal. If the response signal value increases by applying the load, it means that the load cell is performing well, and if an uncertain change occurs in the value of the response signal, it means that the load cell has been damaged.
Final verdict
The load cells work on specific principles when applied in the different appliances, but negligence can damage the load cell easily. If you see any physical damage to the wire of the load cell, immediately replace it with the new one; otherwise, it can cause a short circuit in the load cell and damage the whole load cell badly.
While changing any cable of the load cell, you are advised to check the output signals of the load cell by using the digital multimeter, and it will help you to get satisfied with the working of your load cell.
Related Guides:


