Lamp cords are made of various materials, and wire colors can vary. This is a step-by-step guide to help you identify the wires in the lamp cord.
Identifying wires on the lamp cord is necessary for properly wiring a lamp and ultimately lighting your room. This post will discuss identifying wires(hot and neutral) on the lamp cord.
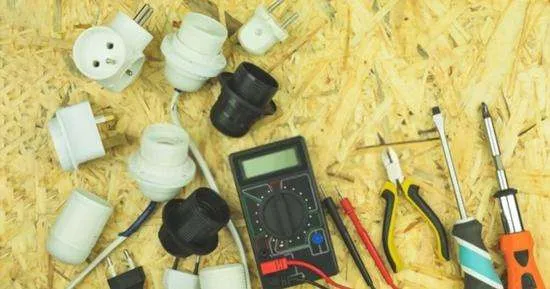
We can identify wires with color codes, insulation texture, tester screwdriver or a multimeter:
Let’s discuss this in detail.
How to identify wires on lamp cord?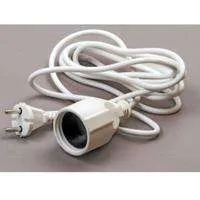
To tell which wire is hot and neutral on the cord:
- Check the color of the wires in the cord. The live wire(hot) usually has red or black smooth insulation. While the neutral wire has white or blue insulation with ribbed(ridges) texture
- Expose the lamp socket terminals and turn on the lamp’s power supply.
- Take a tester screwdriver, press its brass head with your finger and attach the other metal end to each wiring terminal in the lamp socket. The tester will continuously glow on the live wire and remains dark with the neutral wire.
- Measure the voltage of the socket by setting your multimeter to AC voltage. Connect the black probe to any ground point in the electrical system and the red probe to each wiring terminal in the light socket. A multimeter will show 120 r 240 V with the live wire terminal and 0V with the neutral wire terminal.
Follow the complete step-by-step guide below to identify live and neutral wires in the cord.
1: Safety is Necessary
To identify live and neutral wires in the lamp cord, we’ve to power the lamp and work with live wires carrying high voltage and amperage.
That’s why you must wear insulated gloves before identifying wires in the cord, as accidentally touching live wires can be life risky.
2: Identity wires in the lamp cord with color and texture
A lamp cord has two wires, live(hot) and neutral. Live wires are connected to the metal tab(where the base of the bulb is connected for current) in the bulb socket of your lamp.
The second wire in the cord is the neutral wire. The neutral usually has a white or blue color. Also, the neutral wire can have a ribbed insulation texture, and you can feel it with your fingers. Make sure that the power is turned off.
Sometimes, the same colored insulated wires and available in the lamp cord, and you can’t identify which wire is hot when both are the same color. So we can use a tester screwdriver or a multimeter to identify live and neutral wires in the lamp cord.
3: Using Tester Screwdriver
Lamps from different manufacturers can have different shapes. Remember to turn off the power supply. Expose the wiring terminals of the bulb socket by removing the cover.
Hold the tester screwdriver and press any of your fingers on the top of the screwdriver tester, usually made of brass. Attach the other metal end of your screwdriver on each wire, going to the terminals of the light socket.
When the bulb inside the tester screwdriver glows completely, it means that you have found the live wire terminal in the lamp socket. You will feel a little arcing in your finger at the top of the tester. Nothing to worry about; the tester screwdriver emits a small current through its brass head, notifying that the terminal or wire is live.
However, when you place the tester screwdriver on the neutral wire terminal, the tester may sometimes glow, meaning there is very little current in the wire.
After identifying the terminals, mark the corresponding wires with live and neutral markings for ease in the future.
4: Identity wires in the lamp cord with voltage test (multimeter)
A multimeter is another excellent tool to identify wires in the lamp cord. By measuring the lamp’s voltage, we can identify live and hot wires in the cord. It’ll also help to identify any fault in the lamp wiring or the power supply.
Insert the black multimeter probe into the COM port and the red probe into the VmAΩ port.
To measure the voltage of your lamp, set your multimeter to AC voltage sign(V∿) at a higher range, such as 600V.
Expose the wiring terminals in the lamp socket and attach the lamp to the power supply(outlet).
Connect the black multimeter probe to any ground point in your home electrical system. It could be any ground terminal in an outlet.
Now attach the red probe to both terminals of the lamp socket, one by one.
When your lamp socket’s live(hot) terminal is attached to the red probe, the multimeter will show you the voltage supply, which could be 120 or 240V, depending on your home distribution.
If the voltage drops more than 10%, the lamp cord wiring is wrong, or the power supply is low.
On the other hand, when the multimeter is attached to the neutral wire terminal, the multimeter will read 0 or very low voltage. It is how you identify the live and neutral wires with the voltage difference.
The Live wire shows maximum voltage, while the live wire shows very low voltage. The live terminal and wires are assigned to carry current from the power supply to the circuits, and the multimeter reads high voltage.
At the same time, the neutral wire is assigned to take current from a circuit or device back to the outlet and then to the power supply, completing a cycle. That’s why a neutral wire has a very low voltage compared to a live wire.
5: Identify wires in the lamp cord with continuity test
You can test continuity in the lamp cord and the bulb socket to identify the socket’s live and neutral wires and parts.
The metal tab at the center is the live(hot) terminal that gets power from the live wire. The light bulb’s metal base connects to the lamp socket’s metal piece.
However, the light socket’s metal shell is the light switch’s neutral terminal. This metal shell holds the light bulb in the socket and gives a path for current to flow from the centered metal tab(hot) to the bulb and then through this metal shell to the neutral wire and back to the power supply.
- Turn off the lamp’s power supply. Unscrew the bulb from the lamp socket.
- Set your multimeter to ohms(Ω) or continuity.
- Attach one probe to the piece of brass at the center of the light socket, which is the live(hot) terminal.
- Attach the second probe to both prongs of the lamp cord plug when the live wire terminal is attached to both multimeter probes. The multimeter will show slight resistance, meaning there is continuity in the circuit.
- In the same way, attach one probe to the metal shell of the lamp socket(neutral part) and the other probe to both prongs in the lamp plug. A multimeter will show continuity(low resistance) when neutral components of the circuit are attached to the multimeter.
- While testing continuity, if the multimeter shows high resistance(KΩ-MΩ) or OL(open loop), that component or wiring has poor current carrying capacity due to damage or loose connection.
Remember: While testing continuity and resistance, you can attach multimeter probes in any direction because resistance and continuity are non-directional (no polarity).
However, if the lamp wires are attached to the socket terminal in the reverse direction, your lamp will work the same, and there’ll be no issue until the circuit is complete and the wires are firmly connected.
However, using the correct wire(designed for live and neutral wire) will help you remember the wires while replacing or testing the lamp cord.
Frequently Asked Questions
How to tell hot wire on lamp cord?
The hot(live wire) is usually red or black colored and has smooth insulation. The live wire get’s connected to the metal tab a the center of the lamp socket.
When you check the voltage in the lamp wires with a multimeter, the hot wire will have around 120 or 240V.
Which wire is hot when both are the same color?
- Your lamp cord can have the same colored wires. In that case, connect the lamp to power, use a tester screwdriver and touch its metal end to both terminals in the lamp socket, keeping your finger on the tester’s head. When attached o the live terminal light in the tester will glow.
- Set your multimeter to AC voltage. Connect the black probe to any ground terminal in your circuit and the red probe to both wiring terminals in the light socket, one by one. The live wire is the terminal at which the multimeter shows 120 or 240V.
- Check continuity between the central metal tab(hot) in the lamp socket and the prongs of the lamp plug.
- Mark the wires to differentiate between live and neutral wires for future use.
How to wire a lamp socket?
Pull off the metal body from the lamp socket to wire a lamp socket. It’ll expose you to the wires and terminals. The brass terminal is the live component, and the other silver terminal is the neutral component of your lamp socket.
Take the lamp cord and check for a red or black wire with smooth insulation. Peel the insulation from one end, unscrew the brass terminal screw and tighten the live wire. And connect it to the brass terminal(live).
The neutral wire in the lamp cord is usually white or blue and has a ribbed surface(textured insulation). Also, peel this wire and connect it to the silver terminal. Unscrew the bolt and tighten the neutral wire in e silver terminal.
When wiring the lamp plug, attach the live wire connected to the brass metal terminal in the lamp socket to the large prong in the plug. In the same way, join the neutral wire to the smaller prong in the plug.
Conclusion
Identifying live and neutral wire in your lamp cord helps in proper wiring, locating problems, and troubleshooting a lamp cord.
Using a multimeter, we measure the voltage in the lamp cord wires and identify live and neutral wires with the voltage difference.
A tester screwdriver also makes it easy to differ live and neutral wires with the lighting bulb in the lamp.
Follow the step-by-step guide above to identify the hot and neutral wire in the lamp cord. Hopefully, his guide will help you to identify wires(live and neutral) in the lamp cord.
Related Guides:


