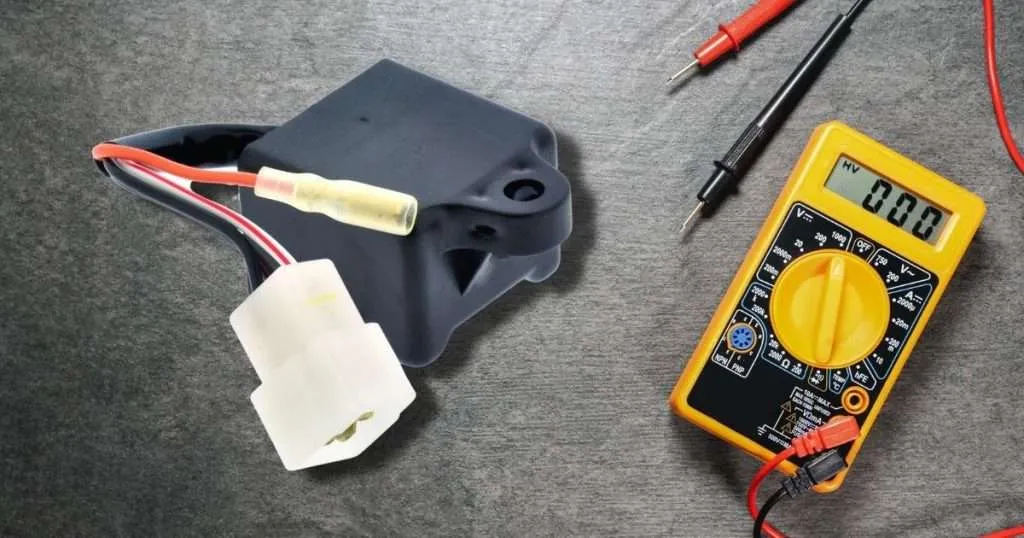
In this detailed guide, you will learn how to test a CDI box with a Multimeter,
Usually, a CDI box is installed under the seat, where it performs the ignition function. Since ignition is the first step when you start the motorcycle, any faulty CDI won’t allow the bike to start.
Before proceeding further, you need to know certain things, including how CDI works and how you can identify malfunctioning CDI.
Let’s explore this in detail.
What is a CDI Box?
The CDI box, or Capacitive Discharge Induction Box, is an electrical component in some motorcycles. It is responsible for providing electrical power to the ignition system and sparking a spark that burns a fuel mix into the engine.
It is essential as it helps produce more powerful sparks, which may lead to better performance and fuel economy. Also, it is necessary to start your engine reliably.
CDI boxes may malfunction, leading to a loss of power and even total engine failure. If you are experiencing problems with the motorcycle’s ignition system, you must check for defects in your CDI box.
So, whether your bike is running poorly or if you are doing a little routine maintenance, it is good to check your CDI box to ensure that it is working correctly.
How does CDI work?
A coil called an Alternator or Exciter is generally powered with a voltage of up to 400 Vac. This AC voltage then passes through a diode which induces DC voltage and, in turn, feeds a micro-capacitor and SCR (Silicon Controlled Rectifier).
A pulse coil also shows whether the position of SCR is open or closed. A closed SCR leads to a short circuit and causes the current to flow from the direction of a charged capacitor.
As a result, these charges ignite the coil before unleashing the energy for sparking the plug; thus, it provides power to the engine.,
Quick Instructions for Testing Your CDI Box
Testing a CDI box using a multimeter is easy and can be completed in a few steps. Following these steps, you can check your CDI boxes function and see if it works correctly. Grab everything you need, and let us get started!
- The first step is to take off the cover of your CDI box. This can be done by removing the screws holding it down. Once the lid is removed, you should be able to see the electronic components within.
- Next, you will want to connect one cable end to the positive terminal on your Multimeter and the other to the negative terminal.
- Be sure to secure the wires tightly, to prevent any chances that they might get untied while you are testing.
- Once your wires are securely attached, you can power up your Multimeter by turning a knob on the side.
- The needle should go right, staying in the green region. Now, you can test the CDI box by touching the Probe to a terminal on the box.
- The needle of your Multimeter should move as you touch the probes together. If it moves, your CDI box might be fine.
- If it works correctly, your Multimeter should display a reading of 0 to 50. Your CDI box might be problematic if your reading is outside this range.
- If you have problems getting the readings out of the Multimeter, try touching the probes to a different section of terminals on your CDI box. Be sure to check both positive and negative terminals. Once the CDI box has been tested, the lid must be back on the box.
Here is the Step by Step guide in detail below:
How to test CDI box with a multimeter
Using a multimeter, you can detect if there is a short circuit or low or high resistance in the CDI box wires.
You can test a CDI box mounted in the engine or after disconnecting wires with a multimeter. Set your multimeter to the continuity setting to test continuity between ground and CDI box terminals (wiring points).
While testing a CDI box in the engine, set your multimeter to measure the resistance and set the range to 2K ohms. Connect probes to blue and white wire, then white and ground wire, and compare the multimeter reading with the recommended resistance range.
Essential safety protocols
The critical safety equipment includes cut-resistant and waterproof gloves and eye protective gear.
Remember that CDI is an active part of your motorcycle, and it has capacitance inside, although it’s minimal; however, this doesn’t mean that one should avoid wearing safety gear or take them on a lighter note.
Test 1: Test resistance of CDI box inside the engine
In this method, you check the resistance of the CDI by connecting both multimeter probes to the blue, white, and ground wires, according to the steps mentioned below.
-
Locate Wires
Usually, CDI boxes are connected via two wires, i.e., blue and white, and both come from a stator(engine).
-
Set Up Multimeter
Set your multimeter to resistance (ohms) mode denoted by the Ω sign on the multimeter. Set the range to kiloohms (kΩ).
-
Evaluate Multimeter Readings
In this case, it is crucial to remember that resistance for blue and white wire should be around 75-85 ohms, and white to ground should have a resistance between 350 to 500 ohms.
If the readings are more than the ones stated above, there is some faulty CDI, and you need to check it with an expert mechanic.

Test 2: Testing Continuity of a CDI box out of the engine
If you have unplugged the CDI box from the engine, test continuity between all its terminals as mentioned in the steps below.
-
Disconnect CDI Box
- A CDI box is usually installed under the seat and connected with insulating leads and pin connectors. So make sure you disconnect it from your motorcycle; remember that it’s not complicated and can quickly be done.
- After disconnecting it, you will have to wait a little to discharge its internal capacitance, or else it can give you current.
- Also, inspect the CDI further and see if there are any damages, overheated, or damaged insulation from the casing.
-
Set Multimeter and Adjust Probes
Set your multimeter to continuity mode by adjusting the knob to the diode symbol (arrow pointing at a vertical line).
-
Evaluate Multimeter Reading
- Check continuity between all terminals of CDI by placing one probe at one terminal and the second probe at other terminals.
- The multimeter should read OL readings on all connections, meaning there should be no continuity between any terminal of the CDI box.
- If your multimeter shows continuity between terminals, the CDI box is short-circuited.
Mostly when you hear the sound coming from a multimeter, it means continuity between the tested points; when there is continuity, parts of the CDI box malfunction, e.g., the CDI’s diode, SCR, or capacitor.
How to identify malfunctioning CDI?
Numerous symptoms will indicate whether your motorcycle CDI is defective or not; these symptoms are explained below.
-
Misfiring
If you notice that your engine misfires, there could be various reasons, and the best would be to consult with a certified mechanic. One of the most common reasons why your motorcycle might misfire is because of a worn-out ignition coil found inside your motorcycle’s CDI.
-
Backfiring
It is pervasive to encounter backfiring at higher RPMs, such as 3,000, which can be caused due to an issue in the stator; however, manufacturers often claim that this could also be caused due to malfunctioning CDI.
-
Dead cylinder
In some cases, there are defective blocking diodes (forwarding diodes). As a result, it creates ambiguous voltage signals and negatively affects the standard firing mechanism of the plug.
FAQ’s
Do You Need A CDI Ignition Battery?
A CDI ignition battery is not required for testing the CDI box. However, it can be helpful to have one on hand to understand your test results better.
Can a CDI box result in a weak spark?
A CDI box can cause a weak spark. By checking the CDI box using a multimeter, you can tell whether it is the one that is causing the problem. CDI boxes are not compatible across the board. Each box is made to fit specific makes and models of motorcycles.
How often do I need to check my CDI box?
There is no fixed frequency to test your CDI box. However, testing the box at least once yearly is usually recommended to ensure it works properly.
Can CDI boxes make my bike stop starting?
A CDI box may cause your bike not to start if it is not working correctly.
What do I do if my CDI box is not working correctly?
If your CDI box is bad, then you need to replace it. Check the bike owner’s manual to ensure the correct CDI box is used.
Conclusion
Remember that a malfunctioning CDI won’t allow your motorcycle engine to start. In some cases, you might be able to start the motorcycle, but still, it will cause issues such as misfiring, backfiring, and dead cylinder.
It’s pretty easy to identify a faulty CDI box by just doing simple continuity and resistance test using your multimeter. Hopefully, you learned something new, and if you have something to share, you are welcome in the comment section.
Thank you for reading. Share your feedback, suggestion, or experience about testing of CDI box!
Related Guides:


