This post teaches how to test a 110v outlet with a multimeter. Many home appliances run over 110-120 volts, such as microwave refrigerators, dishwashers, phone chargers, vacuum cleaners, ironing Machines and lamps.
Home supply could be a single 240V live wire or 2 live wires divided into 120 volts. So you must test 110V in your outlet with a multimeter or a voltmeter.
Commonly AC power supply is delivered to the homes. AC means alternating current, and it’s the type of current that can change its direction in a circuit. To measure a circuit’s AC voltage, you should have a multimeter or voltmeter that can measure voltage in variable ranges.
How to test 110v outlet with multimeter
To test a 110V outlet:
- Locate the live (hot), neutral and ground wire.
- Set your multimeter to AC voltage at 200 or 600V range. Connect the red probe to the live wire (hot) and the black probe to the ground wire.
- If the multimeter reads 110-120 volts, then the outlet supply is OK.
- While if there is low voltage, the circuit wiring is faulty, and the current leaks through a damaged wire.
Follow the step-by-step guide:
Safety Precautions
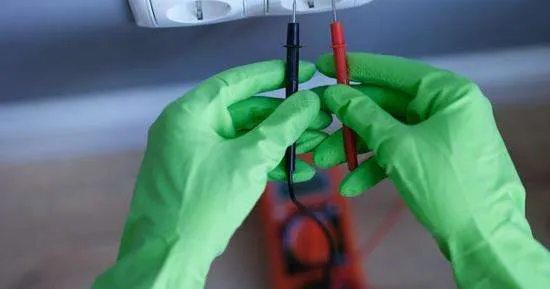
- Before testing an outlet, make sure to wear insulated gloves.
- As we have to test live wires in the outlet circuit, carrying high voltage can bring serious harm if touched barehanded.
- Make sure to wear shoes and dry the surrounding area.
Identify the Live neutral and ground wire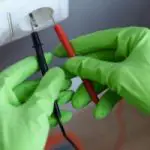
For testing a 110V outlet with a multimeter, it’s important to identify live neutral and ground wire. Because to test voltage, the live and ground wire should be connected to the multimeter.
To test an outlet, first, we must identify the live, neutral and ground wire in the outlet. Unscrew the outlet cover and check the color of the wire connected to your outlet prongs (terminals). A red, black or brown color wire is used for live (hot) wire. The neutral wire is blue or white. However, the ground wire is green or yellow.
You can also identify the live, neutral and ground wire with the receptacle terminal shape on the outlet cover. The D-shaped terminal at the top or bottom is for ground connection. The right rectangular terminal is for live wire (hot), and the left rectangular terminal is for neutral.
Multimeter Setting for voltage testing
Insert the red probe into the VmAΩ port and the black probe into the COM port on your multimeter.
Now set your multimeter to AC voltage at a higher range, such as 200 or 600V, by rotating the knob to the V〜 or VAC symbol.
Connect Multimeter Probes to the outlet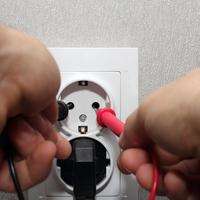
Turn on the multimeter. Connect the red probe inside the ground terminal (D shaped) and the red probe into the live wire terminal (right rectangular).
If you cannot identify the live, ground and neutral wires, insert the black probe into the D-shaped terminal and the red probe into both rectangular terminals one by one. The two rectangular terminals are for live and neutral terminals. If your multimeter reads 110 or 240, the live is attached to the red probe.
If you have reversed the order of probe connection, black is connected to the live and ground to the red probe. A multimeter will display negative voltage. Negative voltage reading on a multimeter means that you’ve connected probes in opposite polarity (direction)
Evaluate Multimeter Results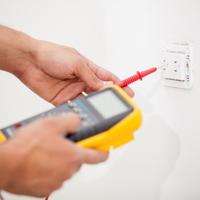
If the outlet circuit is fine, your multimeter must read around 110-120V. That means max
There is always a margin of 10% in the voltage. For example, if the voltage supply is 120, it can range between 110-120V. However, if the voltage supply is 240V, 220-240V is a usable range.
However, if the multimeter reads too low, the ideal voltage supply (110-120), the circuit wiring is faulty, and the current leaks through a wire. Insufficient voltage supply from the power source could be a reason for low voltage readings.
For example, if the power source supply is 120V and your multimeter reads 100 or lower, the outlet needs proper voltage to run your appliances.
Also, remember that your home supply is either 240 or divided into two live wires, each carrying 120 volts, so your multimeter can read 220-240 if a single wire powers your electrical system.
If the multimeter reads OL, it means the live wire is broken and the circuit is incomplete. Voltage can’t reach from the power source to your outlet.
How to test an outlet without a multimeter?
You can test an outlet with a non-contact voltage tester, receptacle tester and a tester screwdriver.
Take your receptacle tester and insert it into the outlet, and you’ll see a few lights glows on the tester. The tester lights indicate correct, correct reverse, missing live, missing neutral, missing ground and live/earth reversed conditions. So compare the lights on the tester with the diagram and check if there is an issue in your outlet.
Take a tester screwdriver and insert it in each outlet hole (terminal) by placing your thumb on the tester’s head (top). A bulb in the tester will glow continuously, indicating live wire. The tester also blinks when it finds voltage in the ground and live wires.
Take a non-contact voltage tester and pass it through all wires in the outlet. The tester will beep when it encounters a live wire.
Frequently Asked Questions
How to test a 240v socket with a multimeter?
A 240V socket is tested the same as any other outlet. The only difference is the voltage supply (240V) powered by a single-phase wire.
Set your multimeter to AC voltage at 600V range. Insert the black probe into the D-shaped (ground) terminal and the red probe into both rectangular terminals in your outlet. When the live wire is connected to the red probe, the multimeter will read 120 or 240V, depending on the voltage supply.
Voltage supply can decrease up to 10%, such as for 240V supply. 220 V is also ideal for powering your devices. However, if the voltage decreases more than 10%, the circuit is faulty.
How to test a 220v stove outlet?
Set your multimeter to AC voltage at 200V range.
A stove outlet has 2 live wires and can have 3 or 4 terminals. If your outlet has three terminals, then the single rectangular terminal is for neutral wire, and the two rectangular terminals (prongs) in a row are live terminals.
In a 4-terminal stove outlet, the D-shaped terminal is ground, and the opposite rectangular terminal is the neutral terminal. The left and right rectangular terminals are the live wire terminals.
This way, insert the red probe into both live terminals (left and right). Connect the black probe to the ground/neutral terminal (D). Both live wires should have around 110-120V.
How to find a bad outlet in a circuit?
To find a bad outlet, measure the voltage in the live and ground wires by setting your multimeter to DC voltage. If the outlet is, the faulty multimeter will read low voltage in the outlet (less than 110 or 220V).
Also, check for current leakage by inserting the red probe in the live wire and the black probe into each bolt on the outlet cover (that is not a part of a circuit). If the multimeter reads any voltage, the circuit is shorted, and the current leaks into the not circuitry metal parts.
Conclusion
So how to test a 110v outlet with a multimeter? To install an appliance, it’s necessary to know whether the outlet is compatible with the appliance. Checking voltage is crucial because we can’t install a 220V device on a 110V supplying outlet.
Hence we have to test an outlet to check if the circuit is supplying 120 or 240V and whether the voltage supply is enough (maximum).
We will measure voltage in the live wire with reference to the ground or neutral wire. Follow the complete guide above to identify the live, neutral, and ground wires.
Measure the voltage with your multimeter and know if the outlet is acceptable or faulty.
If that article is helpful, share it with others and ask your queries in the comments.
Related Guides:


