To install appliances that require 220-240 V, it is necessary to identify whether your outlet supplies power up to 220V. It’ll help you make a secure connection and prevent low voltage from destroying your appliances. In this post, we’ll learn how to use a multimeter to test a 220v with an outlet.
Your home supply can be 120V or 240V, and the voltage difference of 10% is acceptable such as 110-120 and220-240V. Relatively lower voltage can cause trouble for your costly devices.
Let’s discover this in detail.
How to use a multimeter to test a 220v outlet
To test a 220v outlet:
- Identify wires in the outlet.
- Set your multimeter to AC voltage at a high range.
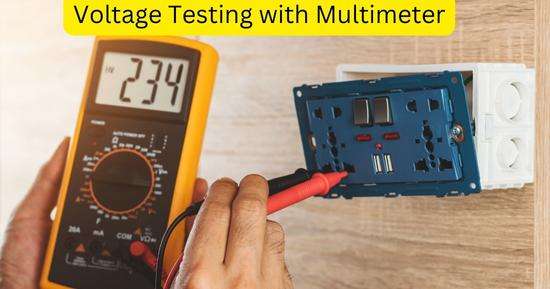
- Insert the red probe in the live terminal and the black probe in the ground or neutral terminals of the outlet.
- If your multimeter reads 220-240, your home supply is divided into a single 220 V phase.
- If your multimeter reads 120V, your home supply is divided into two-phase wiring.
- However, the power supply wiring is damaged if the multimeter reads low voltage.
- A single-phase power supply (single live wire) should have around 220-240V, and the two-phase power supply can have 110-120V.
Let’s scroll down to read the complete test procedure in detail, how to use a multimeter to test a 220v outlet:
Identify the Live Neutral & Ground wires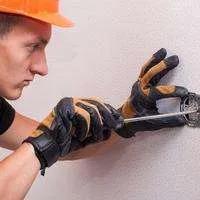
We must first identify the live, neutral, and ground wires to test an outlet’s voltage. To measure voltage with a multimeter, we connect multimeter probes with the live and neutral/ground wires.
So identify wires, unscrew the outlet cover and try to identify wires with the color:
In the United States, the ground wire is green, the live wire is black, and the neutral is white.
In another way, if you are testing a 3-prong outlet (A-shaped). The ground connection is at the top, the live wire is at the left, and the neutral is at the right.
Marks the wires to use them afterward.
Safety Measures
First, ensure that you wear insulated gloves, as we’ll have to touch and handle high-voltage wires.
Set up Multimeter
After identifying wires in an outlet, set your multimeter to the AC voltage setting.
As you know, the power supply to your home is an alternating current.
Remember that the sign of AC voltage is V〜.
Adjust the multimeter to a higher range, such as above 200V.
Connect the multimeter to the Outlet Wires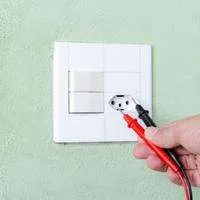
After setting up your multimeter, it’s time to connect it to the wires to measure voltage.
Connect the black probe to the ground/neutral wire and the red probe to the live wire.
Ensure that the wires or the multimeter probes don’t contact each other.
Evaluate Results
After the multimeter is attached to the wires in the outlet, check the voltage readings on the multimeter.
Your multimeter is expected to read 120 or 240 volts.
A 10% voltage decrease is considered to be fair. Such as, if your home supply is 240V, it can safely range between 220-240 volts.
This way, if your appliance requires 220V, it can work on a 220-240V power supply.
Remember that if your multimeter reads above 10% voltage drop, the recommended voltage supply (220-240V) is either the wiring damaged or the current leaking. It is also possible that the voltage supply is low (insufficient).
Frequently Asked Questions
-
How to test a 4-prong 220v outlet?
In a 4-prong outlet, there are two live wires at the left and right terminals. The top D-shaped terminal is for the ground wire, and the lower L-shaped terminal is for the neutral wire.
To test voltage in a 4-prong outlet, set your multimeter to AC voltage at a high range. Connect one probe to the ground/neutral wire and the red probe to both live wires one by one. The multimeter will show you the voltage of your 4-prong outlet.
-
How to test dryer outlet with a multimeter?
A dryer outlet can have 3 or 4 terminals. In a 4-terminal dryer outlet, the top terminal (D) is for ground, the left and right terminals (rectangular) are for live, and the neutral is at the bottom (L).
In a 3-terminal dryer outlet, two rectangular terminals at the left and right are for live wire. The L-shaped terminal at the top and bottom is for live wire, and the L-shaped terminal at the top or bottom is for the neutral wire. There is no ground wire in the 3-prong dryer outlet.
This way, set your multimeter to AC voltage and connect the black probe to the ground/neutral terminal and the red probe to the live terminals.
-
How to test a 220v stove outlet?
A stove outlet has 4 terminals, and the ground terminal is D shaped. Opposite the ground, the terminal is the neutral wire terminal, and the two rectangular terminals on the left and right are for live (120V each).
Set your multimeter to AC voltage and connect the black probe to the ground/neutral terminal and the red probe to the live wire terminals.
Conclusion
Hence it’s a must to check for voltage supply, either 120 or 220-240, because an imbalance voltage supply can damage your appliances. So make sure to wear safety gloves. Then adjust your multimeter to AC voltage and check the voltage by connecting the multimeter to live and neutral/ground wires.
If your home supply is divided into a single phase, there should be a 220-240V constant supply in the electrical system (outlets).
Hopefully, this guide will help you to test 220 V outlets; if there is still confusion, ask us in the comments.
Related Guides:


