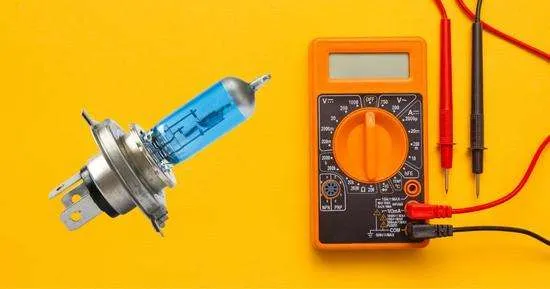
Visually inspect the halogen bulb to detect damage. A filament (a tightly wound wire) in the bulb, like a coil, provides a path for current flow and must have some resistance. Unlike other bulbs, a halogen bulbs filament looks 100% fine while inspected visually.
That’s why you can’t decide if there is an error in the bulb or other components. We use a multimeter to detect that bulb resistance is within the ideal range.
A flickering or dim bulb is the main sign that a bulb will expire. Also, a faulty bulb can be the culprit if the light fuse continuously blows.
How to Test a Halogen Bulb with a Multimeter?
To test a halogen bulb with a multimeter.
- Set your multimeter to ohms (Ω).
- Connect the multimeter probes (red and black) to both prongs (input terminal) at the bottom of the bulb.
- Test your bulb’s resistance and compare the reading with the ideal resistance range of that bulb. A good halogen bulb should have around 1 ohm.
- If the multimeter is set to continuity, check if the multimeter beeps or displays continuity and must not read OL (which means a broken circuit).
Follow the step-by-step guide below to test halogen (headlight bulb) with a multimeter.
Step 1: Remove the bulb from the socket
To remove a bulb from a car headlight, unscrew the headlight cover and unplug the wires (plug). After removing the wires, rotate the bulb holder to unscrew the bulb from the headlight.
Step 2: Set Multimeter
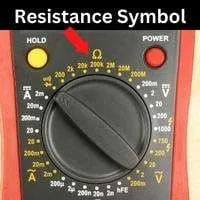
Set your multimeter to the ohms sign (Ω) because the ohm symbolizes resistance. Also, select a range such as 200 ohms. A bulb usually has resistance around one ohm, so we don’t need a high-range setting.
You can also select a continuity or resistance setting to test a bulb.
Insert the red prong in the port labeled with VΩmA on the multimeter. The black probe goes to the COM port.
Step 3: Connect probes to the bulb
Before connecting probes for resistance measurement, ensure your multimeter is adjusted to the proper settings.
Now connect black and red probes to the prongs at the base of the bulb.
You can attach multimeter probes to the bulb prongs in any direction because continuity and resistance are non-directional, and we have to test if the bulb’s tiny circuit is complete.
If you are testing a 3-prong halogen (headlight) bulb, check the resistance between all 3 prongs one by one.
Step 4: Evaluate Results from the multimeter reading
The resistance between both prongs of the bulb should be around 1 ohm. If your bulb’s resistance is below one ohm, then the bulb is about to expire.
If your multimeter reads OL (broken current loop), the bulb is dead or about to expire.
Another thing is if your multimeter has an audio function, it’ll beep when it measures continuity in a circuit, which means that the circuit is complete from one prong to the other.
In a 3-prong halogen bulb, the resistance between all three prongs should be the same.
Hopefully, you’ve understood this easy testing. After finding the faulty bulb with your multimeter, dispose of it.
Step 5: Check voltage if a new bulb doesn’t work
After you have installed a new bulb and it still not glows, test the voltage of the headlight wires(input connector wires).
Connect the black probe to any ground point and the red probe to a live wire in the headlight plug(wires). Voltage should be around 12.4 volts; low voltage indicates a faulty headlight connector or low-charged battery.
Frequently Asked Questions
-
How to test a 12- volt halogen bulb with a multimeter?
To test a 12-volt halogen bulb, set your multimeter to ohms. Connect both probes to the bulbs prongs (input terminals). A good halogen 12-volt bulb should have around 1.5-2.5 ohms between both prongs.
-
How to test a headlight bulb with a battery?
To test a headlight bulb, connect two wires to both battery terminals (use alligator clips). Now connect both wires to the prongs at the bottom of the halogen bulb. If your bulb is fine, it will after connecting to both wires of the battery.
-
How to test headlights without a car?
Using a multimeter or a battery, you can test headlights even if they are removed from a car. Measure resistance and continuity by connecting both multimeter probes to the prongs of the bulb. Now compare the multimeter reading with the ideal resistance.
-
How to test an led bulb with a multimeter?
To test an LED light, set your multimeter to continuity (—▷|—) and connect the red and black probe to the legs or input terminal of a bulb. If there is continuity (complete circuit) in the bulb, the led bulb is fine. The circuit is broken if your multimeter reads OL (open line).
If you are testing a LED tube light, connect multimeter probes to terminals at both ends of the tube to measure resistance.
-
How to test LED headlight bulb with a multimeter
To test an LED headlight bulb:
- Disconnect the bulb from the socket.
- Measure resistance and continuity between the bulb’s input terminal (prongs).
- Compare your multimeter resistance reading with the bulb’s ideal resistance range. The manufacturer manual or online research can find the recommended resistance range.
- However, the recommended resistance for headlight bulbs is around 1 ohm.
Conclusion
Before spending 25-50$ again on a new halogen bulb, we can test a bulb to ensure its health and expected life with a multimeter: test resistance and continuity between the input terminal at the bottom of the bulb.
The multimeter will show resistance or beeps if there is continuity (complete circuit). The resistance of a halogen bulb should be around 1 ohm.
If this article is helpful for you, share it with others and provide your suggestions in the comments.
Related Guide:


