This blog post explains how to check fluorescent bulbs with a multimeter. You don’t need to be an electrical work pro to test a fluorescent bulb. A multimeter and some flying leads are all you need to complete the task. Now that you are informed, you can do this yourself. Test your fluorescent bulbs at home if you like.
To perform a general fluorescent tube light test:
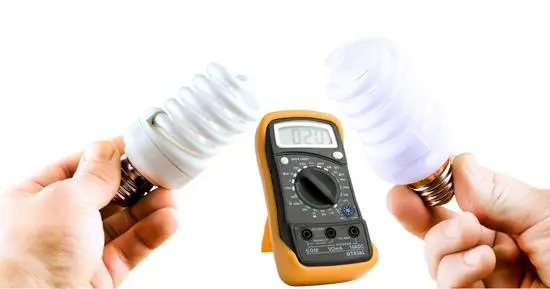
- Set the multimeter to resistance mode.
- Put the black lead on the fluorescent bulb pin after that.
- Place the red pointer on the opposite hook to check the ohm value.
Table of Contents
ToggleHow to check fluorescent bulbs with a multimeter?
One of the least expensive methods to illuminate your home is fluorescent bulbs. To create light, they employ gas and electricity. To check the fluorescent bulbs with a multimeter, you must follow the instructions with extra care. The more you are careful, the more you can minimize the chances of hazards.
- Things you need in this task
- Things you should do before testing
- 3-step Procedure
Things you need:
It would be best if you primarily had the following things in this project:
- Digital Multimeter
- Fluorescent bulb
- A tester.
- Wire cutter
Things you should do before testing:
Following are some crucial points you should notice before testing.
- Test the bulb in another lamp to see if it functions.
- Verify that the circuit breaker hasn’t tripped.
- Examine the darkish color visually on the edges of the bulb or tube. The lifespan of the bulb is shortened if they are present.
- Check that pins should not be broken or bent. If it is so, no current will flow into a bulb.
- You should remove Dust and rust from the holders.
Test fluorescent bulbs with a multimeter
3-Step Procedure:
It is effortless to follow a 3-step procedure. Without delay, let’s get into the details of the procedure step by step.
- Change the Digital Multimeter resistance mode:
Turn the multimeter dial to the symbol to put it in resistance mode. It may be vital to set the range on some multimeters to the maximum. For you, certain multimeters perform this automatically. Then, join the red probe to the V/port and the black probe to the COM port.
The multimeter should now touch the other two probe ends for verification. It should read at least 0.5 cents. It is a sign that the multimeter is malfunctioning if you don’t receive a reading in that range.
- Check the fluorescent light bulb. And note down the reading:
Place the red lead on the opposite pin of the tube light after adequately setting up the multimeter and the black wire on the hook. Write down the multimeter reading after that. The value should be greater than 0.5.
- Voltage test:
You can validate the findings of the resistance test with a quick voltage test. Switch the dial to the alternating voltage symbol (V) to turn the multimeter into voltage mode.
After that, use flying leads to attach the pins of the fluorescent lamp to the fluorescent bulb. Connect the two multimeter leads to the flying leads at this time. After that, record the voltage.
The multimeter will show you a voltage comparable to the lamp’s transformer if the fluorescent bulb operates properly. The bulb is not working if the multimeter gives you no readings.
Conclusions:
Ensure the circuit voltage isn’t too high before performing a voltage test to prevent the multimeter from blowing. Also worth noting are the proper socket connections of the probes.
Testing electrical appliances should consider any defects discovered to prevent further damage that the flaws could cause. Safety should be prioritized to avoid electrification when executing such a test.
Related Guides:


