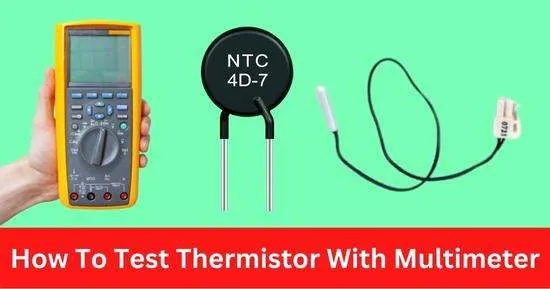
A thermistor fails due to broken wires between the thermistor and the control board, short circuits, damage, and aging. When you notice any unusual thermal change in your appliance, it’s ideal to test a thermistor with a multimeter.
A thermistor is a semiconductor with more resistance than a conductor and lower than an insulator. A thermistor is a type of resistor whose resistance increase with the decrease in temperature and decreases with the increase in temperature.
As the temperature rises, resistance decreases, and electrons become more mobile, allowing more current to travel through the circuit. Generally, the work of a thermistor is to control the hot and cold temperature, voltage, and circuit protection from overcurrent & overheating.
Types of a thermistor
Thermistors are temperature sensors used in large circuits, units, and appliances. A temperature controller monitors the temperature of the thermistor. Thermistors can also produce a variable voltage by increasing and decreasing the temperature and resistance.
Depending upon the functionality, there are two types of thermistors.
- NTC Thermistors(negative temperature coefficient)
In NTC thermistors, resistance is inversely proportional to temperature. As temperature increases, the resistance decreases and increases with the temperature drop. NTC thermistors are used to protect circuits against high currents.
- PTC (positive temperature coefficient))
In PTC thermistors, resistance is directly proportional to temperature. It increases as the temperature increases and decreases with the temperature. PTC thermistors are also used to protect appliances against overcurrent and overheating. Thermistors are attached to control units that examine the thermistor’s temperature and keep the appliance at a controlled temperature.
How to test thermistor with a multimeter
To check a thermistor with a multimeter:
- Set your multimeter to ohms (at least 100-200 KΩ).
- Connect both multimeter probes (red & black) to the legs of the thermistor.
- Measure the resistance at room temperature.
- After that, take the thermistor to a hot place and measure resistance.
- Now take the thermistor at a cold place and again measure resistance.
- In a good thermistor, resistance decreases as the temperature increases, and resistance increases at low temperatures (minus).
- The thermistor is faulty if the multimeter’s resistance reading does not change with the temperature change.
- Also, a 0(quite low) or OL (open loop) reading means the thermistor is broken.
Below we’ll explain step-by-step how to test thermistors with a multimeter used in different appliances.
To test if a thermistor is fine:
Step 1: Set your multimeter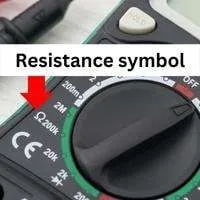
Insert the red probe in the COM port and the black probe in the VmAΩ port.
Set your multimeter to resistance setting (Ω).
Set a higher range, such as 200KΩ.
Step 2: Test the thermistor with a multimeter
Connect the red probe to one leg of the thermistor and the black probe to the other leg. You can attach probes to the thermistor in any sequence, as resistance has no polarity (direction).
Check the resistance reading at room temperature.
Now give heat to the thermistor with a blower, lighter, or stove while attached to the multimeter. Make sure that you don’t take the thermistor near the flame.
At least, we’ll take the thermister connected to a multimeter in a cool place such as a refrigerator.
Step 3: Evaluate your thermistor with multimeter readings
The resistance reading on the multimeter will decrease as the temperature increases. As temperature increases, a conductor’s current carrying ability increases, decreasing resistance(current opposing force).
The resistance reading on the multimeter should increase as we take the thermistor and multimeter in a cold place. As we know, as the temperature decreases, a conductor’s current carrying capacity decreases, increasing the resistance of that conductor or circuit against the current.
However, to identify a faulty thermistor, remember that as we take the setup in a cold or hot place, resistance does not change. If the multimeter reads OL, the tested thermistor is broken(has an open path).
Also, if the multimeter reads 0 or quite low resistance, the thermistor has been shorted, resulting in decreased resistance.
It’s recommended to compare your thermistor’s resistance at variable temperatures with the ideal ranges in the manual.
Signs of a bad thermistor
There are a few symptoms through which you can get an idea that your thermistor will damage or not. Now let’s start to discuss a few symptoms of a failed thermistor.
- Thermistor measures inaccurate and unusual temperature
- The temperature in the circuit increase or decreases than the ideal range.
- Leakage of coolant(refrigerator).
- Irritating noise from the machines
After noticing all the above symptoms, if you can’t change your thermistor, it causes danger.
How to test a dryer thermistor with a multimeter?
A thermistor (temperature sensor) is mounted on the blower fan. It measures the temperature of exhausting air and maintains the ideal temperature inside the dryer.
To test the thermistor, unscrew the dryer, locate the thermistor, disconnect its wires and take it out of the thermistor.
Set your multimeter to ohm sign (Ω) and adjust a higher range, such as 1000k ohms, and connect both probes to the thermistor terminal.
If the dryer thermistor is good, the multimeter should read around 50K ohms at room temperature. As you increase the room temperature, resistance will increase and decreases at low temperature.
How to test a refrigerator thermistor?
Unscrew the control box in the ceiling of the refrigerator and unplug the thermistor from the harness.
Connect both multimeter probes to both wires of the thermistor in the connector. The multimeter will show you the resistance of the thermistor at room temperature. Resistance of the refrigerator’s thermistor will be around 11KΩ at room temperature(22C or 73F).
Now take a glass of ice water and dip the thermistor inside; as the thermistor cools down, its resistance increases. When the temperature of the thermistor reaches 0C or 32F(almost the freezing point of water), the multimeter will read 32KΩ resistance in the thermistor.
How to test an NTC thermistor?
To test an NTC thermistor, set your multimeter to 200KΩ (resistance) and attach both probes to the legs of the thermistor. The multimeter will display the resistance of the thermistor at room temperature.
Take the thermistor to a hot place(near the dryer or stove) and test the resistance again. Resistance reading will decrease as temperature increases.
In NTC thermistors (negative temperature coefficient), resistance is inversely proportional to temperature. Resistance decreases as the temperature increases and vice versa.
How to test a PTC thermistor?
Set your multimeter to ohms(Ω) and connect both probes(red & black) to the thermistor legs. Now take the thermistor to a hot or cold place and check resistance again. If the tested PTC thermistor is fine, resistance will increase and decrease as the temperature decreases.
Resistance in the PTC thermistor (positive temperature coefficient) is directly proportional to temperature. As temperature increases, resistance also increases, and wise versa.
Conclusion
The function of the thermistor is to alter the resistance in response to temperature variations in which circuits and semiconductor applications employ it. If the circuit of the thermistor fails, it makes the whole appliance fail or work poorly.
If your thermistor is not working correctly, you can quickly test your thermistor with the help of a multimeter by measuring the resistance of the thermistor at room, cold and hot temperatures.
Hopefully, this article helped you understand how to test the thermistor with a multimeter.
Related Guides:


