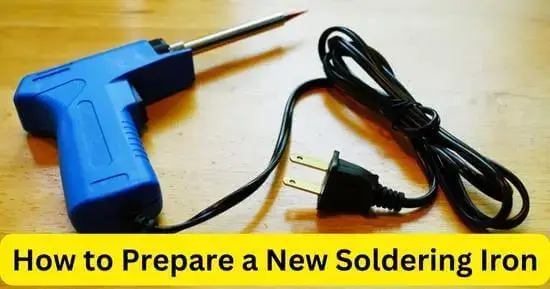
If you’re new to soldering or have just purchased a new soldering iron, it’s essential to properly prepare it before use to ensure efficient and successful soldering projects. Following our step-by-step guide, which includes cleaning the tip and setting the temperature, you can get the most out of your new tool. So, let’s learn how to prep a new soldering iron for use!
Life is all about maintenance. Whether at your home or office or as a self-maintained person, you will always like everything balanced and suitable. So for this type of person, knowing famous maintenance tools like a soldering iron is always mandatory. Small maintenance work can cause great trouble for you when you are in a hurry and need more time to call some professionals.
So most likely, people buy these tools and do home maintenance without help from others. And this is the best quick solution to your problem in this fast world. Although some things are repairable with glue and electric taps, what to do if you have to repair broken jewelry or some detached pipe at your home?
For this, the soldering iron is the best option, so if you have bought a new soldering iron and have the urge to repair all the minor maintenance on your own, then first, you should know how to prep your soldering iron in the right way so that you don’t have to face any sudden Challenges while maintaining any of your stuff.
What is soldering iron?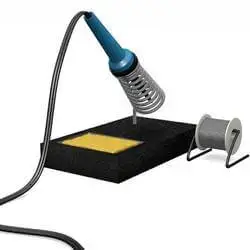
A soldering iron is a simple and professional tool; everyone can use it with little guidance. We use the soldering iron to form a joint between two metals or plastic products. Now they can be any product.
So if you want to repair your broken material, buy a soldering iron whose heated tip makes a joint between two broken things, and within seconds you quickly fix your stuff at home.
The soldering iron comes with an excellent and thin tip that can make minor and undetectable repairs, so quality-wise, the soldering iron is the best tool for some professional-looking works.
How to prep a new soldering iron?
Preventive measures:
Whether you are using the soldering iron at home and have bought it for home maintenance, you have to look professional and deal with the soldering iron professionally. So make sure that your get-up is related enough to the professional ones
- So make sure that you have tied your hair and no other object you are holding with your hand
- All your attention should be on the tool, and do not play practical jokes with it so you cannot damage your new soldering iron whenever you use it for the first time.
- Do not forget to wear protective gloves so that no contamination on your hands can damage the condition of the soldering iron tip.
So it is essential to be fully conscious while performing any task using the soldering iron, mainly if you use it for the first time. Before unboxing your soldering iron, ensure you can follow all the precautions and then move towards the brand new box of your soldering iron for some initial preparations before any repairing work.
How to prep a new soldering iron (step-by-step guide)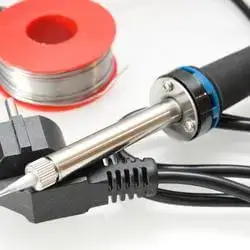
As of now, you are going to deal with the soldering iron, so you should have proper guidance on keeping the soldering iron in the right way.
Step 1: Unboxing the soldering iron
Hold the soldering iron box carefully and place it on a plane surface but not at a height so you cannot throw it accidentally when you pick it up. Now open the box and take out the solving iron from it carefully.
Unwrap it and first understand the whole interface of the two, at which you will see some important things like
- A tip at one and which is the central part of the following iron and which is going to make joints between the metal surfaces
- The Soldering iron has a rod-like appearance.
- You will see a temperature-adjusting dial from which you have to adjust the temperature of the soldering iron, and the heated soldering iron tip will then do your required work.
- Then you will see a wire with the switch from which you have to give the soldering iron an electrical supply and turn it ON for your work.
Step 2: Tinning of the tip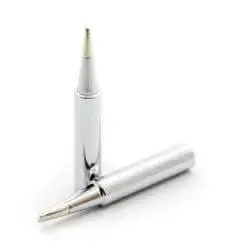
The most sensitive part of the soldering iron is its tip, and there are great chances of it getting oxidized whenever it comes in contact with the air after unboxing. So look at the tip of the soldering iron. If you see that it has oxidized, you have to remove the oxidation layer.
For this, you can use the cleaning substances along with a wet sponge, and then dipping the soldering iron in the brass wool can help remove the oxidation layer from the tip.
Do not neglect the soldering iron tip if it has got oxidized because if you leave it in that condition for an extended period, then you will damage your soldering iron forever, and it will not perform again for you, so make sure that first look at the condition of the tip after buying the new soldering iron.
Step 3: Clean the tip
If not any oxidation layer is present on the tip of your new soldering iron, then you should keep in mind that you have to clean the tip properly no matter whether you are going to use the soldering iron right now or you want to store the soldering iron, you have to clean the tip right after you unboxed because if any contamination kept there for a long time then that can even damage your new soldering iron tip. It all will be a waste of money.
Hence, if you have bought a new soldering iron, ensure you can take proper care of this tool; otherwise, you will not be able to perform the procedures and the maintenance while using the soldering iron properly.
Use specialized detergents for it, and a clean wet sponge lets you clean the whole tip easily because it is a tiny part, so you do not need many cleaning tools for the tip.
Step 4: Store at a dry place
After buying a new soldering iron, it is essential to arrange the best place to store the soldering iron. Do not ever store the soldering iron on a damp surface because the soldering iron will get poorly damaged, and then the rust which will develop on the tip will not be able to remove.
Even after the removal, the soldering iron will not perform precisely for you, so show that you have a dry place. Whether you are storing the soldering iron for one day or one year, ensure the space is clean and dry, and then keep the soldering iron in that place.
Maintenance tips
If you have bought a new soldering iron and think that you do not have to do any maintenance, then it is incorrect because you have to keep a proper check and balance of this tool before and after using it.
- Make sure you buy a suitable soldering iron for you, depending on the type of work you want to do from it.
- Do not give your tool to everyone because different people have different managing skills, so your soldering iron might get damaged because of this negligence.
- Make sure you do not overheat the tip
- Make sure that the soldering iron does not keep on idly.
Final verdict
So how to prep a new soldering iron? These soldering irons are helpful as well as sensitive tools. So, only use the soldering iron if you can handle them professionally. There are so many maintenances and techniques of this tool that you cannot keep it at a rough surface if you do not want to damage the condition of your soldering iron.
So, if you have to spend money buying a soldering iron for your home and opt to do all the repairable tasks by yourself, then make sure that you correctly follow all the guidance regarding the initial preparations of a soldering iron. And then keep it safe from any damage by storing it at an appropriate place and keeping it clean thoroughly.
Related Guides:


