So if you’re looking for an easy way to add some personality and style to your projects, give solder jump rings a try—you won’t regret it!
The process of soldering jump rings can be challenging to learn for first-time users, but don’t worry. It’s pretty easy and creative work.
Soldering is the process of joining two metals together using heat and Iron. When Soldering, the solder flows from the Iron tip of the metal and quickly solidifies(cools).
Follow the easy guide below:
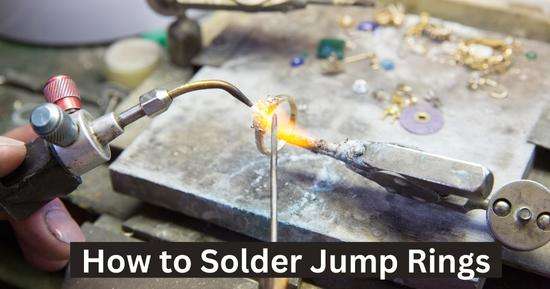
How to solder jump rings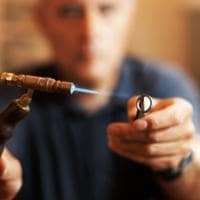
You can solder a jump ring on a pendant, another jump ring, jewelry, or anywhere you want.
Follow the quick steps:
- Either use a soldering iron or heat gun.
- Turn your soldering iron and let it reach 340–343 C.
- Check the open side of the jump ring and place it over the other part to solder.
- Cut a small piece of solder (an alloy of two metals) and place it over the joint.
- Now attach your solder iron tip to the piece of solder, and it will melt.
- Spread this viscous allow over the joint and the open space of the jump ring.
- Shape the melted alloy quickly, as it will cool again and become solid within seconds.
- Apply flux on the solder (grease that makes solder more liquid to spread it all around)
Jump rings are from large to very small and are used in making jewelry, chain maille, and necklaces. By following the steps below, you’ll be able to solder jump rings in your jewelry, such as pendants or chains.
Jump rings can be used to join two pieces of jewelry together. They are made by soldering two pieces of metal together and then connecting the ends of the rings with a jump wire. This process is called “swapping,” It is one of the easiest ways to solder jump rings.
Remember, when soldering a jump ring, use a minimal amount of solder (less than 1/8 teaspoon) at a time. Using too much solder will cause the rings to heat up, which will cause the jump wires to trip and create noise. To avoid these problems, use a small amount of solder and keep your hands away from melted alloy.
To solder jump rings, you will need two pieces of metal. The rings should be soldered together so that the ends of the rings are joined.
Tips for Successfully Soldiering Jump Ring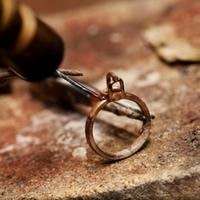
- To combine two metals using a soldering Iron, you first need to preheat the Iron. Preheating the Iron will make it easier to solder and cause less turbulence within the soldering Solution.
- Next, use a flathead screwdriver to open one end of the ring that you want to join with another. Be sure not to damage or loosen any screws on your jump ring!
- Once both rings are free from screws, place them side by side on your work surface (or use some other support).
- From here, you’ll need to place your soldering iron on top of each ring and press down firmly onto the ring’s surface.
- The Iron should start glowing red (this is due to the fusion between the two metals).
- Carefully remove any excess solder with a knife or wire brush.
Step 1: Preheat the Iron
If you don’t have an oven on hand, you’ll need to preheat your Iron before beginning your task. Place it in an oven at 300 degrees Celcius for 3-5 minutes or in a hot water bath for about 15 minutes.
Step 2: Place rings on each other
Once the Iron has been preheated, Place one ring on top of the other (the open side is at the joint) and press down firmly onto the ring’s surface. The Iron should start glowing red (this is due to the fusion between the two metals). Once both rings are saturated with solder, slowly lift off of the ring.
Carefully remove any excess solder with a knife or wire brush.
Step 3: Glue the Rings Together
After completing the steps above, glue things together using a hot soldering iron and a low-grit soldering jig or spray adhesive such as Tacky Glue. Be sure not to over-solder reflecting light from your rings when gluing them together- this will cause them to look blurry during display!
Step 5: Solder the rings together
Once things have been soldered together, it is time to connect them using a jumper wire (or any other means possible for joining two pieces of metal). Use caution when connecting these pairs of metals, as they can create sparks and cause a fire if not handled properly!
How to solder jump rings to pendants?
To solder a pendant, you must first wrap the edges of the pendant with foil paper, such as silver or aluminum. After covering the edges, use a brush or wood to burn the edges (rubbing or smoothing).
Now turn on your soldering iron and let it get hot. Then, melt some solder with a soldering iron hot tip and apply it to the wrapped foil around the pendant edges. It’ll help to make a hard surface on the pendant to attach a jump ring.
Now get a jump ring and place it so that the open side of the ring is in contact with the pendants. Melt the solder, and put a few drops on the open face of the ring (attached to the pendant).
Spread a thick coating on the joint of the pendant and ring.
Your jump ring will solder to the pendant after the solder cools down.
Conclusion
Soldering jump rings are a great way to create beautiful and unique designs in minutes. Additionally, a soldering iron and preheating can help make the process easier.
Overall, this step is an essential part of making jump rings, designs, and jewelry and should be done with caution – too much heat or pressure may cause the iron to overheat and damage the ring.
Related Guides:


