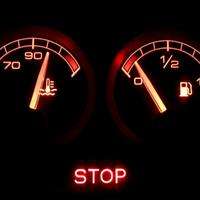
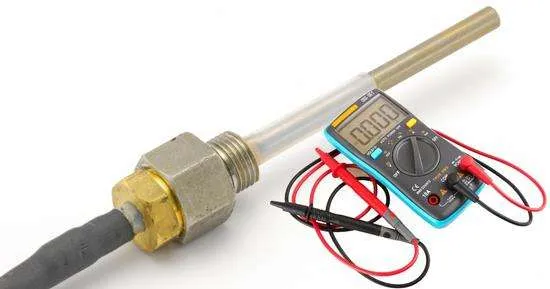
A temperature gauge is the backbone of many devices, such as refrigerators and vehicles. It measures the surrounding temperatures and sends the information to the control unit to work according to the current temperature. You must test the temperature gauge with a multimeter to identify a fault.
This post will discuss identifying a bad temperature gauge and testing it.
Let’s understand some basics first.
Table of Contents
ToggleHow does the temperature gauge works?
A temperature gauge, also known as a temperature sensor, is usually installed in your vehicles to measure the temperature of the coolant. Coolant is a colored liquid(blue) liquid that drains heat from the engine to maintain it at an ideal temperature.
According to experts, Ideally, your car should run between 195 to 220 degrees Fahrenheit (80-105 C).
This way, the temperature gauge or sensor measures the temperature in your vehicle’s engine and shares the information with the ECU(engine control unit). When the weather is cool, coolant is pumped into the engine to maintain heat in the engine.
The ECU receives the information/signals transmitted by the temperature gauge and enables different operations according to the temperature. Temperature sensor reading impacts fuel injection and ignition timing and turns the engine cooling fan on and off.
Temperature gauges are divided into two main categories: contact temperature sensors(gauges) and non-contact temperature gauges.
The contact temperature Gauge or sensor should be physically connected to the device or system t measure its temperature.
A non-contact temperature sensor works without contacting an object. Such as an Infrared Forehead Thermometer that detects your forehead temperature.
In today’s vehicles, electrical temperature gauges are installed that run over the vehicle’s battery. However, older vehicles have mechanical temperature gauges.
Sign of faulty temperature gauge
A faulty temperature gauge/sensor may read quite high or low, resulting in poor data sharing with the ECU, and the fan stays off or on.
- Vehicle throwing Black Smoke.
- Relatively high or low coolant temperature.
- Engine Overheating.
- Increased Fuel Consumption(Poor mileage).
- Poor ignition
- Inaccurate Fuel Injection
- Check Engine Light
All the signs result in poor engine performance.
How to test a temperature gauge with a multimeter?
- To test the automotive temperature gauge, locate and disconnect the sensor from the connector.
- Set your multimeter to DC voltage and attach both probes to the left and most right terminals using alligator clips.
- Place the sensor in the ice cold water and then hot water, and record the reading.
- In hot water, a fine temperature censor should read around .25 volts. However, the temperature sensor will give a 5 V reading on a multimeter in ice-cold water.
Follow the step-by-step guide below:
-
Locate the temperature gauge
The first step to test a temperature gauge is to locate and unplug it from the vehicle.
A temperature sensor is usually located on the thermostat body. To locate the thermostat, follow the radiator hose going into the engine. The thermostat housing is at the end of this hose, and the temperature gauge is located near the thermostat.
The temperature sensor is connected to the engine or ECU through a wiring harness and connectors.
However, it depends upon the manufacturer, as different models have different locations of components.
Make sure that the vehicle is off. Remove the wiring harness(connector) from the temperature sensor.
-
Set your multimeter
We’ll test the voltage in the sensor by putting it inside hot and cold water.
Take water in a bowl, add some ice and wait for it to cool.
Set your multimeter to a DC voltage sign (V with a dotted and straight line).
Adjust a low voltage setting/range such as 20V.
A temperature sensor (gauge) can have 3 or 5 terminals. You have to connect one probe to the leftmost terminal and the second probe to the rightmost terminal in the sensor plug.
Use alligator clips to join the terminals with multimeter probe ends.
-
Evaluate temperature gauge with multimeter readings
Take a cold water bowl and dip(submerge) the temperature sensor in the water.
In cold water, you can expect 5V reading if your temperature sensor is fine. However, if you don’t get any reading even after reattaching the clips, your sensor is bad and should be replaced.
Take tap water from a cooking pot and place it on the stove. Let the warm water well. After a few minutes, take your sensor attached to a multimeter with alligator clips and insert it in hot water. Carefully hold the sensor so you don’t harm your hands.
Let the multimeter probes record a stable reading.
In hot water, you can expect .25 volts from the temperature sensor.
To evaluate the temperature sensor, you should compare the multimeter reading taken in hot and cold temperatures with the ideal ranges of your sensor’s model. You can find these values online or in the manufacturer manual(guide).
FAQs
How to reset the temperature gauge in a car?
Turn on the car, press the AC, and recirculate the button simultaneously for 5-10 seconds. It will reset your vehicle’s temperature gauge(sensor).
How to test a refrigerator temperature sensor with a multimeter?
Disconnect the temperature sensor from the refrigerator. Set your multimeter to resistance at the 20k-ohm range and attach both sensor wires to the multimeter probes. Place the sensor on ice(not water); you should expect around 5k ohms if your refrigerator sensor is fine.
Conclusion:
A temperature gauge or sensor is an essential component used in many appliances. It keeps the device or vehicle updated with the surrounding temperature to work accordingly.
So if your vehicle is facing issues especially related to overheating and cooling problems, you must test the temperature gauge to evaluate its working.
Locate the sensor, test the voltage and evaluate it with the ideal reading of your sensor model.
You can ask us in the comments below if you still have queries.
Related Guides:


